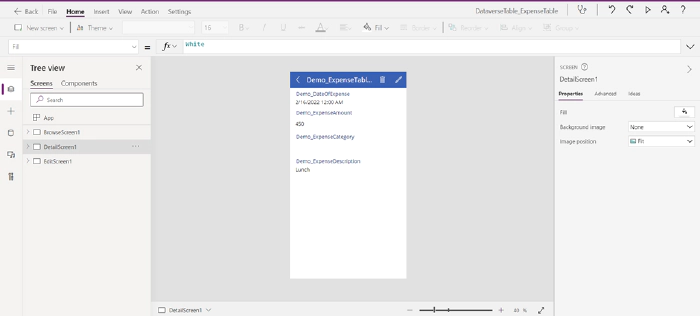
Create Dataverse Expense Details Table and build a simple Power Apps app using that table
This article is divided into 2 sections:
- Creating Dataverse Table with Choice, Date, Lookup type columns and;
- Creating a simple Power Apps app using that Dataverse table
Let’s jump into Creating a simple use-case where we will create Expense Table & Expense Category Tables with the following Data types of Columns,
For Expense Table, we will create below mentioned columns of mentioned Data types:
- Expense Amount: Currency
- Expense Description: Text
- Expense Category: Lookup from Expense Category Table
- Date of Expense: Date Only type
For Expense Category, we will create below mentioned column:
- Category Type: Choice
Above mentioned is the quick summary on Tables and Columns we will create, Let’s look into this step by step in more detailed fashion,
Step 1: Navigate to https://make.PowerApps.com
Step 2: From the left navigation select Dataverse > Tables > New Table as shown in the Fig 1.1
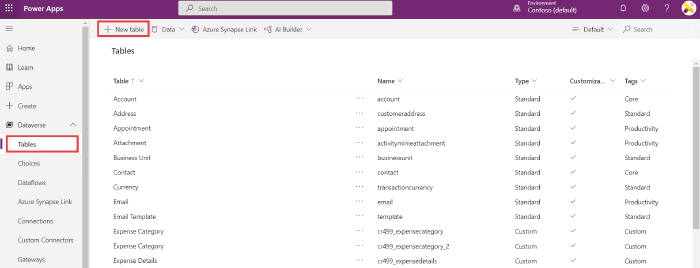
Fig 1.1 – Dataverse New Table
Step 3: A panel will open when clicked on New table, fill in the details like Name, also give a** primary column** name, this will be basically creating a primary column with the given name when this table will be created, give some Description and select the Standard for Type of table as shown in below Fig 1.2. Then select Create table
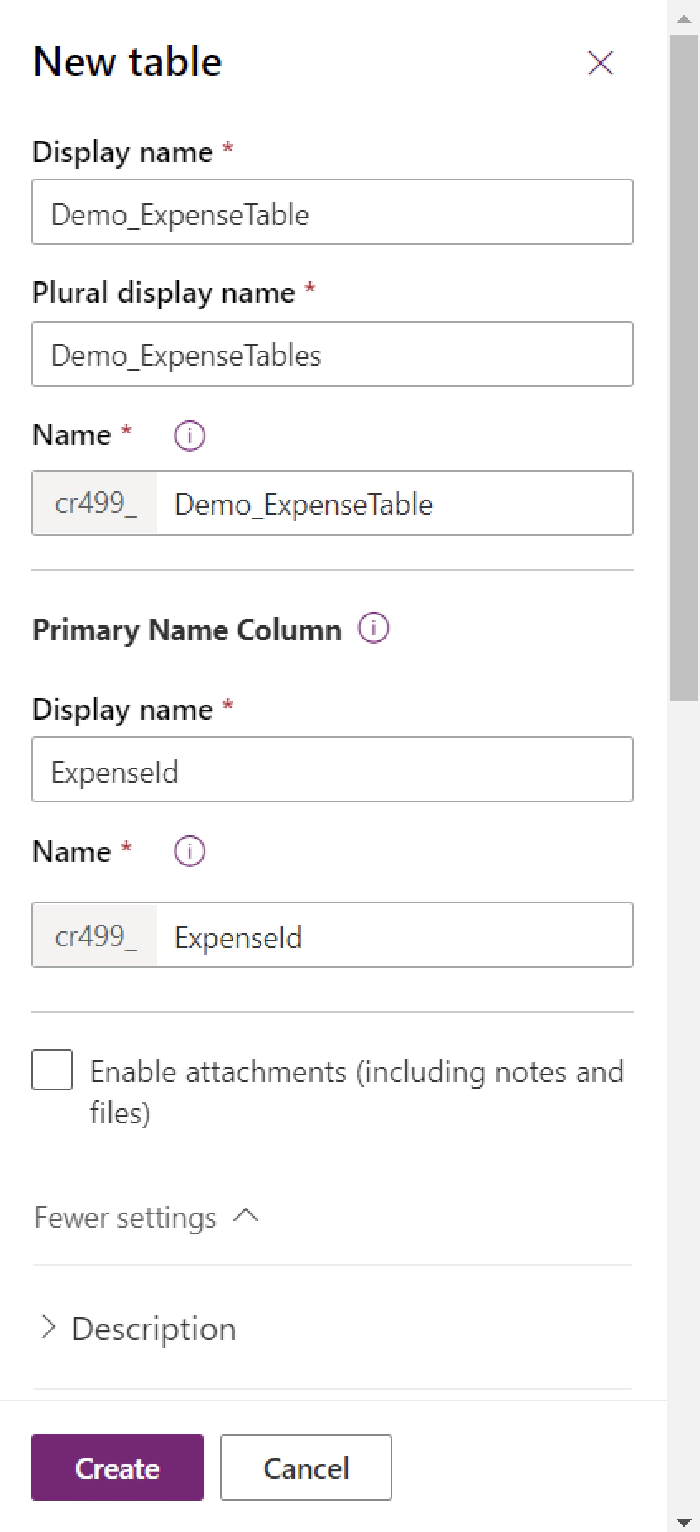
Fig 1.2 – New Dataverse Table Demo_ExpenseTable with Primary Column as ExpenseId
Step 3: Newly created Dataverse Table once created will look something like shown in below Fig 1.3,
Also notice that the primary column ExpenseId is created for the new table
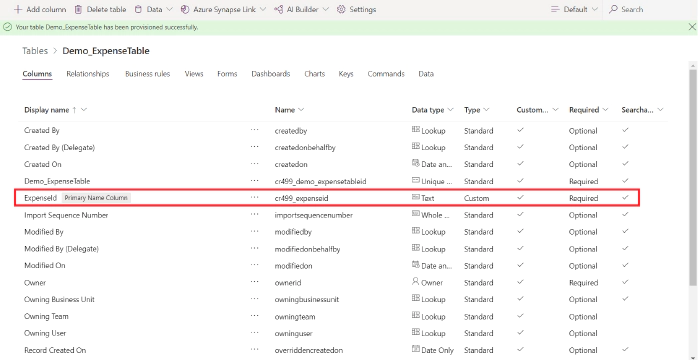
Fig 1.3 – Dataverse Table created with primary column
Step 4: Let’s modify the created Primary column, select the Primary column, and edit the details like change the Data type to Autonumber with Minimum number of digits as 1, Seed value as 1, as shown in Fig 1.4 then don’t forget to select Done and Save table at the end
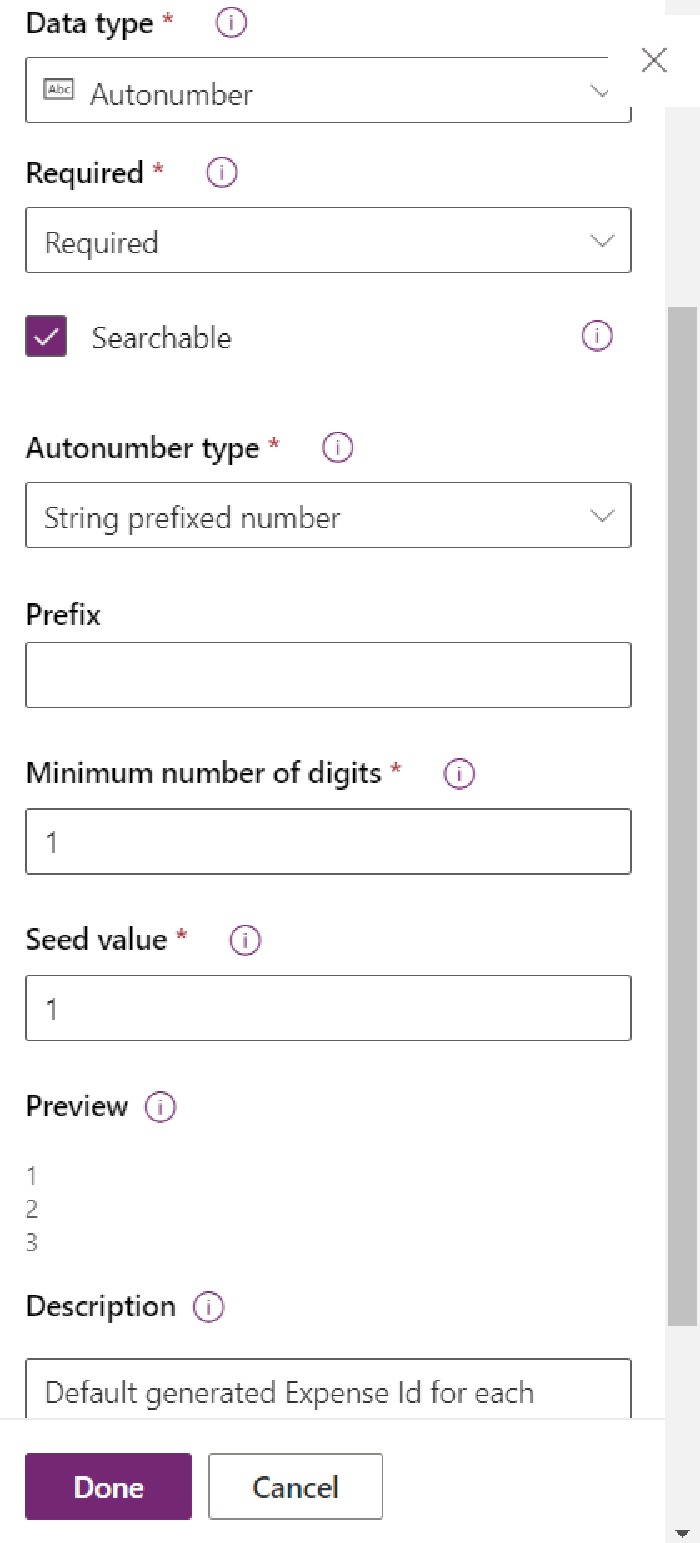
Fig 1.4 – Edit the Primary Column ExpenseId > Select Done > Save table
Step 5: Let’s quickly create another Dataverse table Demo_ExpenseCategory with CategoryId as the Primary column. Once the table is created, edit the Primary column as shown in Step 4, refer below mentioned Fig 1.5 & Fig 1.6
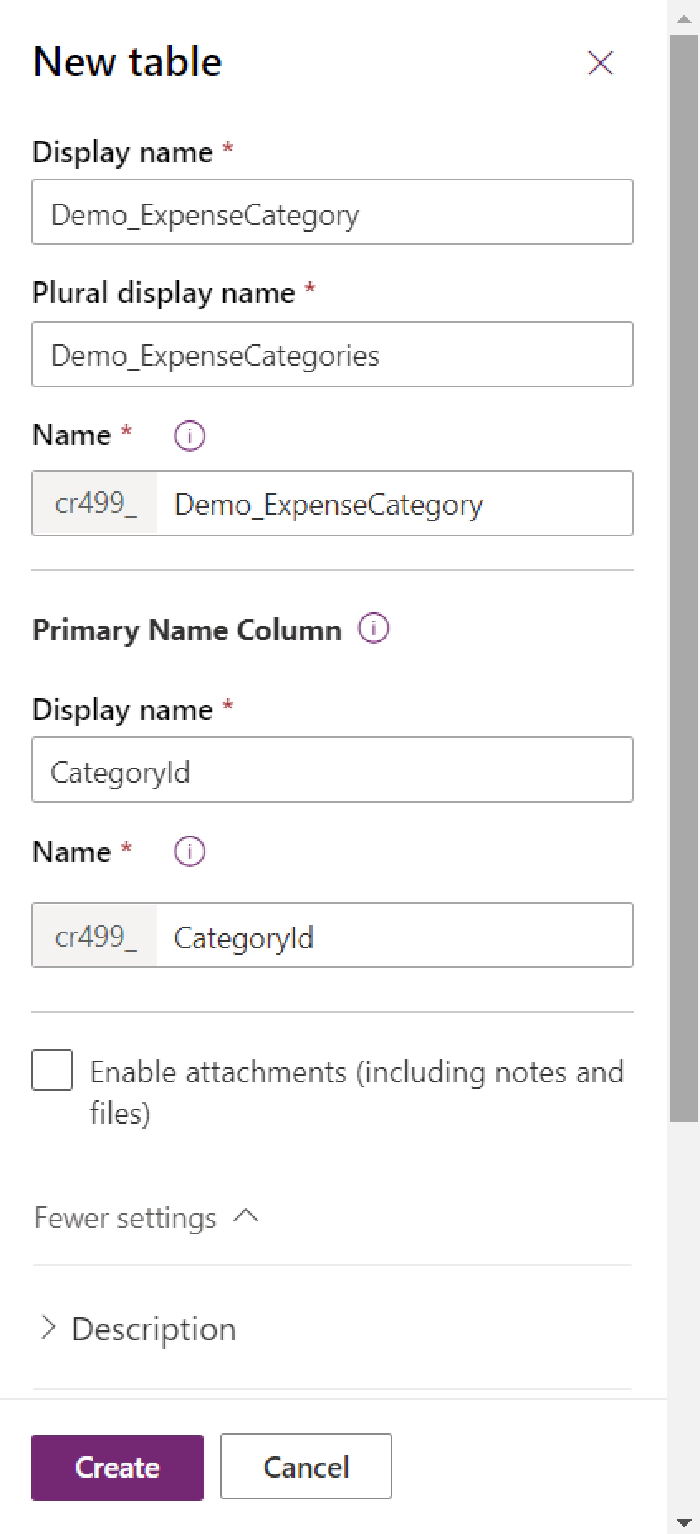
Fig 1.5 – Demo_ExpenseCategory table created with CategoryId as primary column
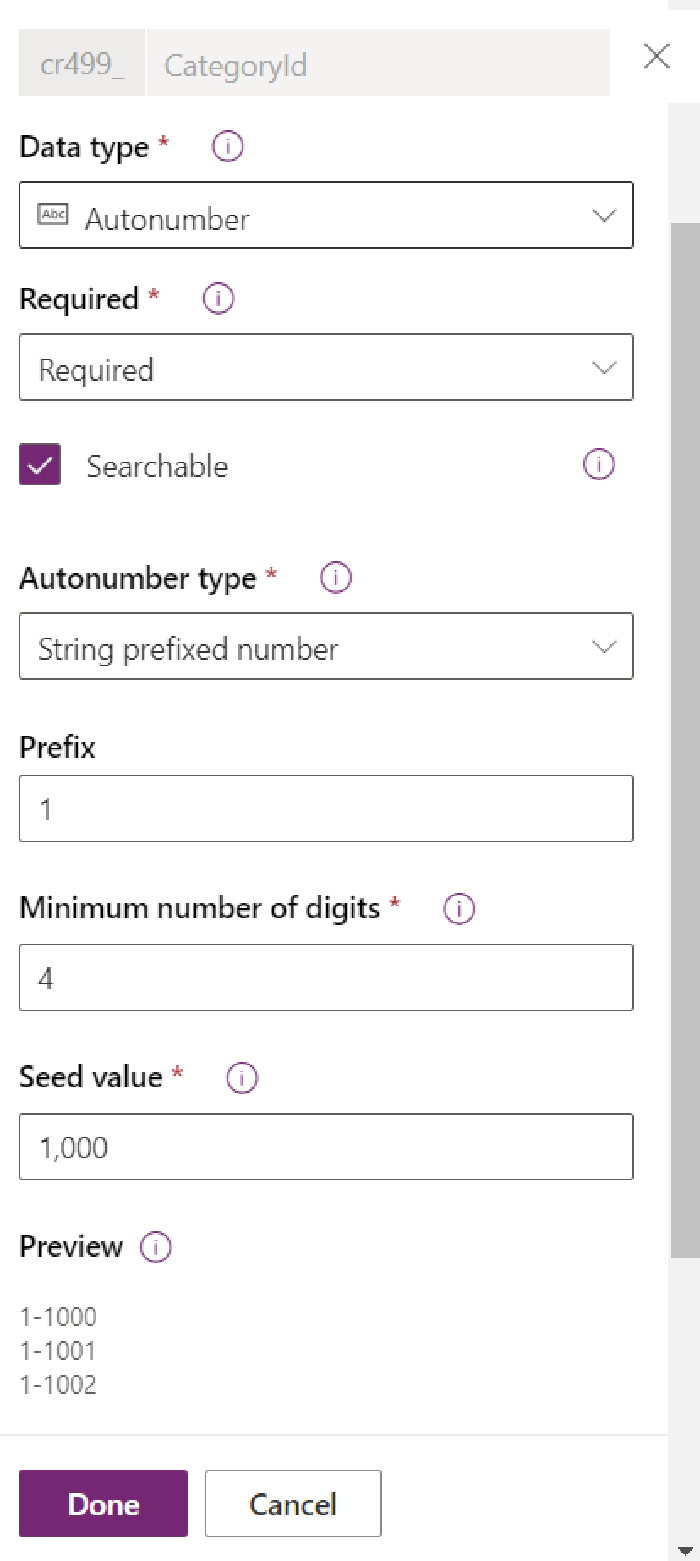
Fig 1.6 – Edit the CategoryId primary column > Done > Save table
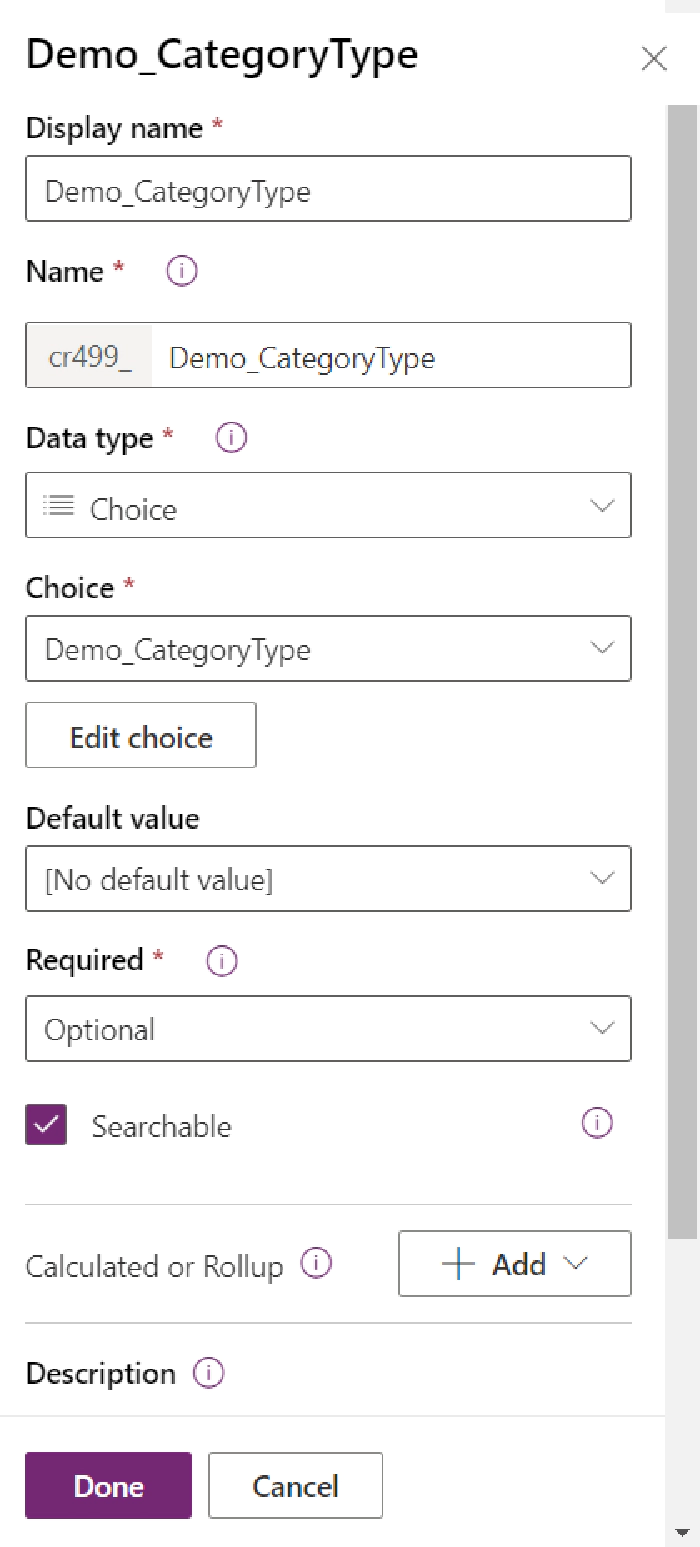
Step 6: Lets create a Choice type C#column in Demo_ExpenseCategory table, for this, navigate to the mentioned table, select Add column, choose Choice as Data type and then Add new choices as shown in fig 1.7. click on save it will redirect you to details panel as shown in Fig 1.8, select Done to create new column then Save table to reflect these changes in the table.
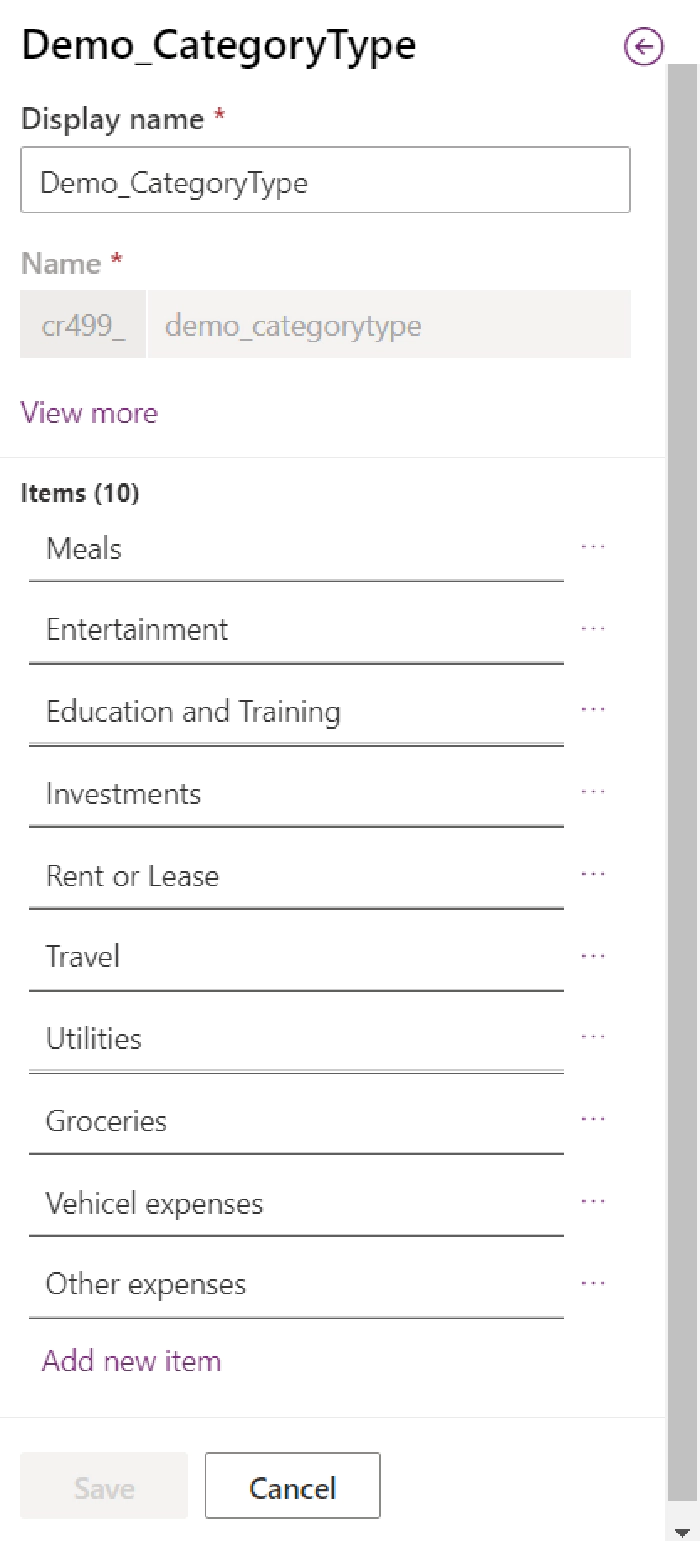
Fig 1.7 – Choice type column Demo_CategoryType
Wohoo, now your Demo_ExpenseCategory table with Choice column Demo_CategoryType is ready as shown in below Fig 1.9
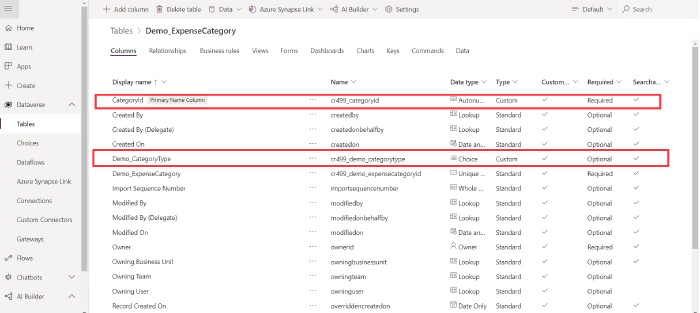
Fig 1.9 – Dataverse table with choice column created
Step 7: Now, go to Demo_ExpenseTable and create the columns as discussed at the start of the article and create Expense Amount, Date of Expense, Expense Description and Expense Category columns
Step 8: Create Optional Demo_ExpenseAmount named Currency type column as shown in Fig 1.10, Select Done and Save table
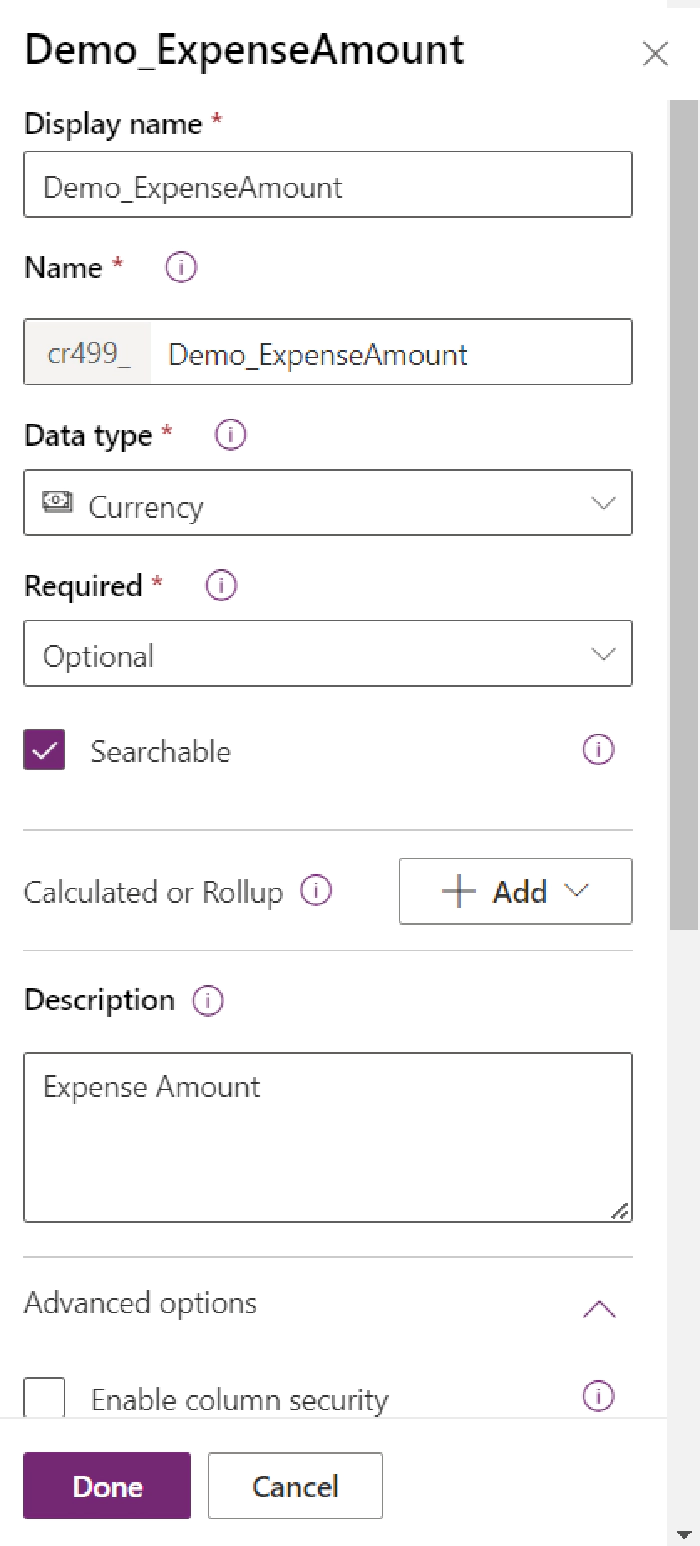
Fig 1.10 – Demo_ExpenseAmount currency type column
Step 9: Create optional Demo_ExpenseDescription named column of Data type Text as shown in Fig 1.11, select Done and Save table
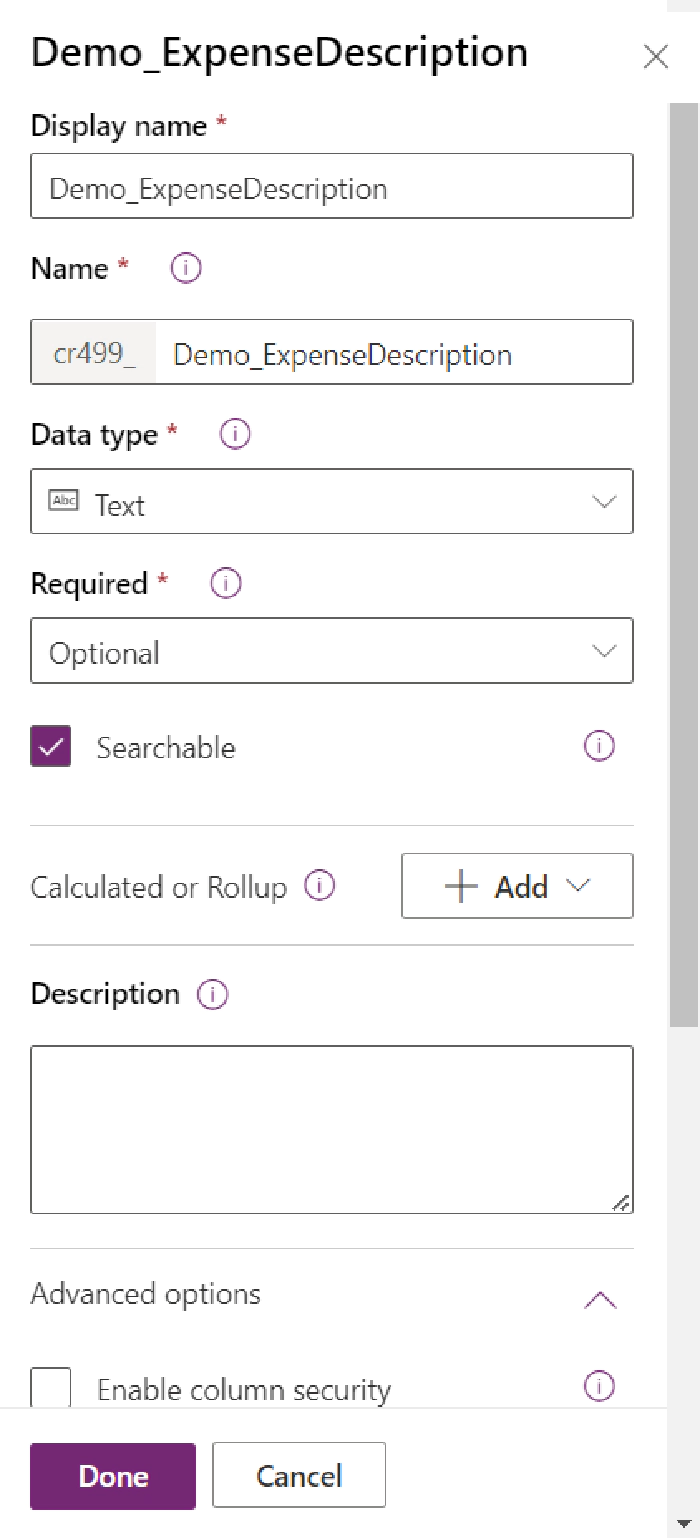
Fig 1.11 – Demo_ExpenseDescription Text type column
Step 10: Create optional column named Demo_DateOfExpense with Data type of Date only as shown in Fig 1.12, select Done and Save table
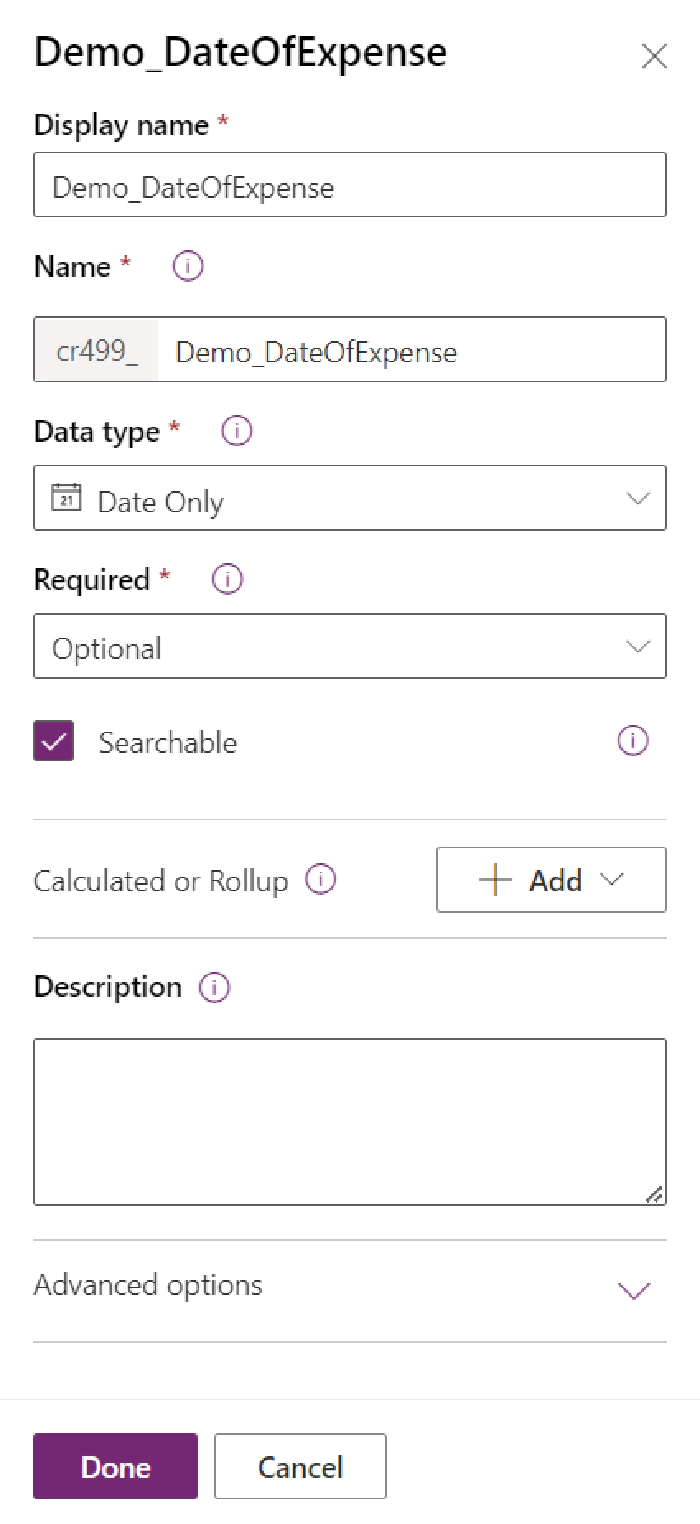
Fig 1.12 – Demo_DateOfExpense Date Only type of column created
Step 11: Create optional column named Demo_ExpenseCategory with a Data type of Lookup wherein add the Demo_ExpenseCategory in Related table as shown in Fig 1.13, select Done and Save table
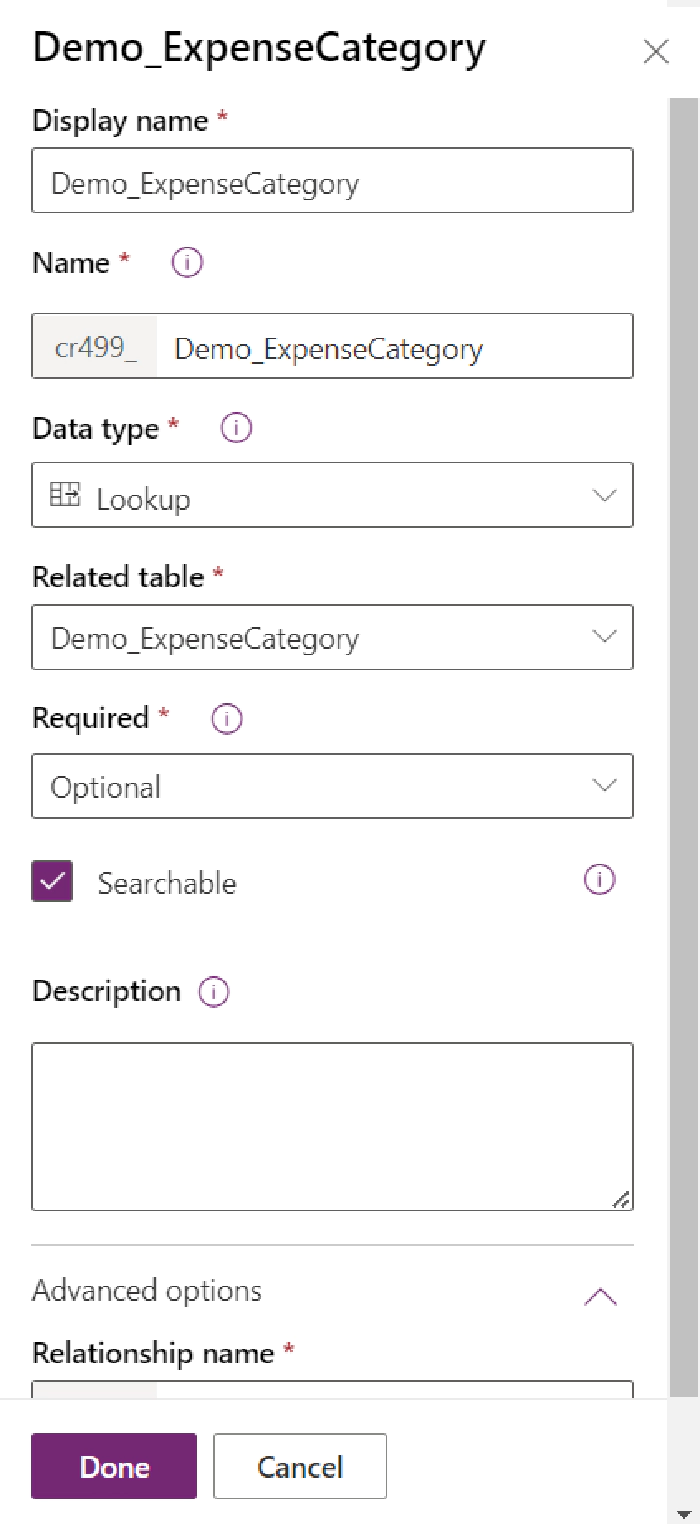
Fig 1.13 - Demo_ExpenseCategory lookup type column created
Wohoo, Demo_ExpenseTable is now created with all the 4 columns.
As both the Tables with columns are ready, go to each table and add few records by selecting Add record as shown in the below fig 1.14

Fig 1.14 – Add record to the created tables
Now, it’s the time to create a simple Power App canvas app using this Demo_ExpenseTable,
Step 12: Navigate to Home Page of Power Apps, select Create an app using Dataverse as shown in below Fig 1.15
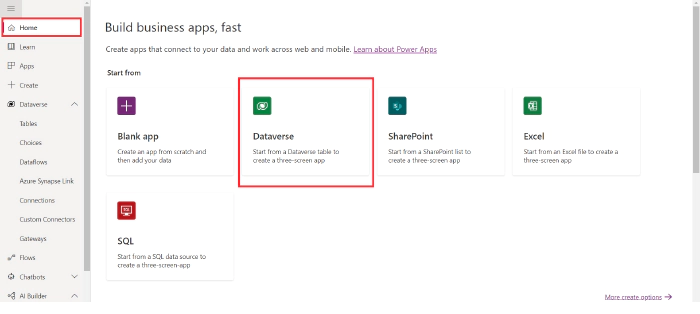
Fig 1.15 – Create Power App canvas app using Dataverse
Step 13: Once you select the Dataverse option, select the connection and choose the Demo_ExpenseTable and select Connect as shown in Fig 1.16
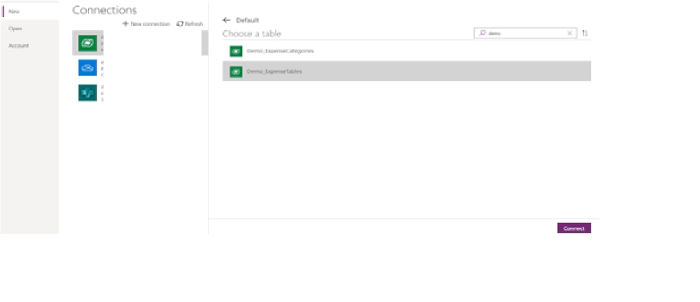
Fig 1.16– Adding connections and Table to create a Power App
Step 14: Once it is connected, a Power App will be created for you with the Browse Details, Edit Details and View Details screen as shown in the below figures.
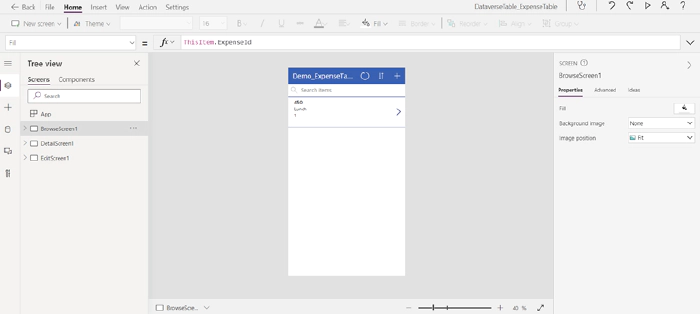
Fig 1.17 – Power Apps Browse Screen
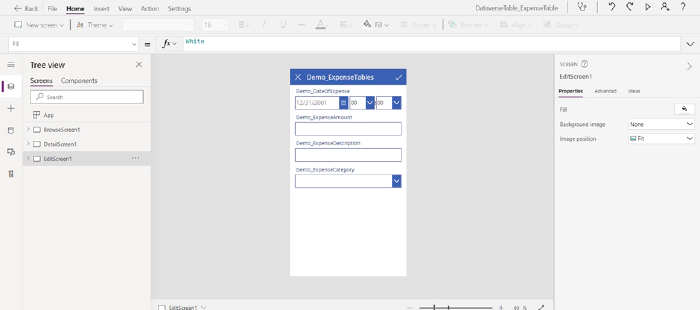
Fig 1.18 – Power Apps Edit Screen

Fig 1.19 – Power Apps Details Screen
Now, modify the fields in Browse, Edit and View details screen and you can go ahead and add new records into your table right from your Power App
Voila, The Dataverse Table and Power App is ready and now you can use it and make further modifications to it.
In the upcoming article will investigate this Dataverse Power App in more detail. So, stay tuned!
Keep Learning!
Keep Sharing!