Easily Automate a Table in SQL Server Management Studio with Power Automate
This Step in this blog shows you how to Update a row in Microsoft SQL Server Management Studio from the response of a Microsoft Forms using Power Automate
Technologies Used
Microsoft Form is used to easily create surveys and polls to collect customer feedback, measure employee satisfaction, and organize team events.
SQL Server Management Studio (SSMS) is an integrated environment for managing any SQL infrastructure.
The on-premises Data Gateway acts as a bridge to provide quick and secure data transfer between on-premises data (data that isn’t in the cloud) and several Microsoft cloud services.
Microsoft Power Automate is a tool that helps users create workflows between desired applications to synchronize files, get notifications, and collect data.
The Process
Step 1
- Create a Database in Microsoft SQL Server Management Studio
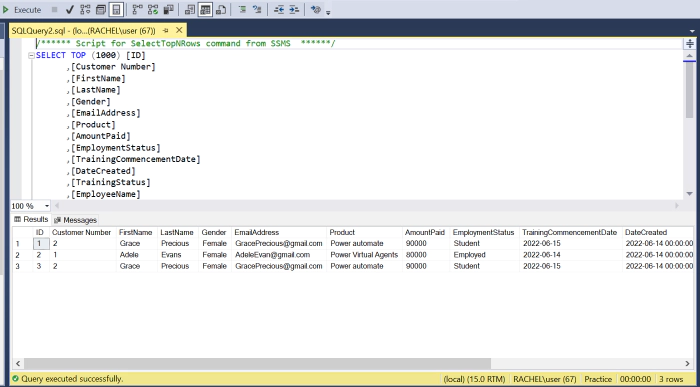
- Create a Table
SELECT TOP (1000) [ID]

,[Customer Number]

,[FirstName]

,[LastName]

,[Gender]

,[EmailAddress]

,[Product]

,[AmountPaid]

,[EmploymentStatus]

,[TrainingCommencementDate]

,[DateCreated]

,[TrainingStatus]

,[EmployeeName]

,[EmployeeEmail]

FROM [Practice].[dbo].[SalesOrder]
Step 2
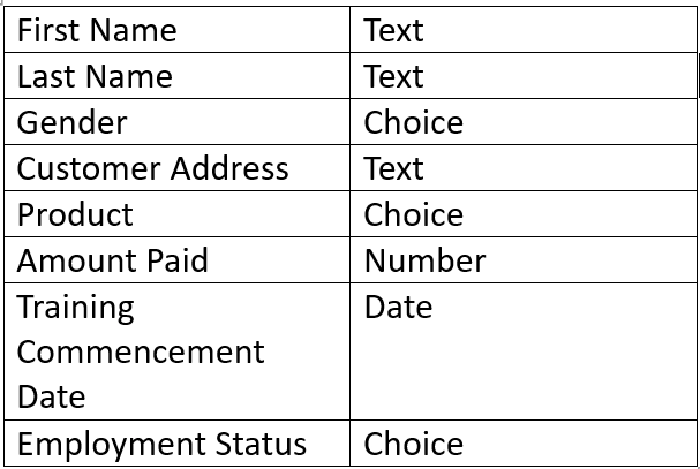
Create a Microsoft Form
Step 3
Install Data Gateway in Power Automate
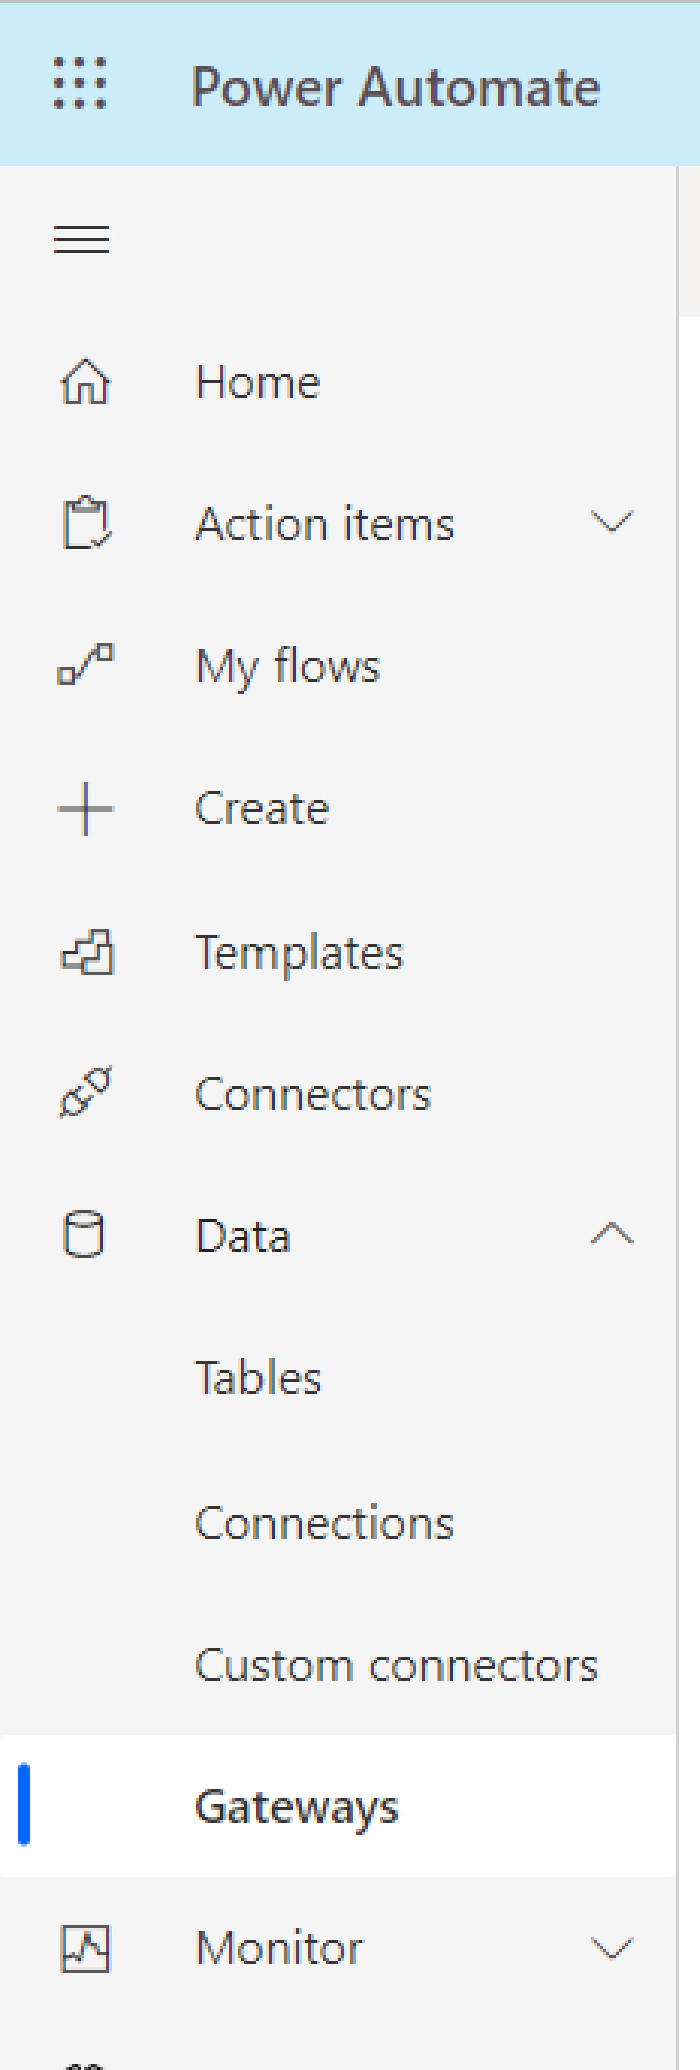
On the left-hand side of your screen, click on the drop-down Data and Select Gateway
Step 4
Create an automated cloud flow
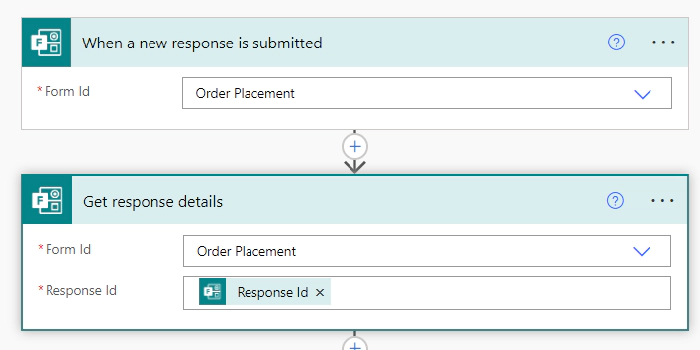
- The Trigger for the flow is When a new response is submitted
- Add the action Get response details to the flow
Step 5
- Add the action Get user profile to the flow

To the User(UPN), add the dynamic contents Responders Email from the Microsoft Form.
Step 6
- Add the action Insert Row for SQL Server
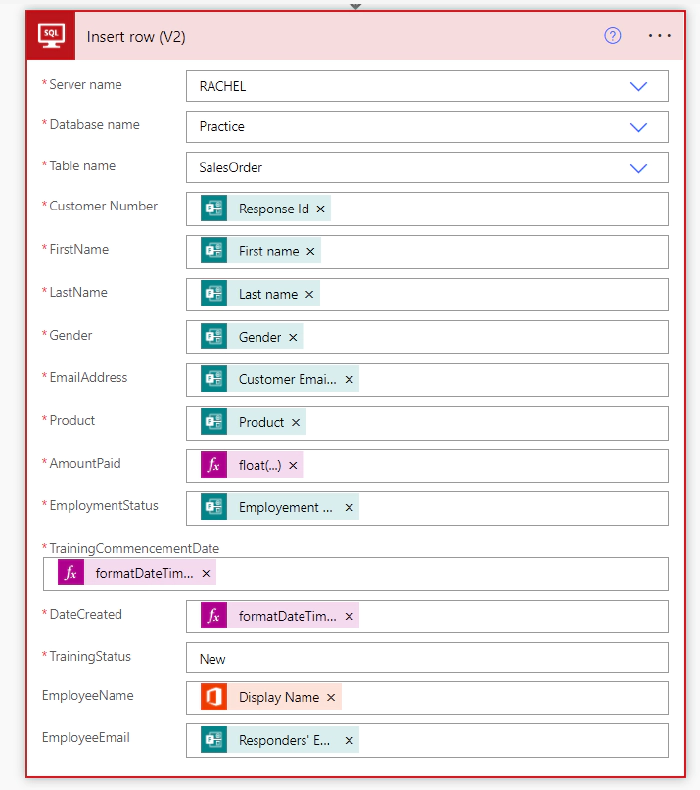
- Make a connection to the SQL Server
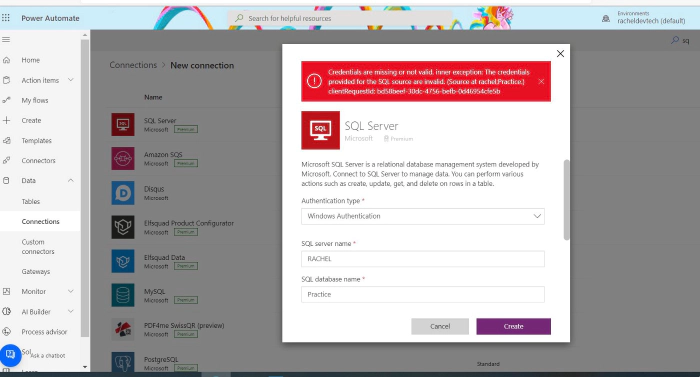
- Add the Authentication type, if you are using Windows Authentication, for the Password use your Laptop Password.
- Add the Server name
- Add the SQL Database name
- Add the Username
NB: To get the Server name and Username you can get it from SSMS.
After the connection, add this to the action, Insert row
- Add the Server name
- Add the Database name
- Add the Table name
Then the action will reveal the rows in your Table
Thank you for Reading!😉
If you have any question feel free to reach out to me on Linkedln and Twitter