How to create an improved Microsoft Teams Files approval process using Azure Logic Apps
We are all there during some days: Power Automate Premium is the key to the next level but there is no way we could justify that licensing – the ROI is simply not enough. Have you thought that you could be utilizing a Azure Logic App instead?

Following my earlier post ( How to: initiate a document approval directly in team files tab (using Power Automate) ) that required a Power Automate Premium license I recreated that with Azure Logic Apps solution. Please do refer and compare to that blog post these steps to see how they differ. For later mentioned parts you need to follow steps in that post.
What are Azure Logic Apps and do they cost?
First: what are Logic Apps? Let’s take a snippet from Microsoft Azure Logic Apps documentation here. Azure Logic Apps is a cloud service that helps you schedule, automate, and orchestrate tasks, business processes, and workflows when you need to integrate apps, data, systems, and services across enterprises or organizations. Logic Apps simplifies how you design and build scalable solutions for app integration, data integration, system integration, enterprise application integration (EAI), and business-to-business (B2B) communication, whether in the cloud, on premises, or both. In short: you are create something almost like a Power Automate Cloud Flow but you do that in the Azure. The user interface is slightly different but almost all essential parts are there: triggers, actions, connections and of course various connector. The big difference is that you will be paying for all Logic App runs but the bright side is that you don’t have to purchase Power Automate Premium. Of course it pays to do some rough calculation on Logic Apps. In my demos for a week I accumulated less than one euro on Logic Apps costs.. If something you construct is used repeatedly and has lots of loops costs can build up. But if you have a random need for a Premium or custom connector requirements Logic Apps might be a perfect solution. This also depends on number of users you would have to license Premium Power Automates to: yearly investment counts. Read more about Logic Apps pricing here. I suggest to start with
- Create a resource group for Logic Apps so you can easily keep on track of the costs – and also manage your apps
- Put a budget to Azure in place so your costs don’t suddenly skyrocket
- Follow costs and cost estimate
Creating Azure Logic Apps -process for file approval requests
Now that we have that householding taken care of we can finally create the Logic App.
Navigate to your Resource Group and select Add.
Add a Logic App. Use search to narrow the list down.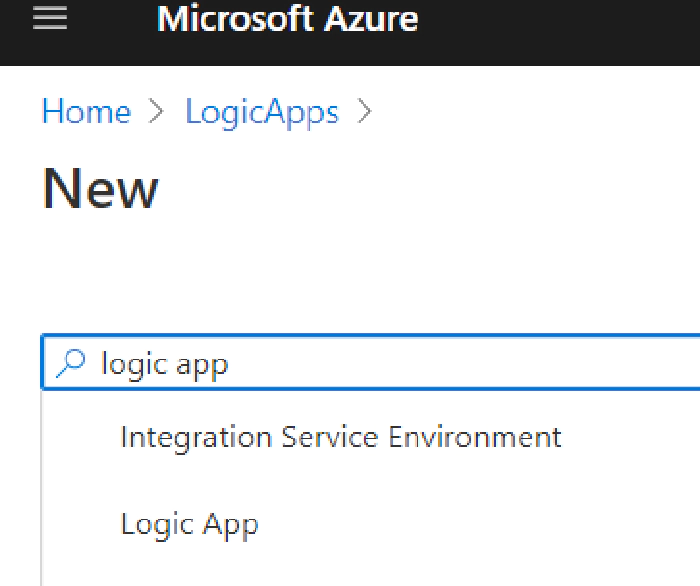
Note: Be careful how you name your Logic App in the next step because
you won’t be able to change it later!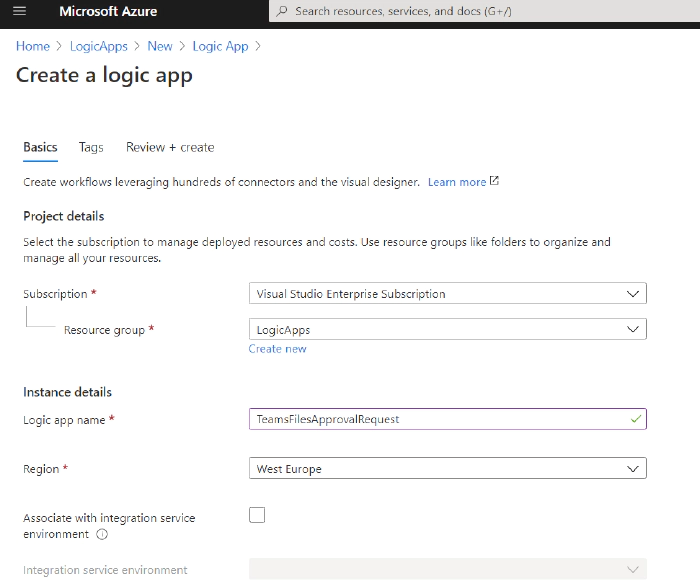
Add Tags if you use them, Review and Create the App. The Logic App is deployed rather quickly and you can then go to the Resource. Go to Logic App Designer
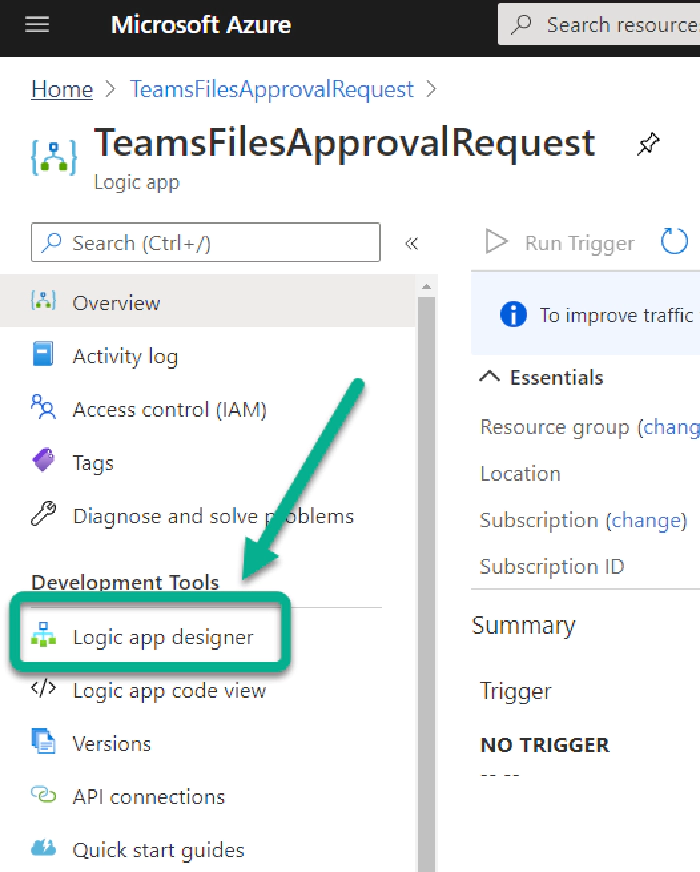
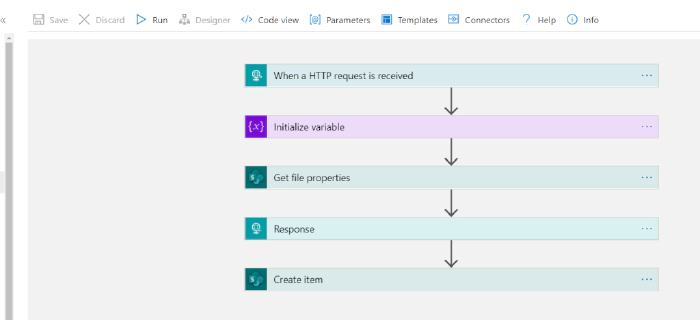
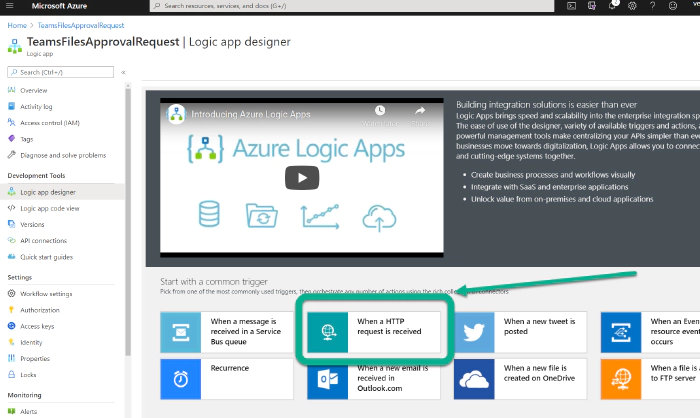
From there you can start selecting your trigger how the Logic App is activated. Since we are duplicating the earlier post functionality with Azure Logic Apps we choose “When a HTTP request is received”
And now the UI starts to look very Power Automatish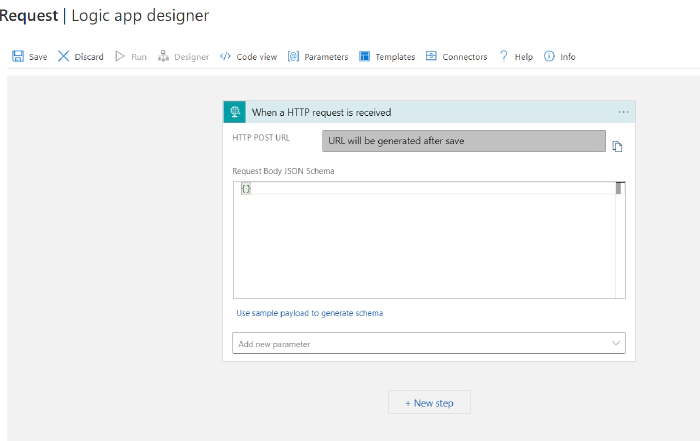
The difference is about available parameters. You need to select Add new parameter to open menu that is in this (and in many other actions) not visible unlike at Power Automate designer.

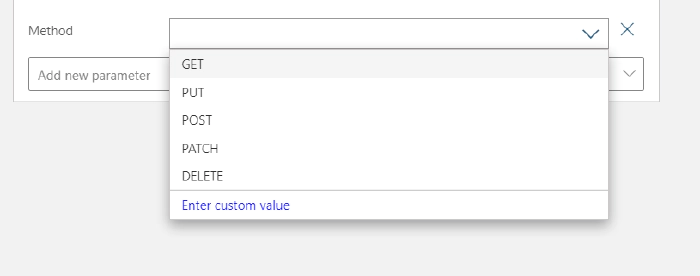
Check Method
And you can choose Get from the list.
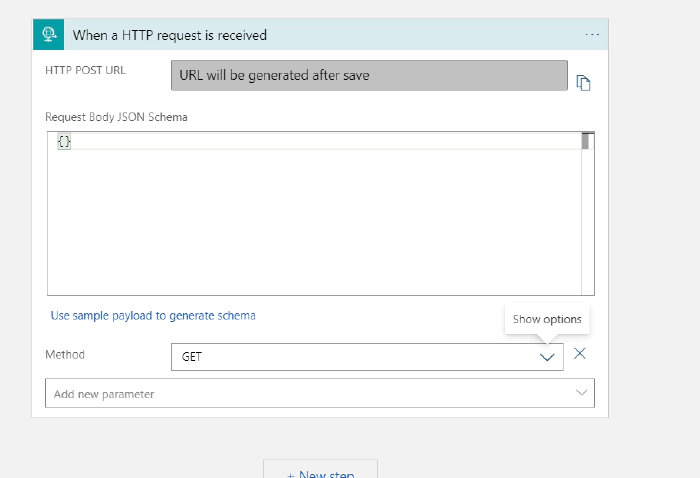
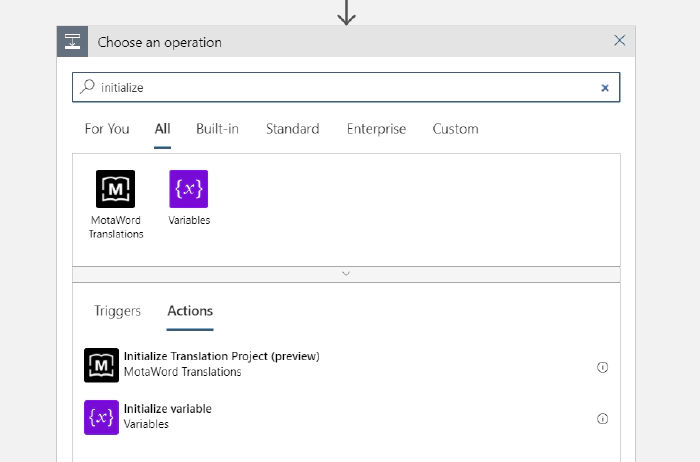
Then we add other parts. The search for actions is not as good as in Power Automate Cloud Flows but keep on trying – the actions are there!
Let’s populate that with triggerOutputs()[‘queries’][‘FileID’] just like in the earlier blog post.

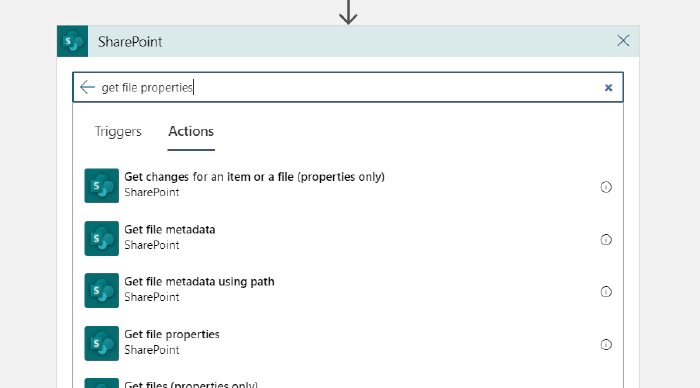
Add there Get File Properties from SharePoint. In this point we need to add a connection to the SharePoint. Use credentials that you seem to be fit.

Once you have signed in you can define the information how to get file
properties.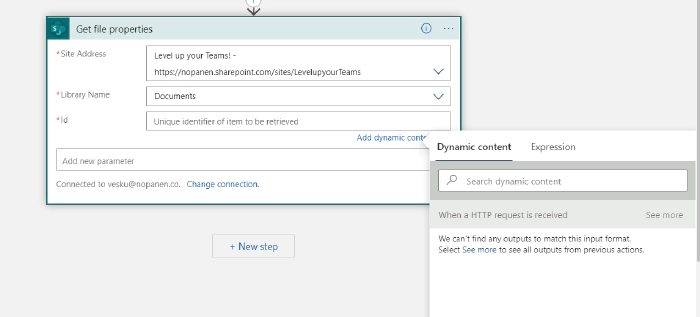
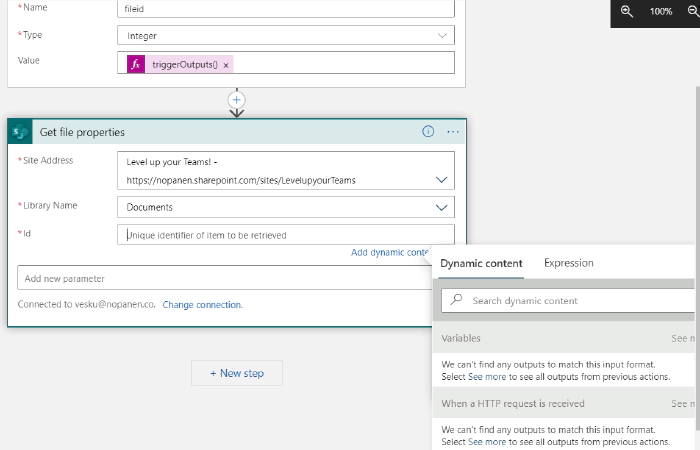
The FileID is missing. You need to do a bit trick here:
- Change parameter to integer
- add it to the Get file properties
- Change parameter back to string

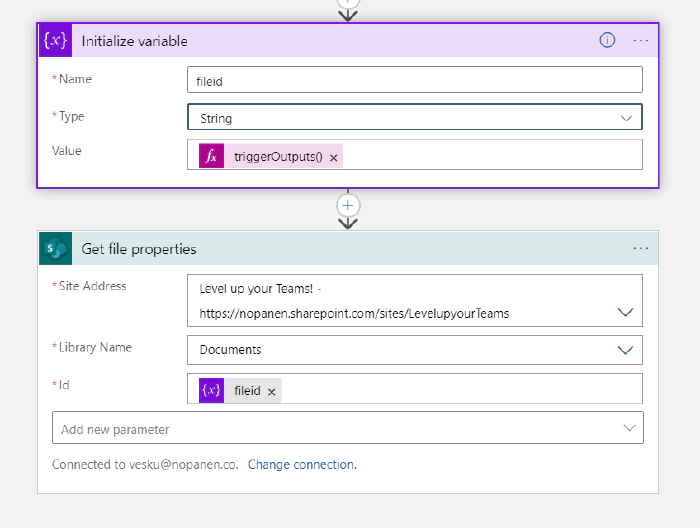
At this point we have
- FileID
- All file properties
- Open HTTP request..
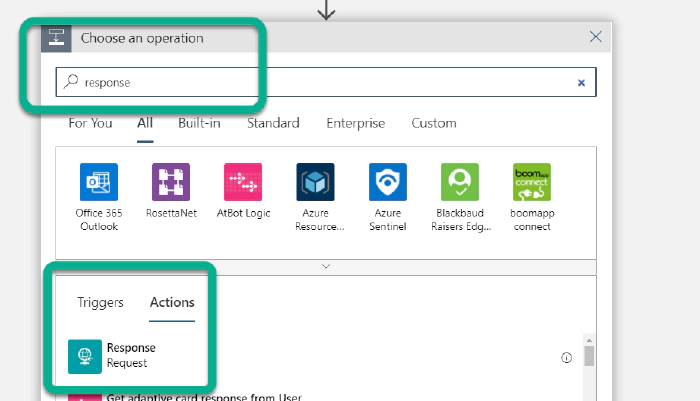
Let’s close that HTTP request first. Add Response-action and instruct to
close the tab.
**
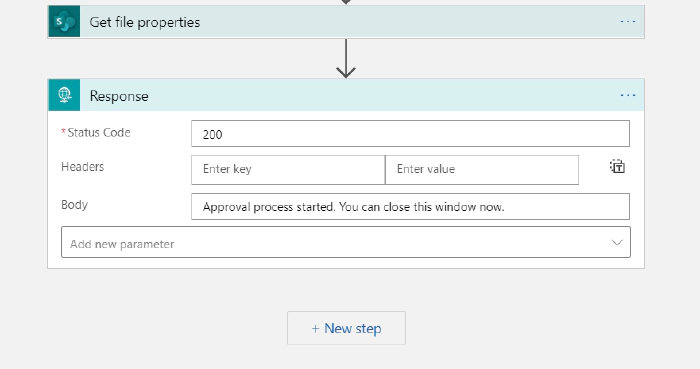
Note: here is when you need to progress differently than with Power Automate Cloud Flow approval This is because Azure Logic Apps doesn’t have Approval-connection. In this phase I decided to make the demo easily: writing the approval request to a SharePoint list in the tenant and and creating a another Power Automate with a when item is inserted trigger there. First – let’s create that list where we can write the information to. We can use Teams Lists -app for that.

Search for the action in Azure Logic Apps and add Create Item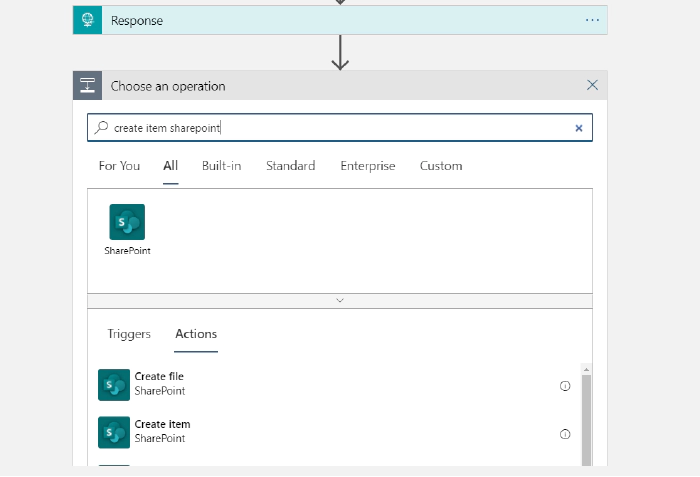
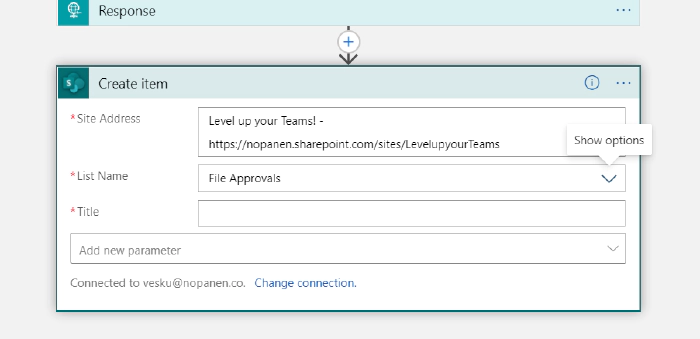
Now, we need to select Add new parameter to add list columns to the
action.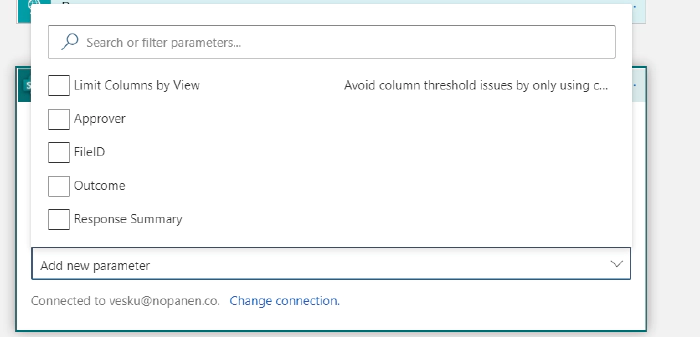
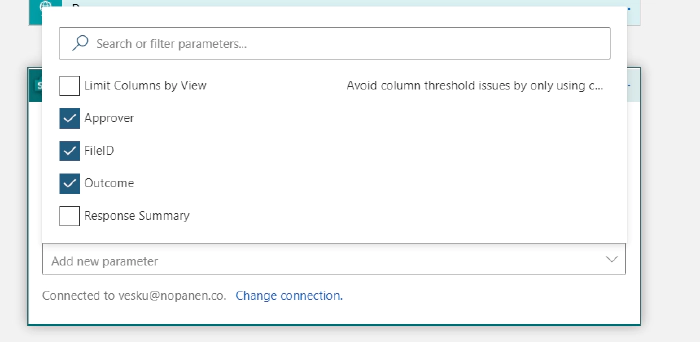
When filling up information you can use Dynamic values from Get file properties. Since we don’t really know who clicked that request approval button we just assume it was the person who did changes the last time.
And that’s it!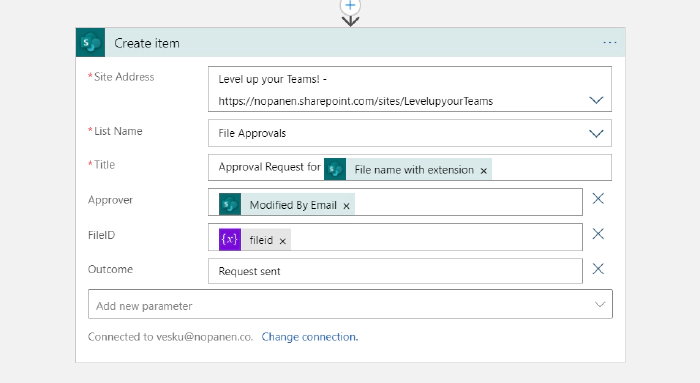
Fast forwarding the Power Automate that is created as a trigger to the
File Approvals -list looks like this: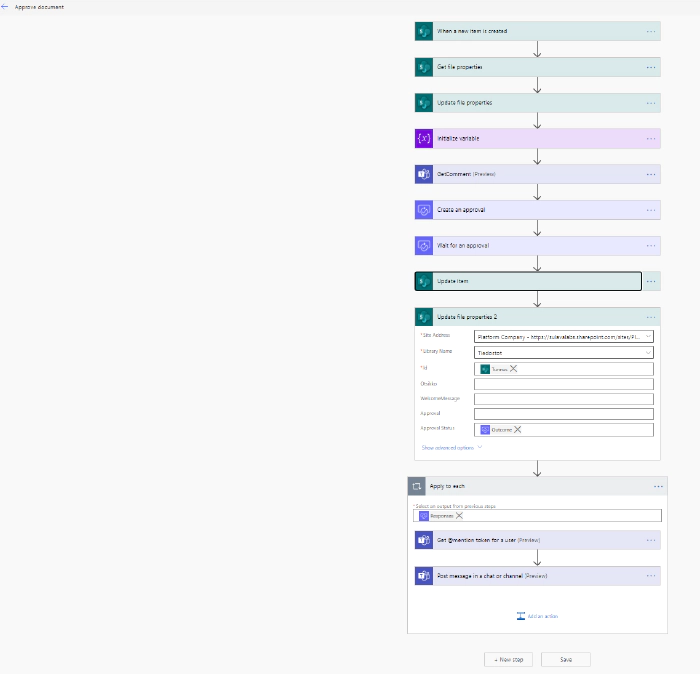
Steps are roughly similar to the ones as in the earlier post.
- The new item is inserted trigger
- Getting file properties from the Documents (based on the fileID )
- Updating that file that Approval is processing
- Storing the file name into a variable
- Getting a comment from the user that last modified the file why this document needs approving
- I didn’t add this one but you could figure out who is really the document approver. Perhaps there is metadata that can define that one – or the library / folder itself is tied to a structure that defines the real approver
- Create the approval request
- Wait for the approval to conclude. I have found out that it is better to use Create + Wait combination in separate actions compared to the Start & Wait single action. If you need to count your Power Automate executions then a single action might make more sense..
- Add also the check is it approved or rejected. I didn’t add this either to this demo but this is definitely needed if you are taking any real action after the approval process!
- Updated the outcome to the list and then to the file itself to a dedicated columns
- Added a information about approval request to be sent to a channel
Conclusion
With Azure Logic Apps it is possible to go the next level without paying for Premium Power Automates. There are also other create features in Logic Apps that I didn’t even touch on this one: ability to modify the app in Visual Studio for example. And that means it is easy to add to a version control as well..
You need to pay attention to the execution costs and make sure that your Logic Apps stay in the budget. This suits extremely well for low-medium usage actions. You may have to switch from a Logic App to Power Automate at some point – like we did in this example. Plan carefully how you do the data exchange and where do you store the information & who can access it. The HTTP trigger in this example isn’t the safest one to use (it lacks security) so you need to plan how you either add some security to it or secure it in some other way. In my earlier post I also made some pointers about this: look them up. Not all connectors / actions are in the Logic Apps but many of them are.
Azure Logic Apps are a great way to extend Microsoft Teams and integrate it to different systems – inside and outside of Microsoft 365 cloud.