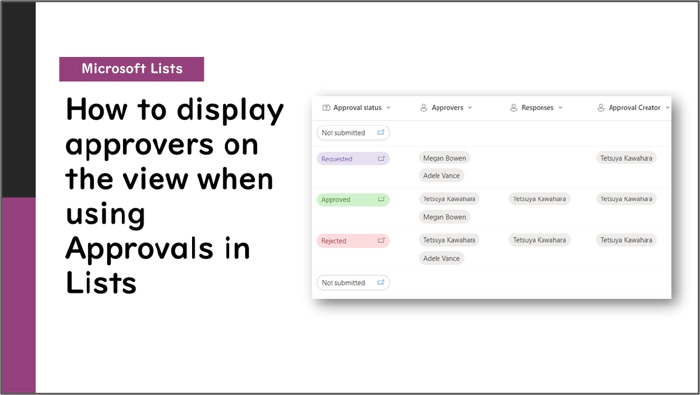
Microsoft Lists: How to display approvers on the view when using Approvals in Lists
Introduction
The approval feature in Microsoft Lists, which was previously only available for specific list templates, can now be enabled for any list. (Note: As of May 30, 2024, this feature may not yet be available for your tenant.)
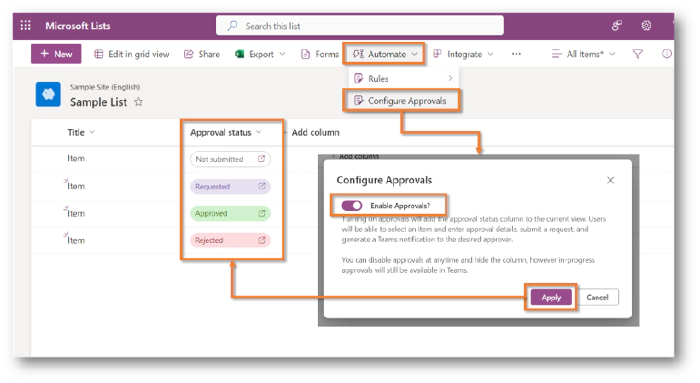
When this feature is enabled, an Approval status column is displayed in the view, allowing you to see the current approval status. However, the view does not show who the approvers are or who has approved an item. Therefore, it can be difficult to easily identify the approvers for each item.
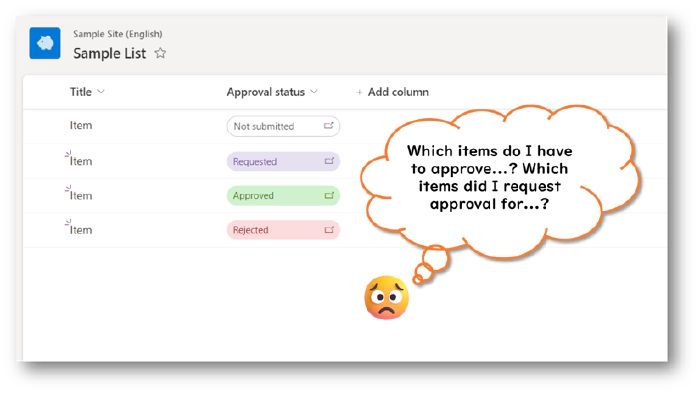
This post will guide you on how to display approvers in the view.
How to Display Approvers in the View
When the approval feature is enabled, columns such as Approver Creator, Approvers, and Responses are automatically created in addition to the Approval status column. However, these columns are not usually displayed in the view. By displaying these columns in the view, you can easily identify the approvers.
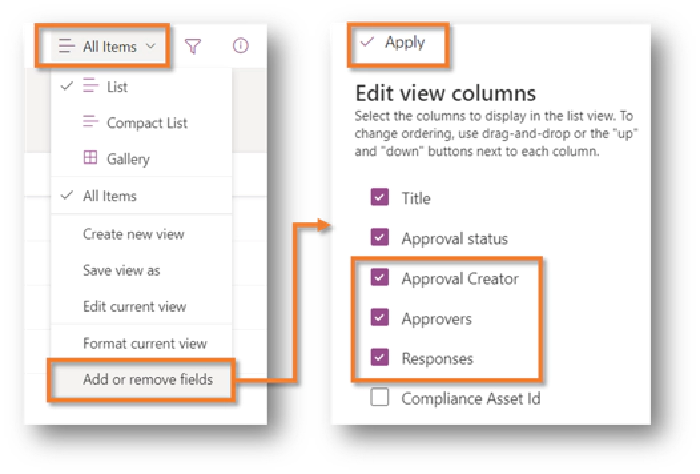
To display these columns in the view:
- Select the name of the view shown in the upper right corner > Select Add or remove fields
- Check the columns
Approver Creator,Approvers, andResponses - Select Apply
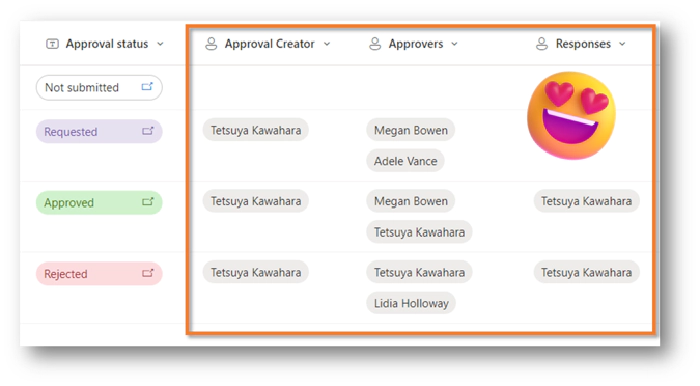
Explanation of Each Column
| Column Name | Internal Name of Column | Column Type | Description |
|---|---|---|---|
| Approval status | _ApprovalStatus | Number | The following numbers are set 0: Not Submitted 1: Requested 2: Rejected 3: Approved |
| Approver Creator | _ApprovalSentBy | Person or Group | Displays the user who requested the approval. |
| Approvers | _ApprovalAssignedTo | Person or Group (multiple selections possible) | Displays the users set as approvers. |
| Responses | _ApprovalRespondedBy | Person or Group (multiple selections possible) | Displays the users who approved or rejected. |
Behavior for Each Process
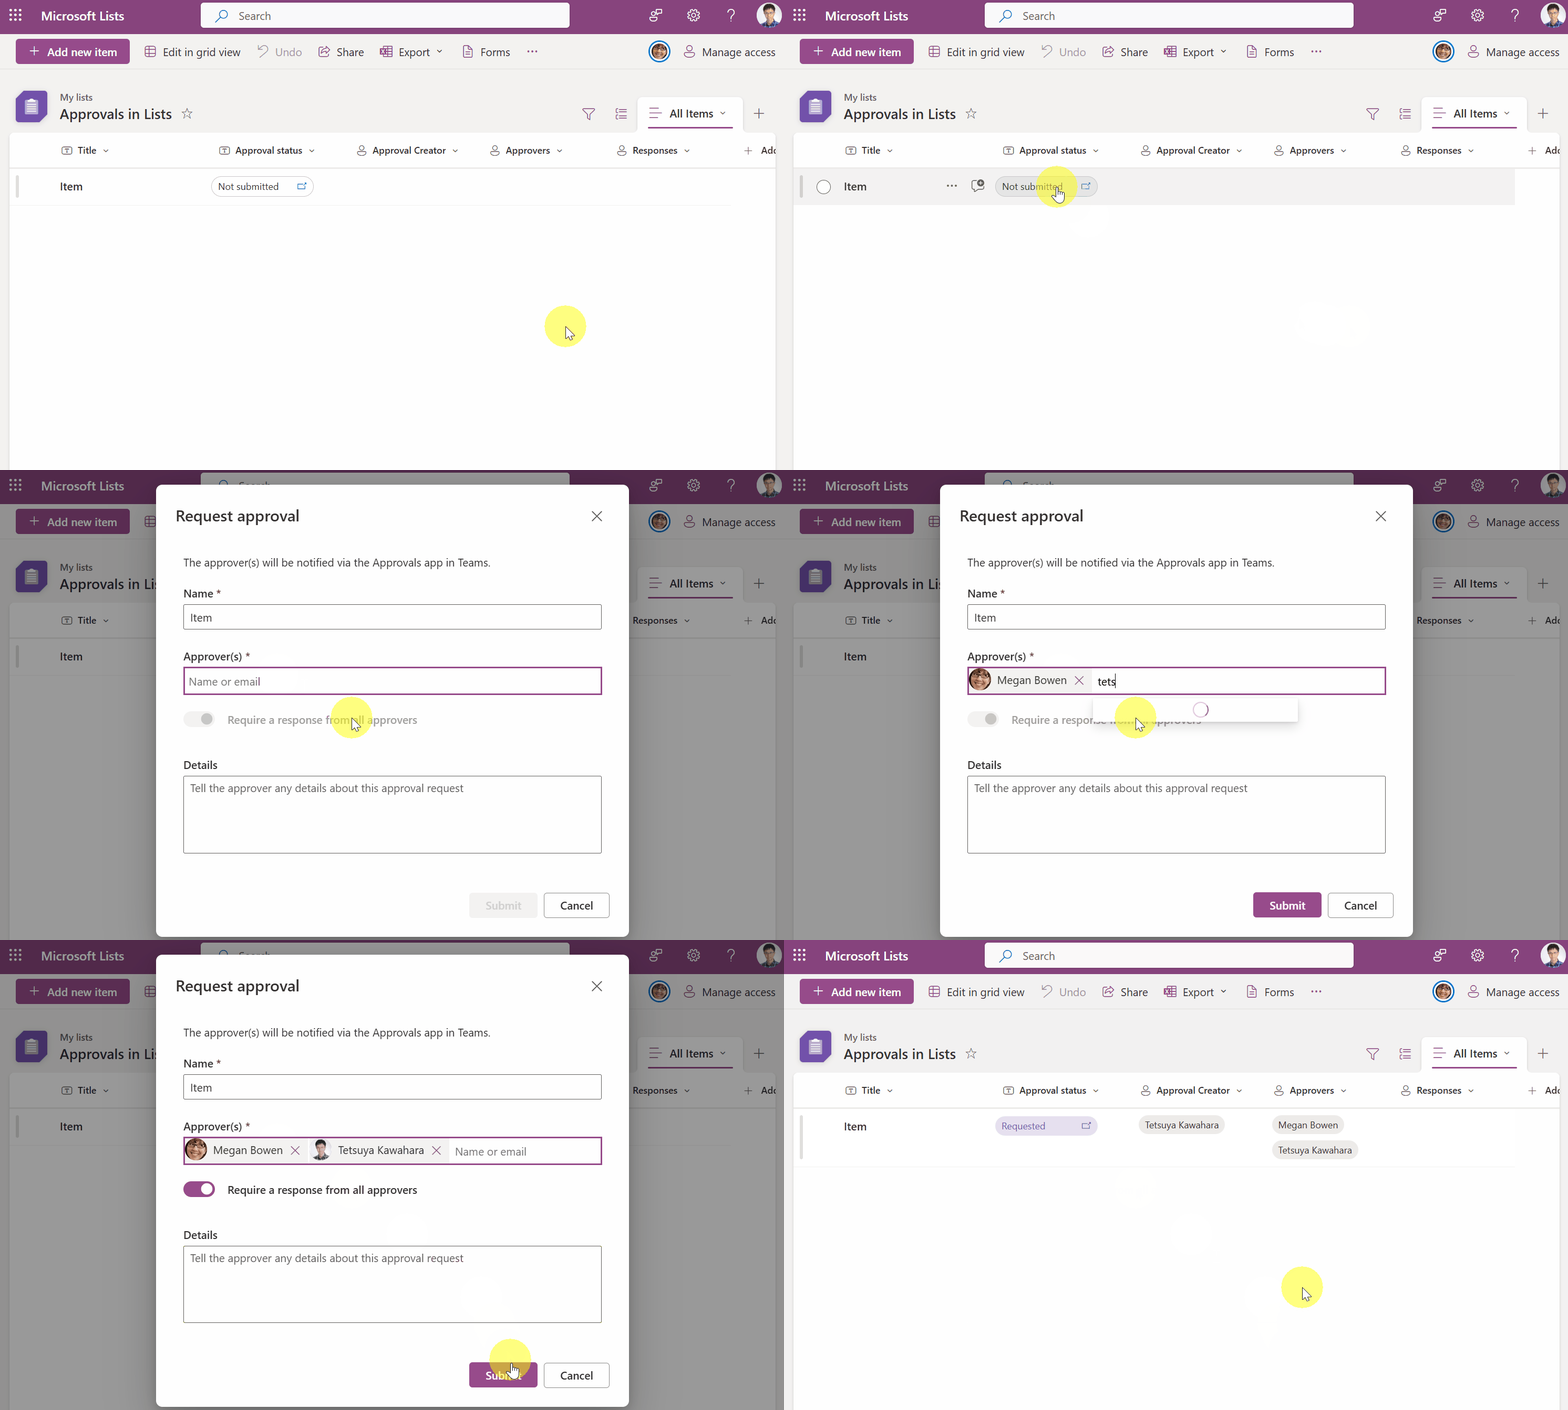
Behavior When Requesting Approval
When requesting approval, the Approval status is set to Requested, the user who requested the approval is set in the Approver Creator column, and the approvers are set in the Approvers column.
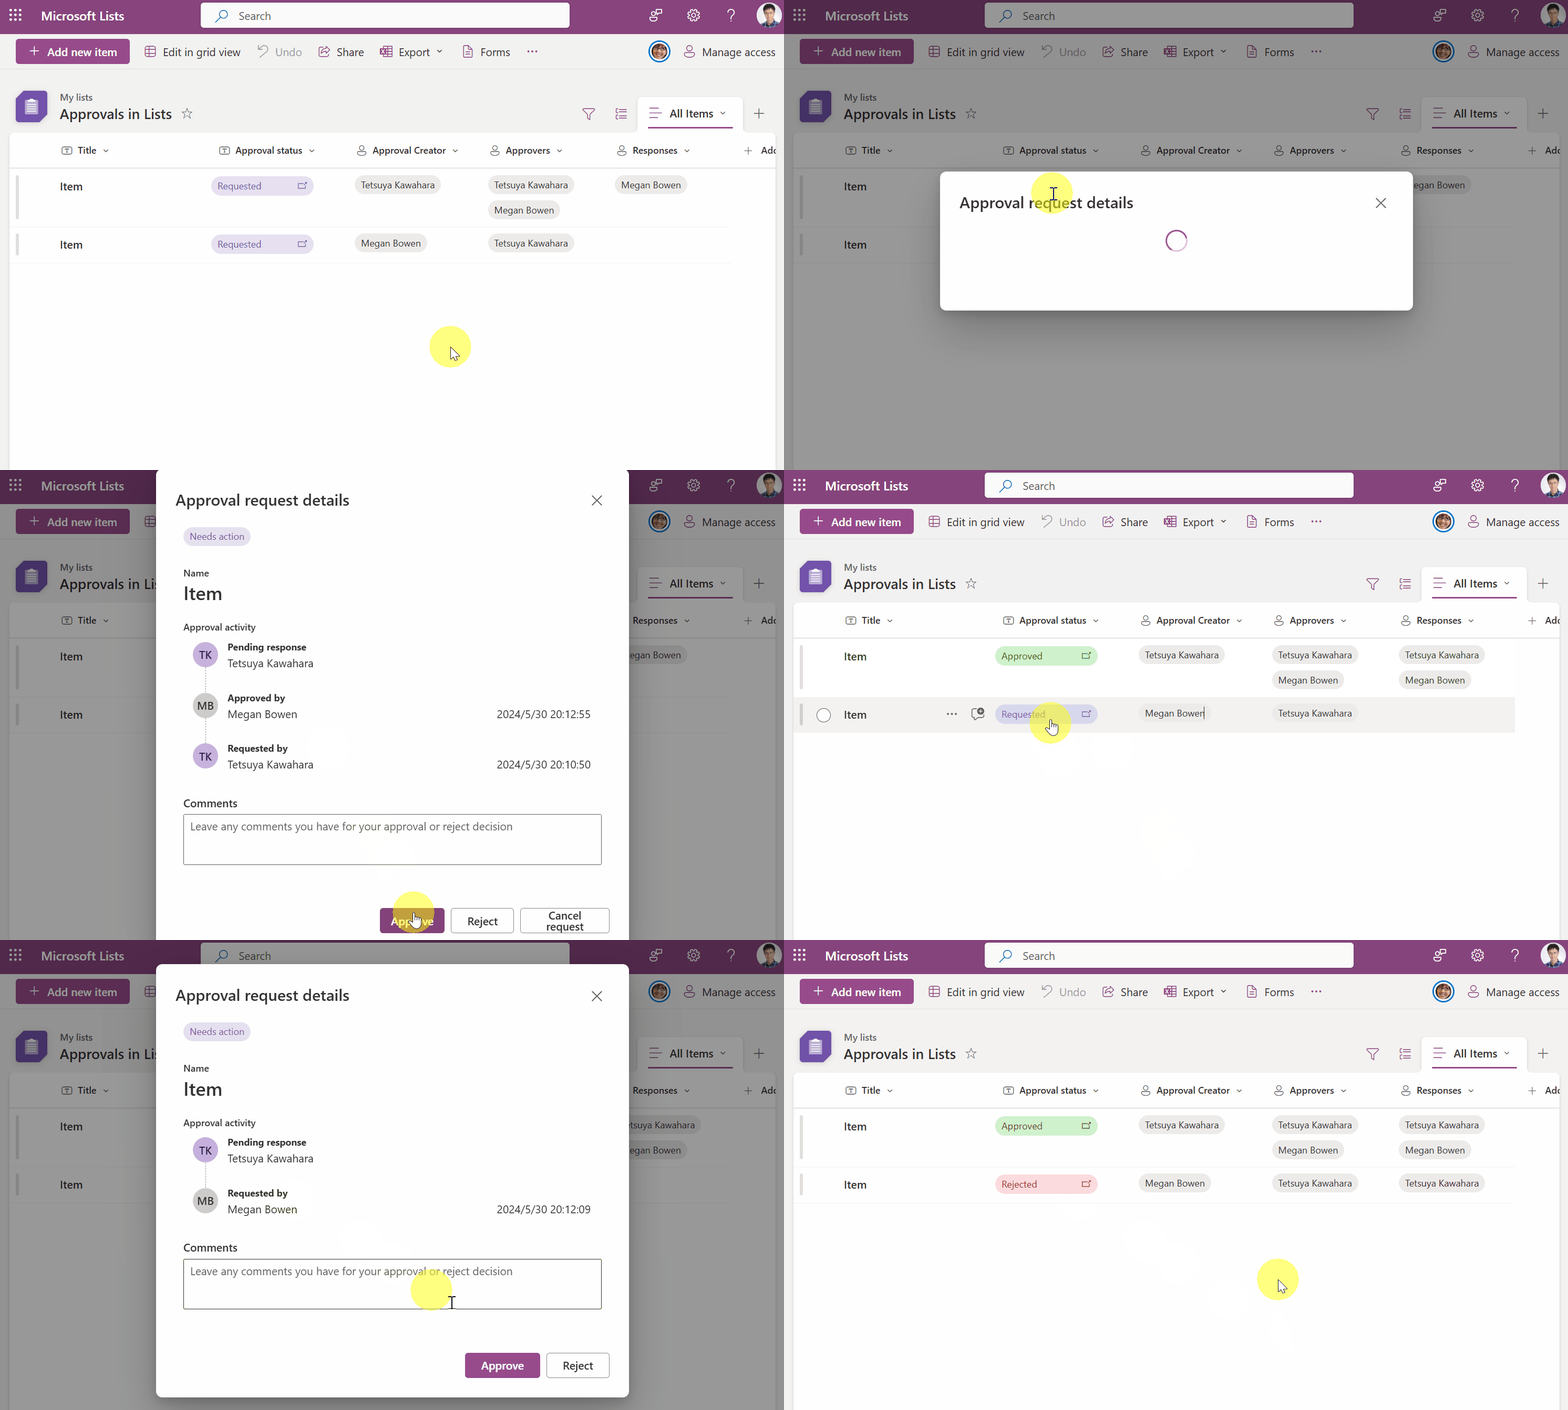
Behavior When Approving/Rejecting
When approving or rejecting, the Approval status is set to Approved or Rejected, and the users who approved or rejected are added to the Responses column.
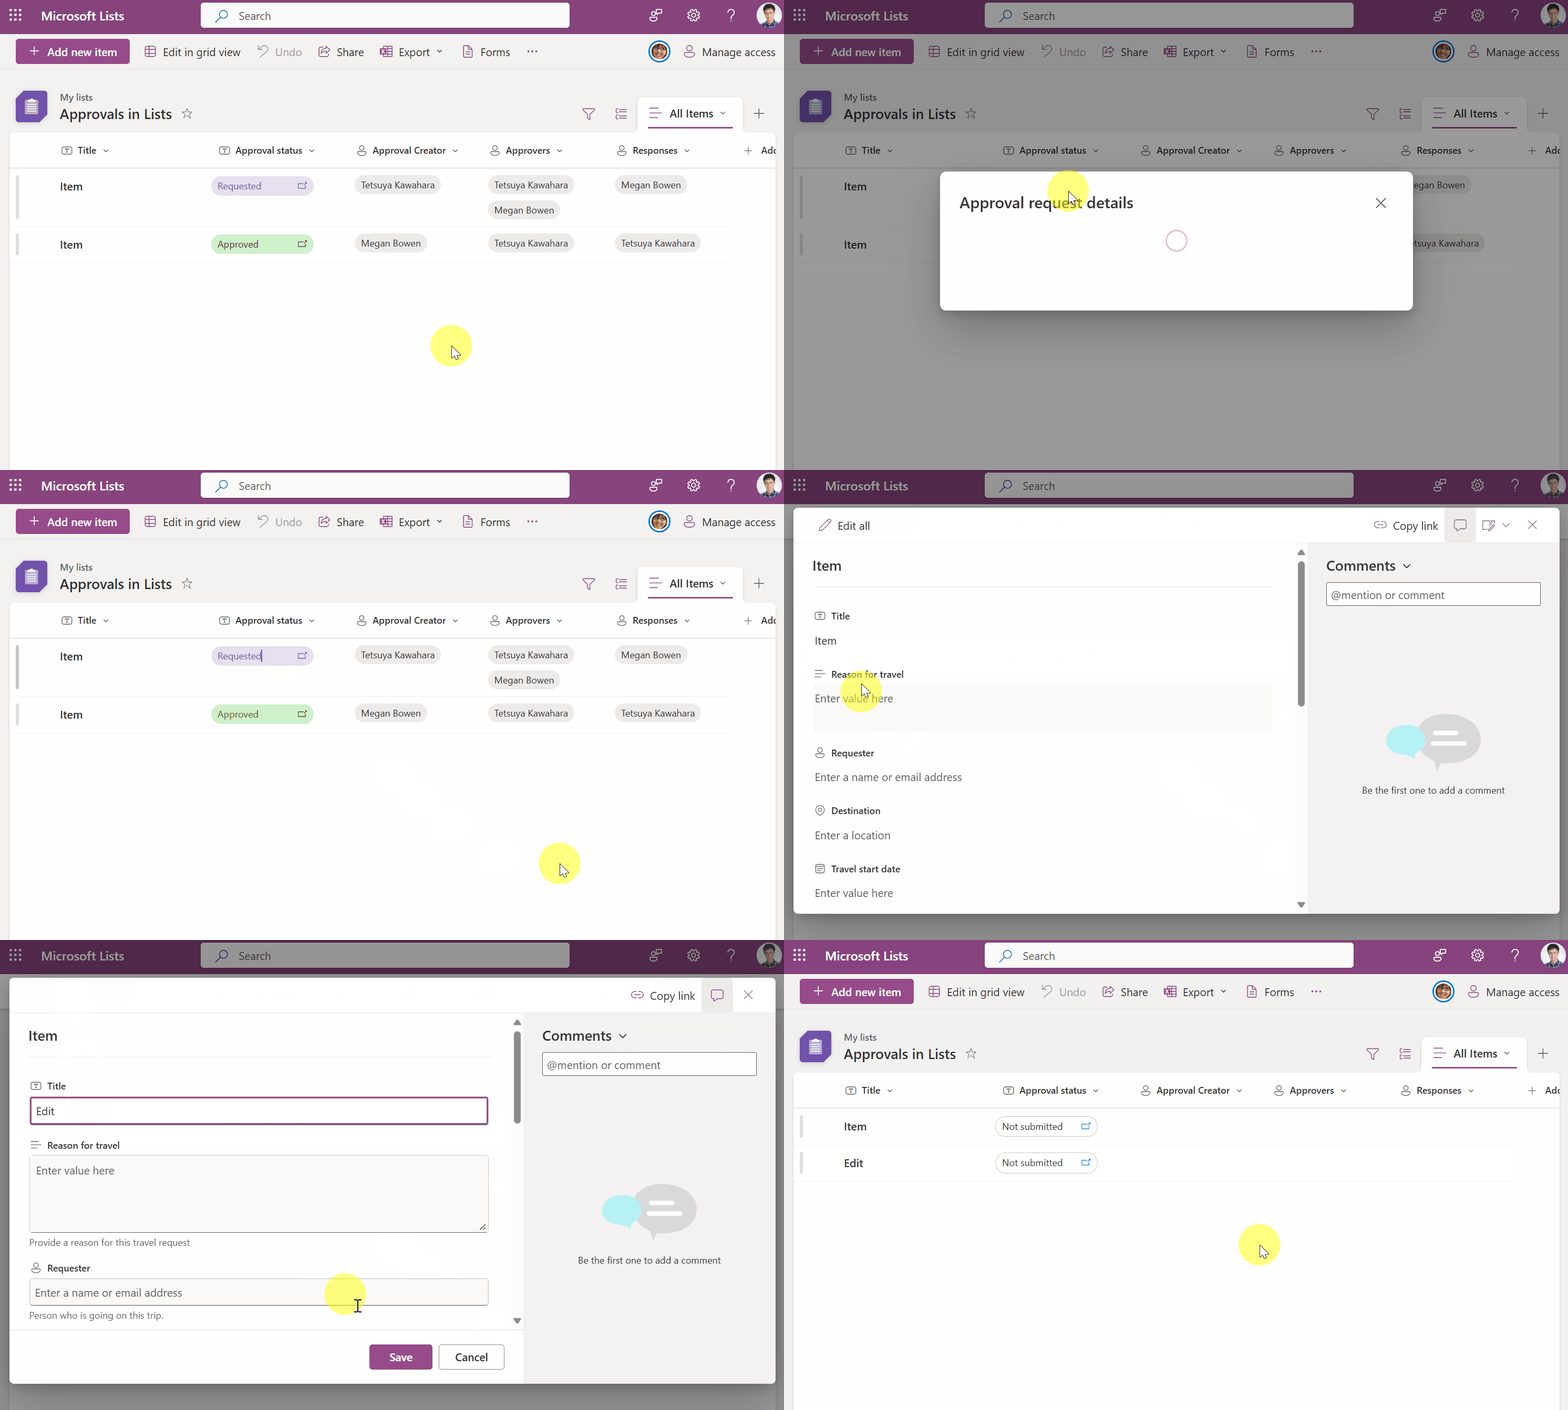
Behavior When Canceling Approval Requests
When canceling, the Approval status is set to Not submitted, and the Approver Creator, Approvers, and Responses columns are cleared.
Creating a View for Items Requiring Your Approval
You can also use view filters to display only the items that the current logged-in user needs to approve.
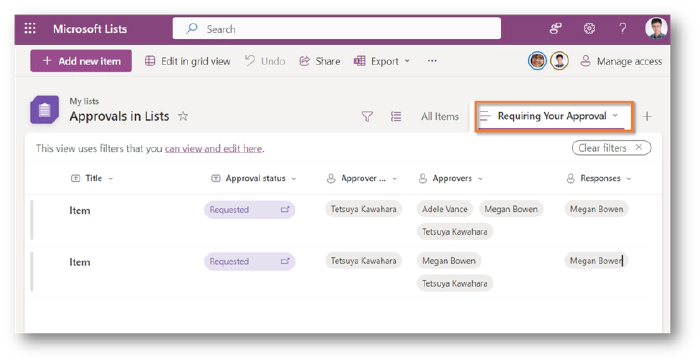
To create the view:
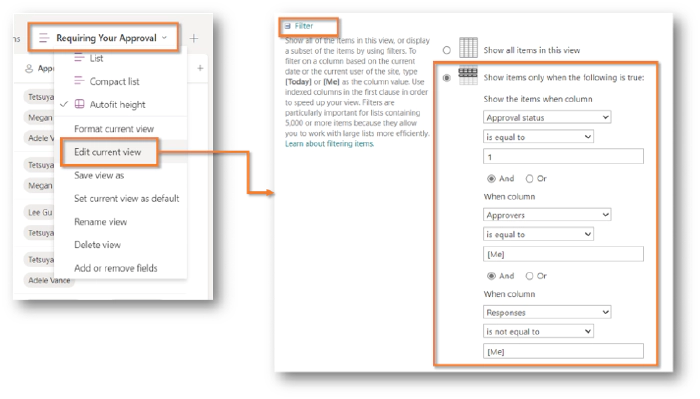
Select the name of the view shown in the upper right corner > Select Edit current view
Set the following filters
Approval statusis equal to 1 (Requested)And
Approversis equal to [Me]And
Responsesis not equal to [Me]Select OK
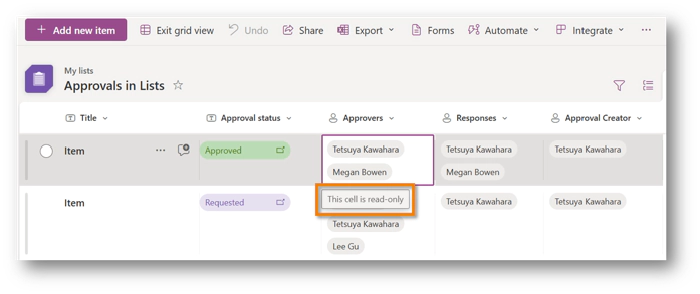
Edit in Grid View
When in edit in grid view, the Approver Creator, Approvers, Responses, and Approval status columns are read-only, and these columns cannot be edited.
Additional Notes
- I confirmed that the
Responsescolumn is also updated when approvals are done via the Microsoft Teams Approval app. However, updates to theApproval statusandResponsescolumns were not reflected until the Approval request details dialog was opened once on the list. It is unclear whether this is a bug, but I have submitted feedback on this phenomenon to the Microsoft feedback portal.