How to use Microsoft Teams app templates
Microsoft Teams can be extended in several different ways using no-code, low-code and custom code solutions. Microsoft Teams app templates are a great way to start discovering ideas, extensibility options and examples of application architectures and coding patters or just start using an app right away in your organization. App templates are community driven, open source and production-ready apps.

Installation instructions, detailed prerequisites and source code are available for each app on GitHub (Office Developer). You can install each app as it is or clone the GitHub repository of an app and start developing it for your own purposes. You can find a detailed list of app templates here: App Templates for Microsoft Teams. In time of writing this article there are already 45 templates available.
App templates are developed using several different technologies and an app can utilize one or more of there technologies.
- Microsoft Teams Bots (What are conversational bots?)
- Tabs (What are Microsoft Teams custom tabs?)
- Personal apps (tabs available on Teams left-rail)
- Message extensions (What are messaging extensions?)
- Power Apps and Power Automate workflows (Teams integration with Microsoft Power Platform)
- SharePoint sites, lists, pages and templates
Prerequisites
- Microsoft 365 tenant. If you are a developer, you can get a free Microsoft 365 Developer tenant by joining a Microsoft 365 Developer program.
- Depending on an app template, you may also require a Microsoft Azure subscription for running web applications, workflows and for data storage. You can get a free trial subscription with $200 credits for first 30 days and 12 months of popular free services here: Azure trial subscription
- Some templates may require a Power BI license, which is now included in new Microsoft 365 Developer subscription tenants. You can also use Power BI Pro trial license on your tenant.
- Depending on a template Power Apps and Power Automate flows can be tested either in default Power Platform environment created for Office 365 subscription or some applications may require Dataverse environment. For production usage I suggest creating a separate production environment, if your organization doesn’t have one already.
Deploying an app template to your environment
Once you have picked a template, first thing is to read the documentation. Documentation contains an overview of the solution, solution architecture, data storage and detailed deployment instructions. For Azure related resources there is also a cost estimation. All apps can be deployment following deployment guide. Depending on a template you may require to deploy and configure
- App Registration to Azure Active Directory
- Resources to Azure using ready-made ARM template
- Import and configure a Power App and/or Power Automate Flow
- Create artifacts like sites and lists to SharePoint manually, with Power Automate or with PowerShell
- Install the app to Teams using side-loading or uploading to app catalog
Deploying an Azure resources
For Azure based resources you need to have an Azure subscription and permissions to deploy resources to the subscription. For Azure AD App registration you need to have Global Admin role access to Azure Active Directory in your Microsoft 365 tenant.
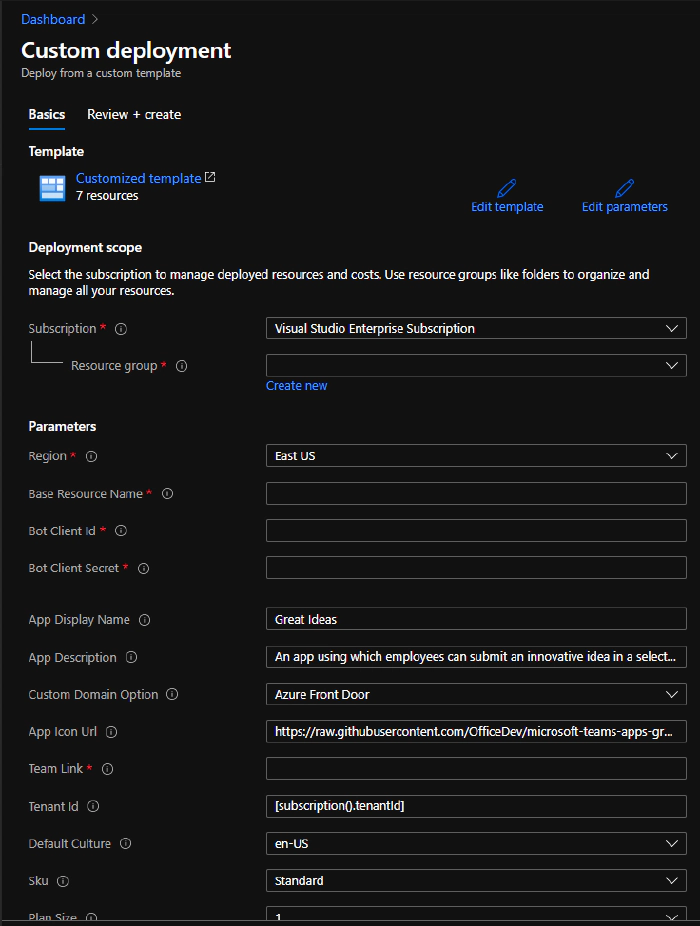
All Azure related services are created with Azure Resource Manager template (ARM). Each app has a Deploy to Azure button, which opens up the Azure Portal based on your credentials.

Easiest way is to use that browser session, where you have logged in with an account linked to your Azure subscription where you like to deploy the services. Based on required resources for the app, ARM template is providing different configuration options.

First pick-up a subscription and a resource group to deploy new resources. I suggest creating a new resource group for the app, at least when you are testing, so you can easily manage app’s resources and access to them. Choose something unique for Base Resource Name, it’s quite commonly used as part of deployed service URL endpoints, so it needs to be globally unique. Refer the app deployment documentation for other configuration options. Once complete select Create and Azure resource deployment begins. Depending on a type and number of services, it can take up to 15 minutes to complete. Azure portal will notify when resources are deployed.
Considerations
Each app template with Azure resources also contains a documentation about estimated costs. Cost estimation is based on production usage for certain number of users and usage of the app. Actual costs depend on how resources are scaled and how much usage there is.
For testing apps you can scale down at least the app service plan and Azure Search. Note that Azure Search cannot be scaled after deployment.
Deploying SharePoint resources
Some app templates require you to create new resources, like sites and lists, to SharePoint Online. SharePoint resources are created with a PowerShell script provided in deployment guide, with a Power Automate Flow or manually. If the app is using a premade site template, deployment is done from SharePoint Lookbook. For scripts you need PnP PowerShell module installed and easiest way is to install it from PowerShell Gallery by running a command
Install-Module SharePointPnPPowerShellOnline
When SharePoint resources are deployed with Power Automate, first you import a Flow to your environment in Power Automate portal, configure the Flow and run it manually. Creating resources manually is guided in the deployment guide, remember to use exact column names or otherwise rest of the solution might not work correctly.
Deploying a Power App
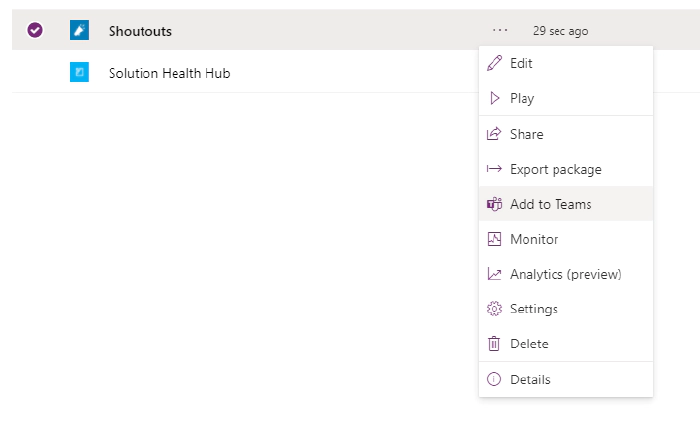
Power Apps are first deployed to Power Apps environment in Power Apps maker portal. Depending of a template app is either uploaded as a Canvas App (image below) on Apps page or as a solution in Solutions page. Solution require a separate Dataverse environment, which can be created from Power App admin portal.

After import is complete, you can create a Teams app package for created Power App by selecting “Add to Teams”. Fill-out details and click Download app.

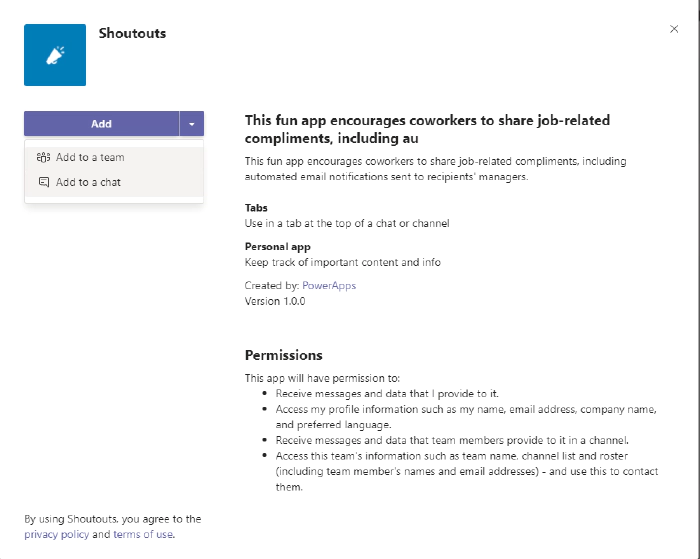
Install the app (downloaded zip file) to Teams either using side-loading or uploading the app to Teams app catalog.
Installing an app to Teams
When you have your Teams app package ready, either downloaded from Power Apps portal or created following deployment guide, you can install it to Teams. Depending on your tenant’s configuration, there is two options for installing an app. With sideloading you can upload the app to you or your team. App is not available for anyone else in your tenant. To sideload an app open “Apps” in bottom left corner on Teams client, select “Upload a custom app” and select “Upload for me or my teams”. If the option is not available for you, sideloading is disabled. Configure the app and you’re done.

For uploading an app to your whole tenant, select "Upload a custom app" and select "Upload for <your tenant name>". App will appear on "Built for <your tenant name>" section on Apps. Other option is to upload your app on Teams Admin Center’s app catalog. After uploading an app, it will be available for your users.
Wrap-up
Teams app templates are ready to use solutions. Deployment and installation to Teams is fairly simple, when you have needed services and tools in place, just by following a deployment guidance. Templates are also great way to learn how solutions around Microsoft Teams can be built using different technology approaches and patterns. Always see the documentation first to see what is the purpose of the app, how it is built, what data is stored and what are the possible costs. New app templates are introduces quite often, so also remember to check out what new apps are available.