Professional SPFx Solutions: Superb solution packages
SharePoint Framework (SPFx) is an extensibility model for Microsoft 365 enabling developers to build different kinds of extensibility for Microsoft Viva, Microsoft Teams, Outlook, Microsoft 365 app (Office), and SharePoint. SPFx has multiple benefits like automatic Single Sign On, automatic hosting in the customer tenant, reuse same code across the service and industry standard web stack tooling.
- How do I change the name of my app in the app store?
- How do I provide an app icon?
- Where do I add screenshots and videos of my apps?
- How do I control whether my app gets deployed automatically to every site?
Great questions! You can control how your application appears in the app store by configuring your package-solution.json.
This blog post is part of a month long SPFx series for January 2023. Each business day we’ll publish a new blog post covering different aspects of the SPFx.
- Previous blog post in this series - Professional SPFx Solutions: More web part manifest secrets
- Next blog post in this series - Do more with less in Microsoft 365 by using SPFx
Unless you have published your SPFx solutions to the SharePoint Store for others to purchase, you may have never paid much attention to the package-solution.json file. But, just like the web part .manifest.json, the package-solution.json is full of cool configuration options that you should be aware of.
In today’s post, I hope to convince you to spend a little bit more time with your package-solution.json to make your solutions appear more professional, and to change how your solutions behave when deployed.
What is the package-solution.json and what does it do?
Located in your SPFx solution’s config folder, the package-solution.json defines the parameters for the tasks that create your SharePoint package for deployment.
When you run gulp package-solution --ship, your package-solution.json determines how your solution will be packaged and how it will appear in the SharePoint App Catalog. It will also control how the app will get deployed, and what permission requests and isolation your app will need.
By default, the package-solution.json is automatically generated for you when you scaffold your SPFx solution with the bare minimum required; there is no user-friendly title, description, or any app icons; there aren’t any screen shots, videos, or information about who created this cool app.
Let’s change all that, shall we?
A word about terminology and testing your changes to the package-solution.json
Throughout this article, I seem to use the words “solution”, “package”, and “app” interchangeably.
Let’s agree on the following terms:
- Solution: The collection of source files that make your SPFx project. It contains .ts, .tsx, .css, and .json files, to name a few.
- Package: The built, bundled, and packed output of your solution into a single .sppkg file; the thing that you upload to your App Catalog to deploy your code and make your solution components available for others to consume.
- App: The ready-to-install instance of your solution as available via the App Catalog. It is what site administrators deploy to their sites in order to use the individual components (e.g. web parts) on their pages.
To deploy your package for the first time
If you decide to test some of the configurations described in this post, you’ll need to perform the following steps:
From the root of your solution, run the following command:
gulp bundle --shipYou only need to run this command once after you change your code. If you’re testing package-solution.json changes, you can skip this step after the first time.
Run the following command:
gulp package-solution --shipYou may object to my using
--shipfor both thebundleandpackage-solutioncommands while testing, but I always want to identify deployment issues as early as possible when I am preparing to deploy to the App Catalog. By using--ship, I make sure that I am testing my app in the same conditions that my users will be using it. Feel free to skip--shipif you wish.Find the generated
.sppkgfile with your file explorer (I usually navigate to the sharepoint/solution folder within VSCode, select the .sppkg and select Reveal in File Explorer in the context menu )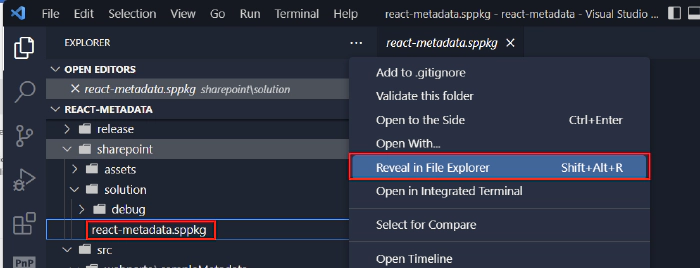
Go to your Tenant’s App Catalog
In the Manage apps page, drag your .sppkg file onto the Apps for SharePoint list.
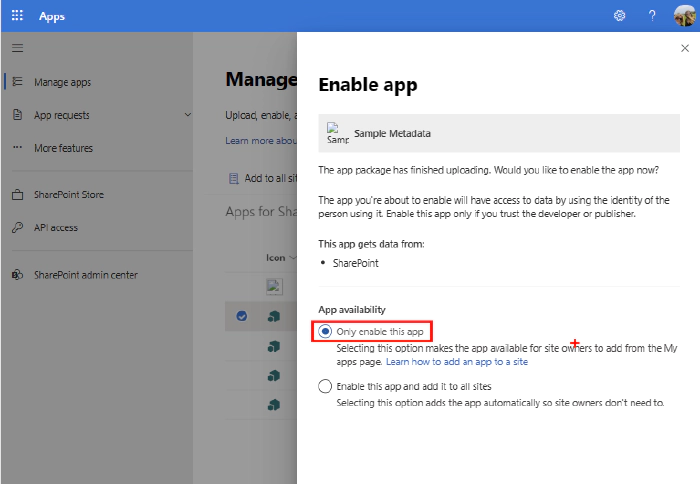
When prompted to Enable app, under App availability, select Only enable this app, followed by Enable app at the bottom of the pane.(there will be plenty of time later to automatically enable and deploy to all sites if that’s what you wish to do, but please don’t do this when you’re testing your package-solution.json changes)
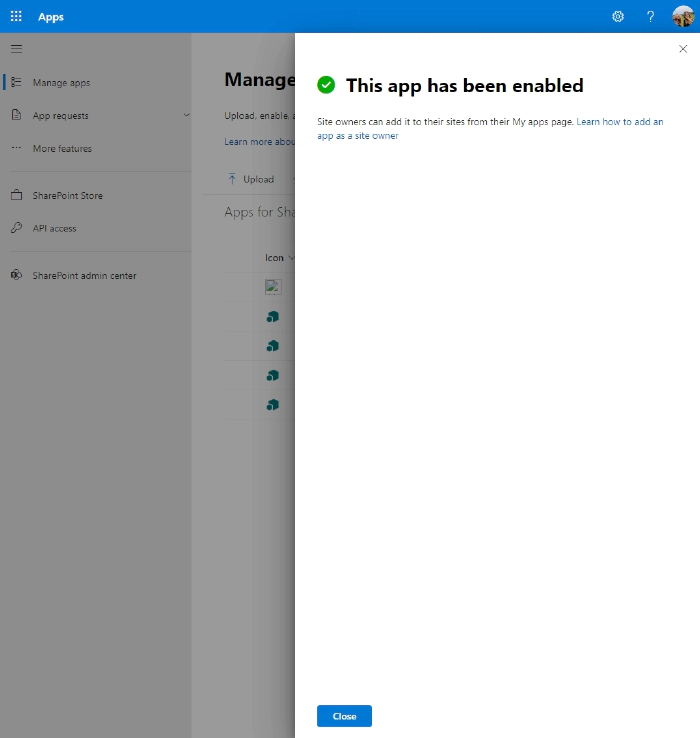
When you see This app has been enabled, select Close at the bottom of the pane.
Test as you wish!
To deploy your package after the first time
In your package-solution.json, increment the
versionvalue. I like to increase by0.0.0.1every time I deploy. For example, ifversionis1.0.0.0, I’ll change it to1.0.0.1,1.0.0.2the next time,1.0.0.3after that, and so on.Run the following command:
gulp package-solution --shipGo to your Tenant’s App Catalog
In the Manage apps page, drag your newly-updated .sppkg file onto the Apps for SharePoint list.
This time, it should say that your package wasn’t uploaded because a file with the same name already exists. Select Replace.
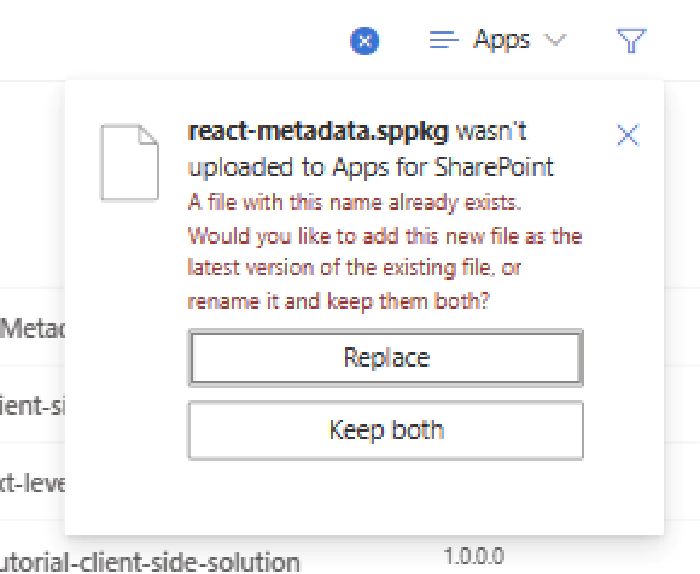
As before, when prompted to Enable app, under App availability, select Only enable this app, followed by Enable app at the bottom of the pane.
When you see This app has been enabled, select Close at the bottom of the pane.
Make sure that the App version column has updated for your app.

Test your updated app!
Updated your site-deployed app
If, in the process of testing your app, you deployed the app to a site, you may want to update the deployed instance by following these steps:
- Go to the site where you deployed your app.
- From the Settings gear, select Add an app
- On the My apps page, find your app under Added apps and select it.
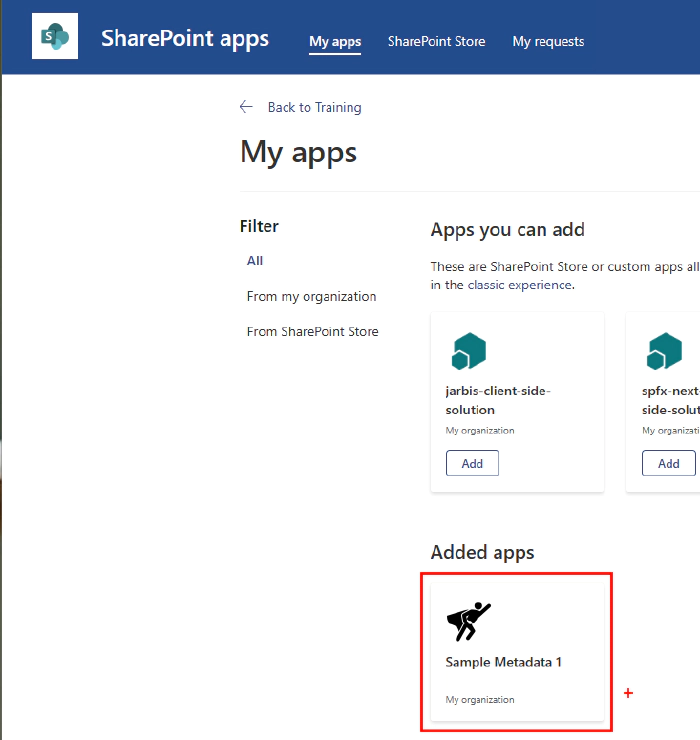
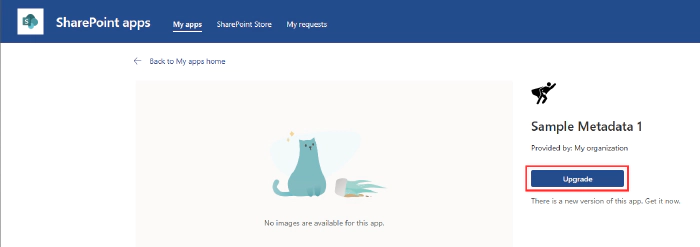
- From the app details page, select Upgrade
package-solution.json contents
Ok, enough pre-amble! Let’s look at the contents of the package-solution.json file.
Like the .manifest.json, the package-solution.json adheres to a JSON schema which determines the valid options that you can use. Withing VSCode, you can always Ctrl-Click on the schema URL to view the schema.

Here are some configurations you can find here:
name
- By default, the name will be [Your Solution Name]-client-side-solution
- The name should be the non-localized name to identify your app.
- Don’t use words matching features in Microsoft Teams or SharePoint, such as Chat, Contacts, Calendar, Calls, Files, Meeting, Activity, Teams, Apps, Help, SharePoint, List, Page, etc. as these names could be confused with the standard functionality in Teams and SharePoint.
- If your app is named after a common word, such as Orders, you should include your company name as well to clearly differentiate it from other apps, for example, Contoso Orders.
- Don’t use names of other Microsoft’s products in your app name, such as Outlook, Word, Teams, Excel, PowerPoint, Visio, etc.
- Don’t use keywords that are related to Microsoft’s products. Your name should not use Microsoft Teams or SharePoint feature-specific keywords like - Start meeting, Make call, Upload file, Start chat, etc. These keywords are used in Microsoft’s products and using them in your application could confuse users. If your application offers similar functionality, include the name of your name in the action, for example: Start a Zoom Meeting, Upload file to Dropbox,Start Freshdesk chat, etc.
{
  "$schema": "https://developer.microsoft.com/json-schemas/spfx-build/package-solution.schema.json",
  "solution": {
    "id": "74116799-8800-4c3f-abfe-fb72bdcb551c",
    "name": "Sample Metadata",
    // ...
  }
}
title
- If you want to localize how your app will be listed in other language, you can use a localizable string for the title of the package.
- Can either be a non-localized string, or
$Resources:<stringId>;if localized resources are provided for the package through a .resx file - If your organization does not need to localize, you can skip this one.
{
  "$schema": "https://developer.microsoft.com/json-schemas/spfx-build/package-solution.schema.json",
  "solution": {
    "id": "74116799-8800-4c3f-abfe-fb72bdcb551c",
    "name": "Sample Metadata",
    "title": "Sample Metadata",
    //...
  }
}
version
Helps SharePoint make sure that sites where your app is deployed are notified when you change your app.
Recommend that you use one of the following versioning number schemes:
- major.minor.build.revision, or
- major.minor.maintenance.build.
Each build the version number is incremented at the last digit.
Updating the major / minor version indicates changes of the functionality contracts:
- Major Version: A breaking change
- Minor Version: A backwards-compatible minor change
- Build / Revision: No functionality change, just a different build.
Example of the versioning scheme:
Type of change Stage Versioning rule Example version First release New solution Start with 1.0.0.0 1.0.0.0 Subsequent build Testing Increment the last digit 1.0.0.1 Backward compatible bug fixes Patch release Increment the third digit and reset the last digit to zero 1.0.1.0 Backward compatible new features Minor release Increment the middle digit and reset third and fourth digits to zero 1.1.0.0 Changes that break backward compatibility Major release Increment the first digit and reset remaining digits to zero 2.0.0.0 Of course, feel free to use whichever convention you or your organization may already have in place.
{
  "$schema": "https://developer.microsoft.com/json-schemas/spfx-build/package-solution.schema.json",
  "solution": {
    "name": "Sample Metadata",
    "id": "74116799-8800-4c3f-abfe-fb72bdcb551c",
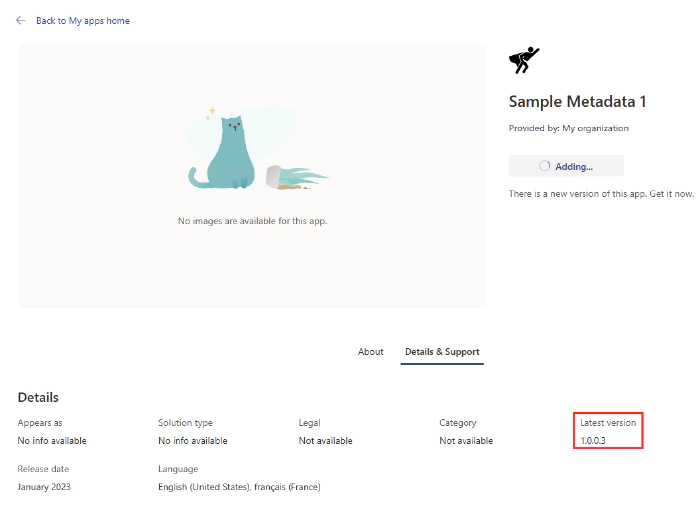
    "version": "1.0.0.3",
  }
}
- Appears in the app details page, under Details & Support
supportedLocales
If you localized your solution (i.e.: you support more than one language), you should list the cultures which this package can be used with.
Follows LL-CC for each locale, where:
- LL: Is the 2-character language code (e.g.:
enfor English,frfor France) - CC: Is the 2-character region code (e.g.:
usfor United States,cafor Canada)
- LL: Is the 2-character language code (e.g.:
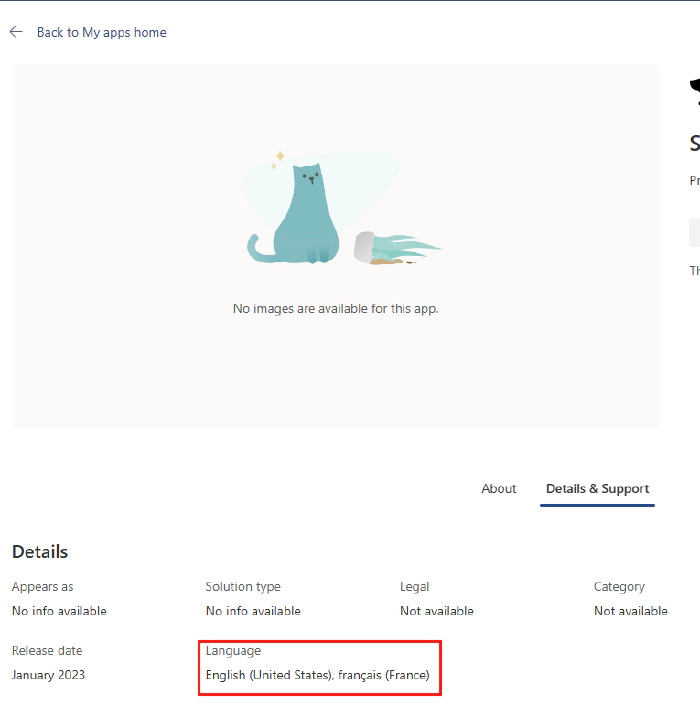
For example, if your app is localized for English (US) and French (France), you would use the following
supportedLocales:{ "$schema": "https://developer.microsoft.com/json-schemas/spfx-build/package-solution.schema.json", "solution": { "name": "Sample Metadata", "id": "74116799-8800-4c3f-abfe-fb72bdcb551c", "version": "1.0.0.3", "supportedLocales": [ "en-us", "fr-fr" ], //... } }Appears under Details & Support on your app details page:
iconPath
The path to an icon for your app.
Path is relative to the base package directory (i.e.: the sharepoint folder in your solution).
Image must be 96x96 pixels.
Appears in the My apps page, app details, and Manage apps
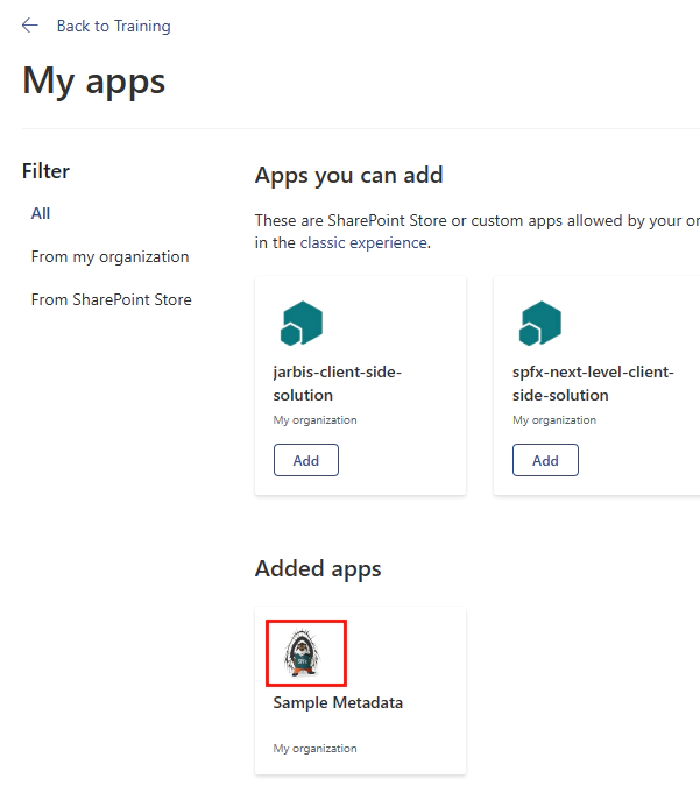

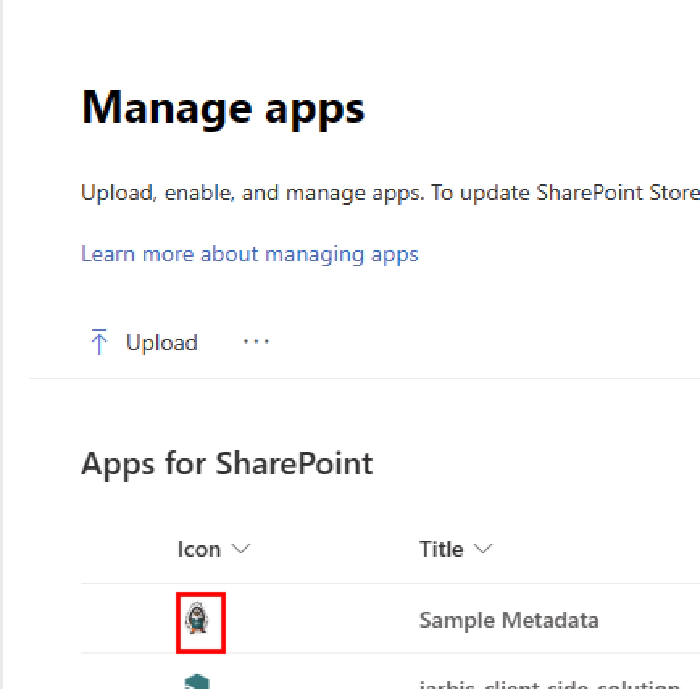
Your browser will cache the image. If you change the image in your solution, make sure to rename the file, or you’ll spend many frustrating hours trying to figure out why your new icon is not reflected. (I speak from experience, here)
To add in icon to your app, follow these steps (inspired by these great instructions by Chris Kent – but don’t tell him I said anything nice about him, or it’ll get to his head)
In your SPFx solution’s sharepoint folder, create an assets folder. You don’t need to create a folder, and the folder does not need to be called assets, it’s just a common convention. You do you.
Save a 96px by 96px .png file that you wish to use as your app icon in your assets folder. For these instructions, we’ll name the file appicon.png, but you can use whatever name you’d like.
In your package-solution.json, add a new line in the
solutionnode as follows:"iconPath": "assets/appicon.png",
Remember: the path to the image must be relative to the sharepoint folder.
Your .json file should look as follows:
{
  "$schema": "https://developer.microsoft.com/json-schemas/spfx-build/package-solution.schema.json",
  "solution": {
    "name": "Sample Metadata",
    "iconPath": "assets/appicon.png",
    "id": "74116799-8800-4c3f-abfe-fb72bdcb551c",
    "version": "1.0.0.6",
    //...
  }
}
skipFeatureDeployment
- If set to
true, it will give the tenant admin the choice of being able to deploy the components to all sites immediately without running any feature deployment or adding apps in sites.
developer
The properties about the author (or developer) of this app.
Contains the following properties:
Property Description Required nameThe developer name or company name Yes websiteUrlYour company’s web site URL, including https://orhttp://Yes privacyUrlYour company’s privacy policy URL, including https://orhttp://Yes (but can be an empty string "")termsOfUseUrlYour company’s terms of use URL, including https://orhttp://Yes (but can be an empty string "")mpnIdYour Microsoft Partner Network ID, or Undefined-1.16.1if you aren’t a partnerYes Your .json should look as follows:
{
"$schema": "https://developer.microsoft.com/json-schemas/spfx-build/package-solution.schema.json",
"solution": {
  "name": "Sample Metadata",
  "id": "74116799-8800-4c3f-abfe-fb72bdcb551c",
  "developer": {
    "name": "PnP",
    "websiteUrl": "https://pnp.github.io/",
    "privacyUrl": "",
    "termsOfUseUrl": "",
    "mpnId": "Undefined-1.16.1"
  },
}
The metadata node
So far, everything we have discussed was within the solution node of your package-solution.json. These next configuration options can be found under the metadata node, within the solution node:
shortDescription
Short description of the app. This value will be displayed on legacy Add an app page.
It is a localized dictionary, which means that it should contain a locale, and a localized string, as follows:
"shortDescription": {
      "default": "Shows how to use metadata in a SharePoint Framework solution.",
      "fr-fr": "Montre comment utiliser les métadonnées dans une solution SharePoint Framework."
    }
It must contain a “default” key.
The description should always clearly describe what different components (web parts, application customizers, etc.) are included in the package to manage user expectations and help them understand the impact of using your application.
{
  "$schema": "https://developer.microsoft.com/json-schemas/spfx-build/package-solution.schema.json",
  "solution": {
    "name": "Sample Metadata",
    "iconPath": "assets/appicon.png",
    "id": "74116799-8800-4c3f-abfe-fb72bdcb551c",
    "version": "1.0.0.6",
    "supportedLocales": [
      "en-us",
      "fr-fr"
    ],
    "developer": {
      "name": "PnP",
      "websiteUrl": "https://pnp.github.io/",
      "privacyUrl": "",
      "termsOfUseUrl": "",
      "mpnId": "Undefined-1.16.1"
    },
    "metadata": {
      "shortDescription": {
        "default": "Shows how to use metadata in a SharePoint Framework solution.",
        "fr-fr": "Montre comment utiliser les métadonnées dans une solution SharePoint Framework."
      },
      //...
    },
  }
}
longDescription
Long description of the app, with (supposedly) HTML support. This value will be displayed on the app details page.
Although the schema says that it supports HTML, I have only been able to add newline characters (
\n), no other HTML.Just like the
shortDescription, it is a localized dictionary.You should have a “default” key.
Here is an example of using a newline character in a
longDescription:{ "$schema": "https://developer.microsoft.com/json-schemas/spfx-build/package-solution.schema.json", "solution": { "name": "Sample Metadata", "iconPath": "assets/appicon.png", "id": "74116799-8800-4c3f-abfe-fb72bdcb551c", "version": "1.0.0.7", "supportedLocales": [ "en-us", "fr-fr" ], "developer": { "name": "PnP", "websiteUrl": "https://pnp.github.io/", "privacyUrl": "", "termsOfUseUrl": "", "mpnId": "Undefined-1.16.1" }, "metadata": { "shortDescription": { "default": "Shows how to use metadata in a SharePoint Framework solution.", "fr-fr": "Montre comment utiliser les métadonnées dans une solution SharePoint Framework." }, "longDescription": { "default": "Shows how to use metadata in a SharePoint Framework solution.\n\nIt demonstrates how to define app metadata and web part metadata." }, //... }, } }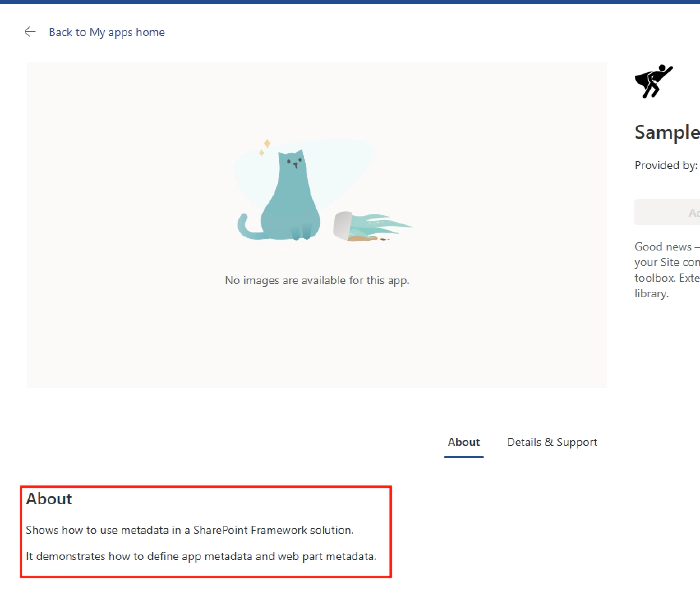
screenshotPaths
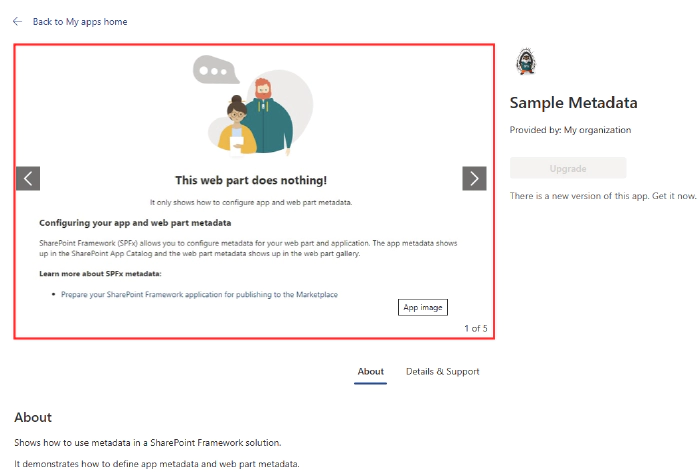
Relative paths or absolute external URLs to the screenshots.
Like the
iconPath, the base for relative paths is the base package directory (i.e.: sharepoint).You can add them to the assets folder you created under sharepoint
Unlike
iconPath, you can include a link to an external image.The screenshots will be displayed on the App’s About page.
You can add up to 5 screenshots.
The recommended screenshot dimensions aren’t explicitly listed, but the placeholder is 706 pixels wide by 397 pixels high – which is a 16:9 aspect ratio.
Make sure that your app’s screenshots describe only the app and don’t contain any additional advertising. It isn’t cool.
You can include .gif files
Here is an example of a including relative and absolute screenshots, with an animated .gif:
{
"$schema": "https://developer.microsoft.com/json-schemas/spfx-build/package-solution.schema.json",
  "solution": {
    "name": "Sample Metadata",
    "iconPath": "assets/appicon.png",
    "id": "74116799-8800-4c3f-abfe-fb72bdcb551c",
    "version": "1.0.0.8",
    "metadata": {
      "screenshotPaths": [
        "assets/screenshot1.png",
        "assets/screenshot2.png",
        "assets/screenshot3.png",
        "assets/screenshot4.png",
        "https://github.com/hugoabernier/hugoabernier/raw/master/assets/HomerSharePoint.gif"
      ],
      //...
    }
  }
}
videoUrl
Add a URL to a YouTube or Vimeo video of your app.
Recommended length: 60-90 seconds.
Your video should communicate the value of your product in narrative form and/or demonstrate how the product works.
Appears on the about app page
If you have screenshots and a video, the video will appear as the first slide on the carousel
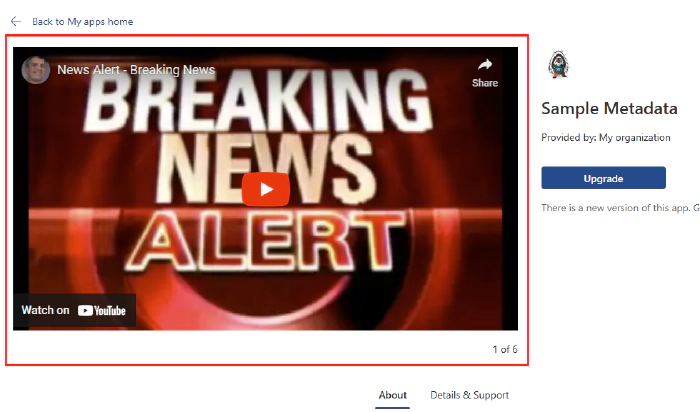
Here is an example of a package-solution.json with a video:
{
"$schema": "https://developer.microsoft.com/json-schemas/spfx-build/package-solution.schema.json",
    "solution": {
      "name": "Sample Metadata",
      "iconPath": "assets/appicon.png",
      "id": "74116799-8800-4c3f-abfe-fb72bdcb551c",
      "version": "1.0.0.9",

      "metadata": {
        "videoUrl": "https://youtu.be/xfr64zoBTAQ",
      }
      //...
    }
  }
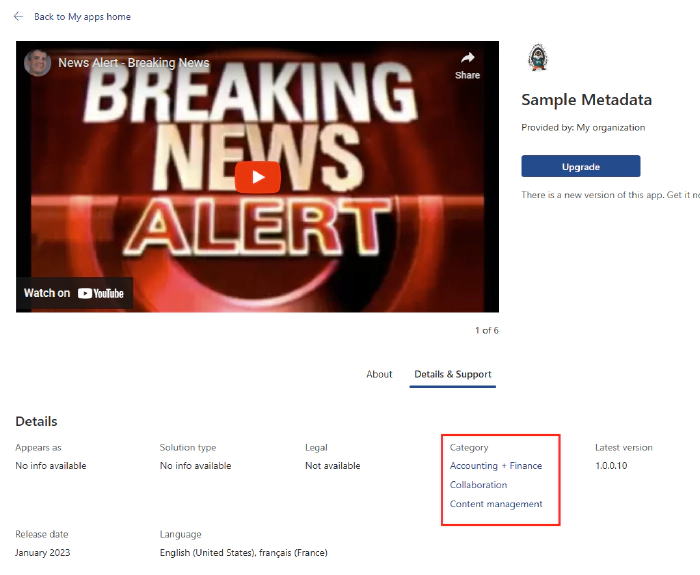
categories
- Indicates which categories you want your app to appear in the SharePoint store.
- Pretty much only useful if you plan to publish on the SharePoint store. Otherwise, it is of little use.
- Your product description should show how these categories apply to your app.
- You can pick up to 3 choices from this list:
- Accounting + Finance
- Collaboration
- Content management
- CRM
- Data + analytics
- File managers
- IT/admin
- Legal + HR
- News + weather
- Productivity
- Project management
- Reference
- Sales + marketing
- Site Design
- Social
- Workflow & Process Management
- Appears in your app details page, under Details & Support
Conclusion
Whew! That was a lot of settings to look at! I hope that you learned a few useful tips to make your SPFx solutions look as good as the professionals!
There are a few other settings that we didn’t cover, so make sure to explore your package-solution.json, and let us know how you did!
References
Here are some initial references to get started with the SPFx in your development. Please do provide us with feedback and suggestions on what is needed to help you to get started with the SPFx development for Microsoft 365.
- SPFx documentation – https://aka.ms/spfx
- Issues and feedback around SPFx - https://aka.ms/spfx/issues
- Microsoft 365 Platform Community – https://aka.ms/m365/community
- Public SPFx and other Microsoft 365 platform community calls – https://aka.ms/m365/calls
- These calls are for everyone to take advantage to stay up to date on the art of possible within Microsoft 365 and to provide guidance for beginners and more advance users.
- SPFx samples in the Microsoft 365 Unified Sample gallery – https://aka.ms/m365/samples
We will provide more details on the different options and future direction of the SPFx in upcoming blog posts in this series.