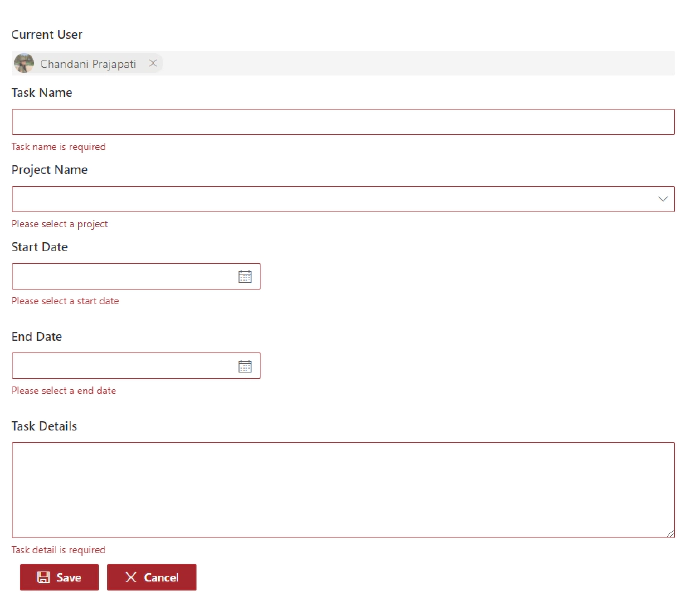
SPFx web part form validation using React Formik
Introduction
Formik is the world’s most popular open-source form library for React and React Native. We can also use this library in our SPFx web part as well to manage form validations. Using this library we don’t have to write custom validations. so let’s start step-by-step implementation.
What is formik?
Formik is a small library that helps us with the these parts: Getting values in and out of form state. Validation and error messages. Handling form submission.
Formik is designed to manage forms with complex validation with ease.
Formik supports synchronous and asynchronous form-level and field-level validation.
Furthermore, it comes with baked-in support for schema-based form-level validation through Yup.
For more details about Fromik refer to the below articles, **Formik official documentation **
**Manage Forms In React With Formik **
SharePoint List Structure
Create a list called **Tasks **with below fields,
Field Name(Internal name) Field Type Title (default) Single line of text StartDate Date and Time (Date only) EndDate Date and Time (Date only) ProjectName Single line of text TaskDetails Multiple lines of text
After the creation of the list, we will start to create the SPFx web part.
Formik implementation with SPFx
Open a command prompt
Move to the path where you want to create a project
Create a project directory using:
md react-formik
Move to the above-created directory using:
cd react-formik
Now execute the below command to create an SPFx solution:
yo @microsoft/sharepoint
It will ask some questions, as shown below,

After a successful installation, we can open a project in any source
code tool. Here, I am using the VS code, so I will execute the command:
code .
Now we will install the following packages:
    npm i formik
    npm i yup
    npm i @pnp/spfx-controls-react
    npm i @microsoft/sp-dialog
In the end, our output will be like this,
After the successful installation, we will start our form implementation. 1. Create below files I{webpartname}State.ts inside src/webparts/reactFormik/components
SPService.ts file inside src/webparts/shared/service In the end, our structure will be looks like this,  2. Create a state interface as below inside IReactFormikState.ts.
export interface IReactFormikState {
  projectName?: string;
  startDate?: any;
  endDate?: any;
}
```

3.  Create a method to create a task inside **SPService.ts.**

```javascript
import "@pnp/sp/webs";
import "@pnp/sp/lists";
import "@pnp/sp/items";
import "@pnp/sp/webs";
import "@pnp/sp/site-users/web";
import { Web } from "@pnp/sp/webs";

export class SPService {

    private web;

    constructor(url: string) {
        this.web = Web(url);
    }

    public async createTask(listName: string, body: any) {
        try {
            let createdItem = await this.web.lists
                .getByTitle(listName)
                .items
                .add(body);
            return createdItem;
        }
        catch (err) {
            Promise.reject(err);
        }
    }
}
Move to the ReactFormikWebPart.ts. In this, we will pass the current SP context and read site URL from user.
import * as React from 'react';
import * as ReactDom from 'react-dom';
import { Version } from '@microsoft/sp-core-library';
import {
  IPropertyPaneConfiguration,
  PropertyPaneTextField
} from '@microsoft/sp-property-pane';
import { BaseClientSideWebPart } from '@microsoft/sp-webpart-base';

import * as strings from 'ReactFormikWebPartStrings';
import ReactFormik from './components/ReactFormik';
import { IReactFormikProps } from './components/IReactFormikProps';
import { sp } from "@pnp/sp/presets/all";

export interface IReactFormikWebPartProps {
  description: string;
  siteUrl: string;
}

export default class ReactFormikWebPart extends BaseClientSideWebPart<IReactFormikWebPartProps> {

  protected onInit(): Promise<void> {

    return super.onInit().then(_ => {
      sp.setup({
        spfxContext: this.context
      });
    });
  }

  public render(): void {
    const element: React.ReactElement<IReactFormikProps> = React.createElement(
      ReactFormik,
      {
        description: this.properties.description,
        context: this.context,
        siteUrl: this.properties.siteUrl ? this.properties.siteUrl : this.context.pageContext.web.absoluteUrl
      }
    );

    ReactDom.render(element, this.domElement);
  }

  protected onDispose(): void {
    ReactDom.unmountComponentAtNode(this.domElement);
  }

  protected get dataVersion(): Version {
    return Version.parse('1.0');
  }

  protected getPropertyPaneConfiguration(): IPropertyPaneConfiguration {
    return {
      pages: [
        {
          header: {
            description: strings.PropertyPaneDescription
          },
          groups: [
            {
              groupName: strings.BasicGroupName,
              groupFields: [
                PropertyPaneTextField('description', {
                  label: strings.DescriptionFieldLabel
                }),
                PropertyPaneTextField('siteUrl', {
                  label: strings.SiteUrlFieldLabel
                })
              ]
            }
          ]
        }
      ]
    };
  }
}
- Move to the ReactFormik.tsx file to render form and validations yup syntaxs:
For string: yup.string().required(‘Required’)
For date: yup.date().required(‘Required’).nullable()
Related to Formik Fromik has its own handleReset and handleSubmit method so we don not have to manage manually
We have to set state value and error message from control so for that I have created a common method
In the constructor, we will set the current SP context, bind the service and required methods and initialize the states.
Create createRecord() to create task list item using SPService.
In the render(), first we will add all the controls like date picker, text field, people picker, and dropdown, etc inside <Formik>.
then We will set properties as below,
initialValues - This is one type o state at here we will set empty or null or undefined as an initial level.
validationSchema - At here we will do validations using yup. so for this, I am creating one const and wills et this constant in this prop.
onSubmit - At here we will call the method to create a record in the SharePoint list
import * as React from 'react';
import styles from './ReactFormik.module.scss';
import { IReactFormikProps } from './IReactFormikProps';
import { IReactFormikState } from './IReactFormikState';
import { SPService } from '../../shared/service/SPService';
import { TextField } from '@fluentui/react/lib/TextField';
import { Stack, } from '@fluentui/react/lib/Stack';
import { Formik, FormikProps } from 'formik';
import { Label } from 'office-ui-fabric-react/lib/Label';
import * as yup from 'yup';
import { PeoplePicker, PrincipalType } from "@pnp/spfx-controls-react/lib/PeoplePicker";
import { DatePicker, Dropdown, mergeStyleSets, PrimaryButton, IIconProps } from 'office-ui-fabric-react';
import { sp } from '@pnp/sp';
import { Dialog } from '@microsoft/sp-dialog';

const controlClass = mergeStyleSets({
  control: {
    margin: '0 0 15px 0',
    maxWidth: '300px',
  },
});

export default class ReactFormik extends React.Component<IReactFormikProps, IReactFormikState> {

  private cancelIcon: IIconProps = { iconName: 'Cancel' };
  private saveIcon: IIconProps = { iconName: 'Save' };
  private _services: SPService = null;

  constructor(props: Readonly<IReactFormikProps>) {
    super(props);
    this.state = {
      startDate: null,
      endDate: null
    }
    sp.setup({
      spfxContext: this.props.context
    });

    this._services = new SPService(this.props.siteUrl);
    this.createRecord = this.createRecord.bind(this);
  }

  /** set field value and error message for all the fields */
  private getFieldProps = (formik: FormikProps<any>, field: string) => {
    return { ...formik.getFieldProps(field), errorMessage: formik.errors[field] as string }
  }

  /** create record in sharepoint list */
  public async createRecord(record: any) {
    let item = await this._services.createTask("Tasks", {
      Title: record.name,
      TaskDetails: record.details,
      StartDate: record.startDate,
      EndDate: new Date(record.endDate),
      ProjectName: record.projectName,
    }).then((data) => {
      Dialog.alert("Record inseterd successfully !!!");
      return data;
    }).catch((err) => {
      console.error(err);
      throw err;
    });
  }

  public render(): React.ReactElement<IReactFormikProps> {
    /** validations */
    const validate = yup.object().shape({
      name: yup.string().required('Task name is required'),
      details: yup.string()
        .min('15', 'Minimum required 15 characters')
        .required('Task detail is required'),
      projectName: yup.string().required('Please select a project'),
      startDate: yup.date().required('Please select a start date').nullable(),
      endDate: yup.date().required('Please select a end date').nullable()
    })

    return (
      <Formik initialValues={{
        name: '',
        details: '',
        projectName: '',
        startDate: null,
        endDate: null
      }}
        validationSchema={validate}
        onSubmit={(values, helpers) => {
          console.log('SUCCESS!! :-)\n\n' + JSON.stringify(values, null, 4));
          this.createRecord(values).then(response => {
            helpers.resetForm()
          });
        }}>
        { formik => (
          <div className={styles.reactFormik}>
            <Stack>
              <Label className={styles.lblForm}>Current User</Label>
              <PeoplePicker
                context={this.props.context as any}
                personSelectionLimit={1}
                showtooltip={true}
                showHiddenInUI={false}
                principalTypes={[PrincipalType.User]}
                ensureUser={true}
                disabled={true}
                defaultSelectedUsers={[this.props.context.pageContext.user.email as any]}
              />

              <Label className={styles.lblForm}>Task Name</Label>
              <TextField
                {...this.getFieldProps(formik, 'name')} />

              <Label className={styles.lblForm}>Project Name</Label>
              <Dropdown
                options={
                  [
                    { key: 'Project1', text: 'Project1' },
                    { key: 'Project2', text: 'Project2' },
                    { key: 'Project3', text: 'Project3' },
                  ]
                }
                {...this.getFieldProps(formik, 'projectName')}
                onChange={(event, option) => { formik.setFieldValue('projectName', option.key.toString()) }}
              />

              <Label className={styles.lblForm}>Start Date</Label>
              <DatePicker
                className={controlClass.control}
                id="startDate"
                value={formik.values.startDate}
                textField={{ ...this.getFieldProps(formik, 'startDate') }}
                onSelectDate={(date) => formik.setFieldValue('startDate', date)}
              />

              <Label className={styles.lblForm}>End Date</Label>
              <DatePicker
                className={controlClass.control}
                id="endDate"
                value={formik.values.endDate}
                textField={{ ...this.getFieldProps(formik, 'endDate') }}
                onSelectDate={(date) => formik.setFieldValue('endDate', date)}
              />

              <Label className={styles.lblForm}>Task Details</Label>
              <TextField
                multiline
                rows={6}
                {...this.getFieldProps(formik, 'details')} />

            </Stack>
            <PrimaryButton
              type="submit"
              text="Save"
              iconProps={this.saveIcon}
              className={styles.btnsForm}
              onClick={formik.handleSubmit as any}
            />
            <PrimaryButton
              text="Cancel"
              iconProps={this.cancelIcon}
              className={styles.btnsForm}
              onClick={formik.handleReset}
            />
          </div>
        )
        }
      </Formik >
    );
  }
}
Move to the ReactFormik.module.scss file to add some relaetd CSS.
@import '~office-ui-fabric-react/dist/sass/References.scss';
.reactFormik{
  .btnsForm {
    background-color: "[theme:themePrimary, default:#0078d7]";
    border-color: "[theme: themePrimary, default: #0078d7]";
    color: "[theme:white, default:white]" ;
    margin-left: 10px;
    margin-top: 10px;
  }
  .customErrorMeesage{
    color: var(--red-color);
    font-size: 10px;
    font-family: 'Light';
    padding: 2px;
  }
  .lblForm{
  font-size: 15px;
  margin:  5px 0px 5px 0px;
  }
}
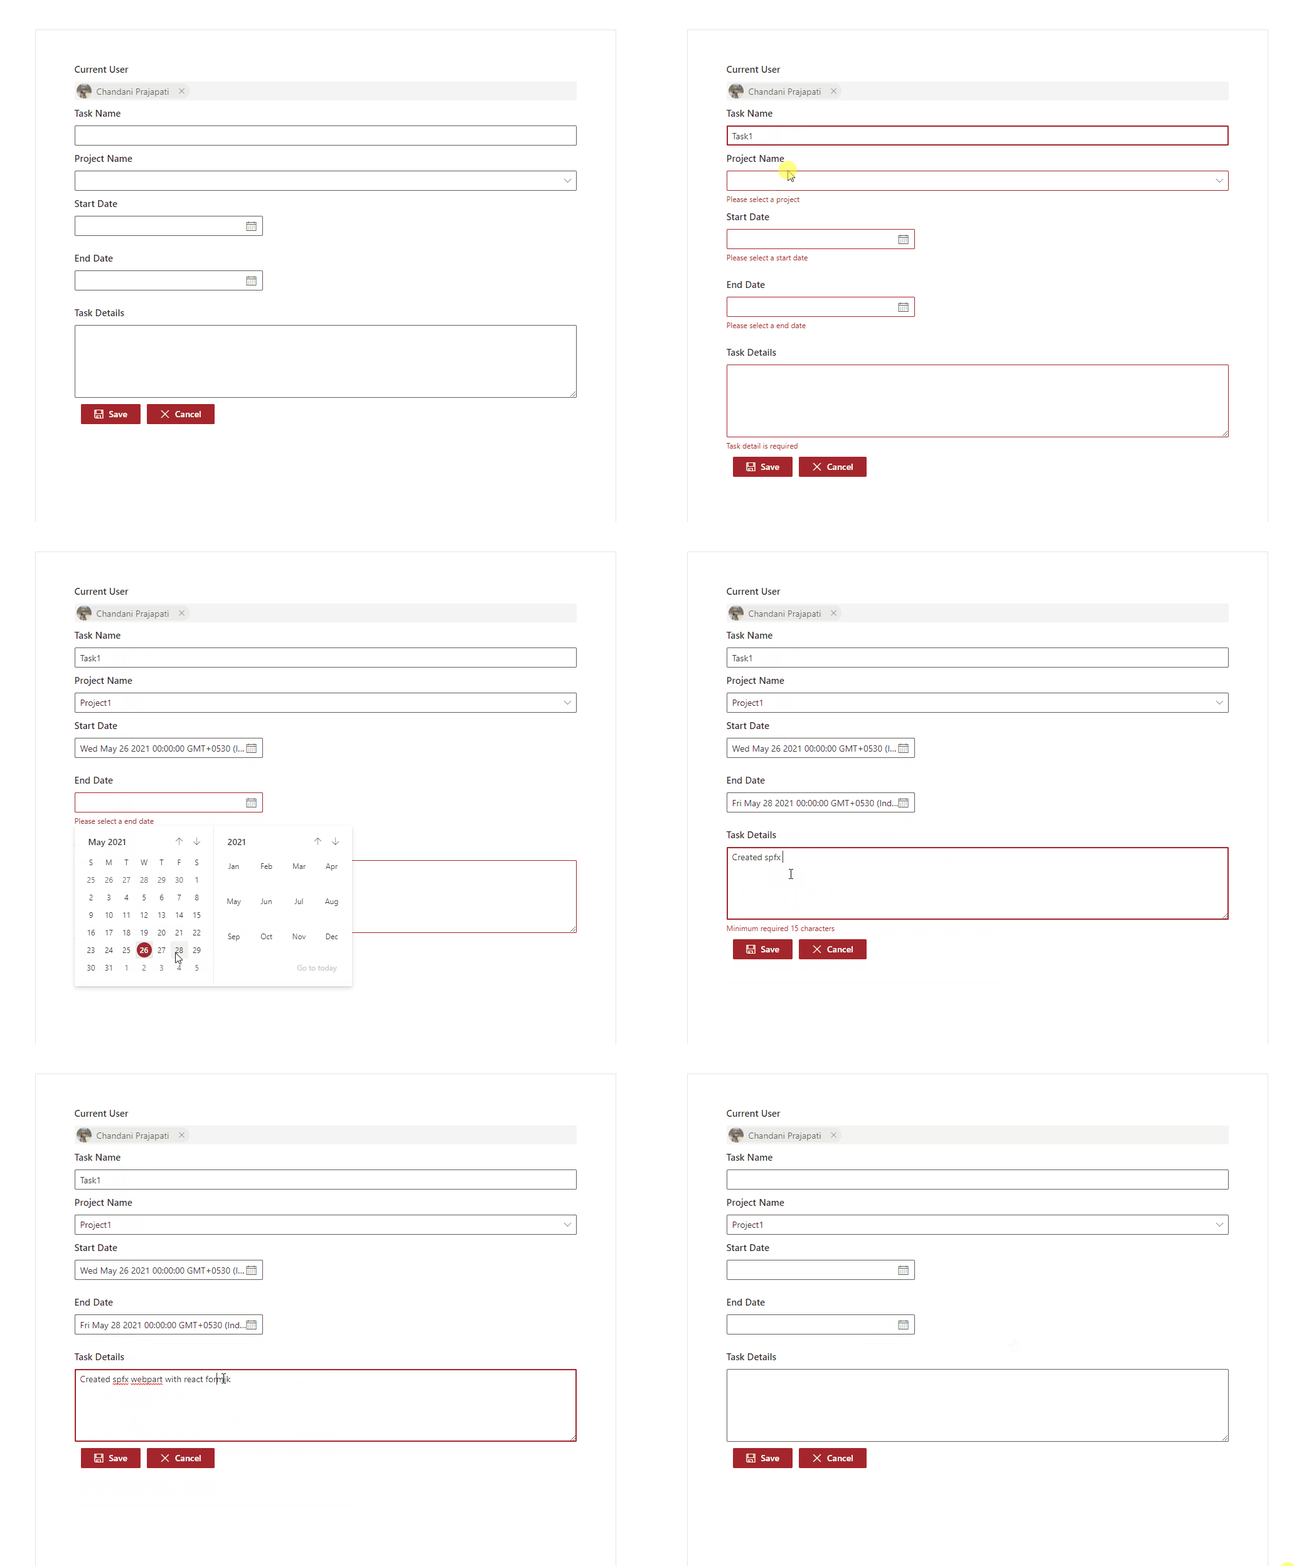
Now serve the application using the below command, gulp serve Now test the webpart in SharePoint-SiteURL + /_layouts/15/workbench.aspx.
Output

Find here the full source code .
Summary
In this article, we have seen how to implement react formik library in
SPFx.
I hope this helps.
Sharing is caring!!