Working with Custom Connectors in Power Platform for beginners
Custom Connector vs HTTPS request - When to use what?
First of all: a custom connector and a https request generally do the exact same thing. They both call an endpoint of a specific api to get data back.
Since this is a blog for beginner, I won’t got into the very details of custom connectors and http requests, yet there is a straight forward explanation for when to use a custom connector instead of a http request:
If more people than just you should be able to use that API call, it makes sense to use a custom connector, because you can easily share it within your tenant.
Or, if the API call you have in mind will be used more than once (in different flows or apps), you might consider creating a custom connector.
Multiple people can use your connector OR you could even use multiple actions in one connector. You see, there are a few more possibilities with custom connectors to http requests.
So, let’s build one right now, shall we? 👏🏼
Build a custom connector
Since this is part two of my mini series “working with APIs” I’m using the same scenario and API as last time. I use an open API to get the number of the day from a website called MathTOOLs. I will post this number in a Microsoft Teams channel afterwards.
First of all, navigate to your Power Automate dashboard. Select “Data” and then “Custom connectors”
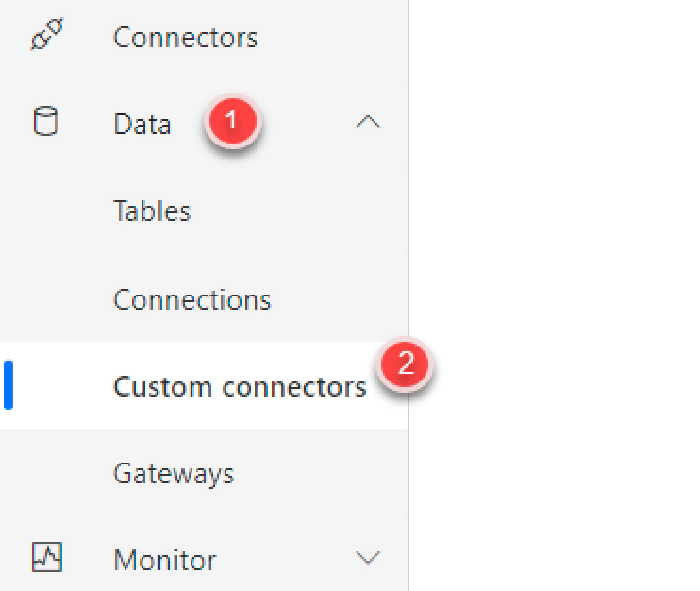
no, it’s not the Connectors menu, but the Data menu
If you already have some, they will be listed here, if not this page is empty. Select “+ New custom connector” in the upper right corner and then “Create from blank”.
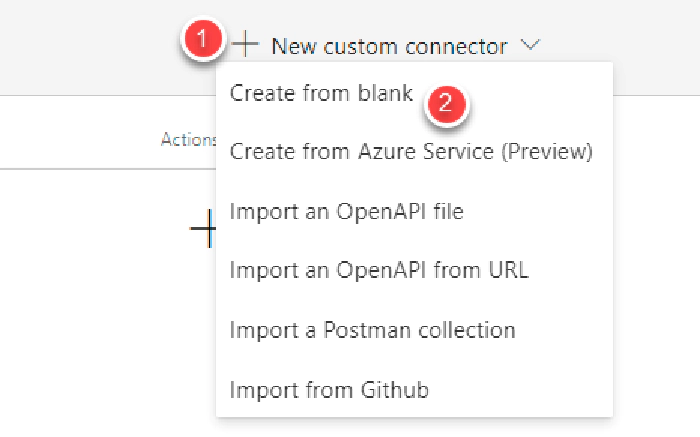
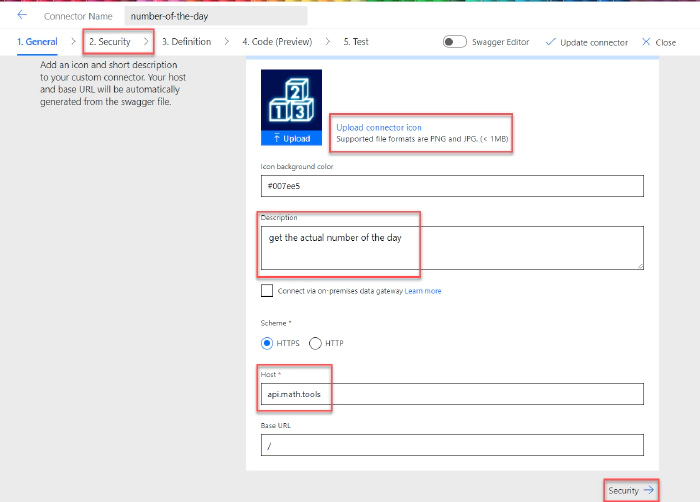
Now you are in the menu to create your own custom connector. At the top of the page you can see the necessary steps in a navigation:
General
Security
Definition
Code (Preview)
Test
General
On the first page is only one mandatory field to fill out. We need to give a Host for our custom connector (but I strongly recommend to fill out the Description as well. Especially when you want to share it, give your colleagues an idea of what your custom connector does ;)). Now you might think, that’s the endpoint, like in the previous blog, but it’s not. The endpoint is connected to a certain method (GET, PUT, POST, PATCH, DELETE) and since we haven’t defined our method yet, this is something else. The host is a part of the URL, usually the documentation will tell you.
In this case, it’s api.math.tools
You can also upload a nice icon for you connector (which I love,
obviously), just make sure that the file is .png or .jpg and smaller
than 1MB.
You don’t need to fill out the rest. We will look into that at a another blog of this series. For now we’re good and we can select "Security" either in the lower right corner or in the navigation at the top of the page.
2. Security
Since we use an open API we don’t need to fill out anything here
3. Definition
Now things are getting interesting, since we’re defining the other parameters here. For this example, we just want to create an action that gets us the number of the day.
Start by selecting “+ New action” on the right hand side.
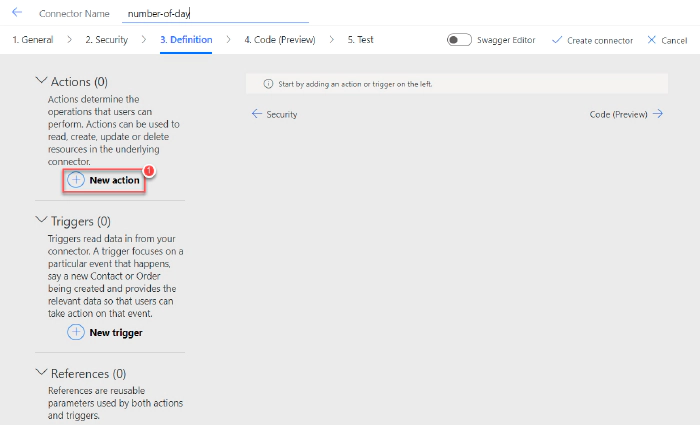
Summary: This will be the name of the action of your custom connector
Description: Gives colleagues a good idea of what it does
Operation ID: This is going to be the string, which is used in the operation. Keep it simple, I guess.
After that information is provided it’s time for our request.
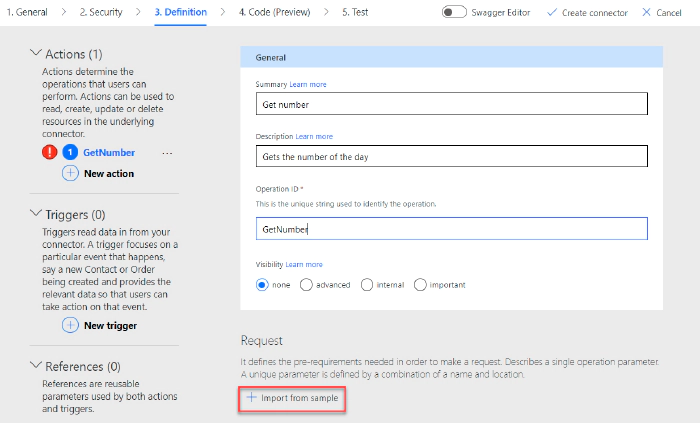
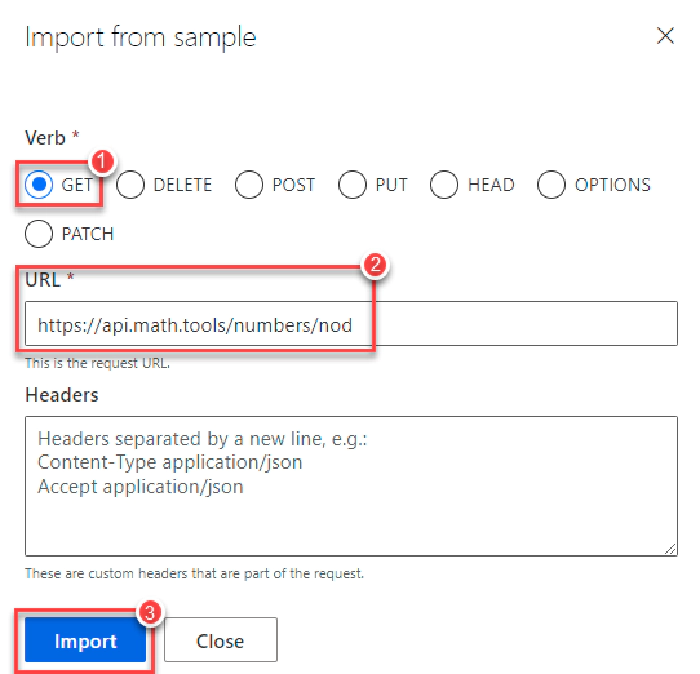
Select “+ Import from sample” and the next menu should look familiar to you. Here we can choose the method as well as the URL.
In this case the method is: GET, the URL is https://api.math.tools/numbers/nod
(We provided the same information at the last part, where we needed to give those to the https request, remember?. When we’re done, select "Import" to finish this step.
feels familiar?
Now it’s time to actually create the connector. Select "Create connector" in the upper right corner and keep your fingers crossed
Usually you get a success notification :white_heavy_check_mark: above the upper navigation.
4. Code (Preview)
Once again, no work for us here, so we skip this part
5. Test
There is one last task for us to finish our custom connector. We need to create a new connection. Select “+ New connection”.
There should appear a connection with the name of your connector in the “Selected connection” field.
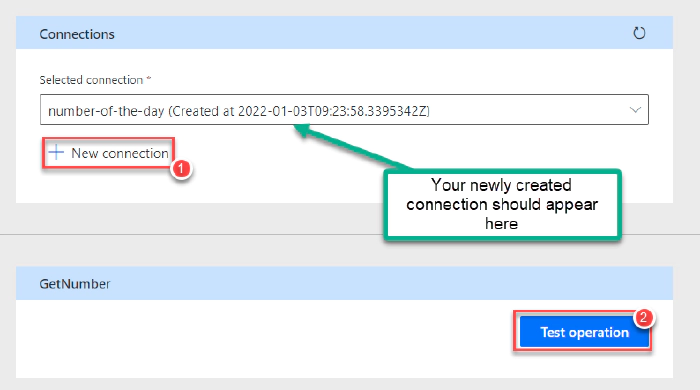
Now we just need to test the connector. Select “Test operation” and wait for the response.
If you did everything right you should get a status 200 response. This is a good thing :)
Congratulations, you just created your very own custom connector. Now let’s take this baby for a test drive in Power Automate, shall we? 8)
Use your custom connector in Power Automate
As in the last part, we want the information about the number of the day and use it somewhere. Let’s go for Microsoft Teams once again and post the number of the day in a channel.
Our flow contents of three actions:
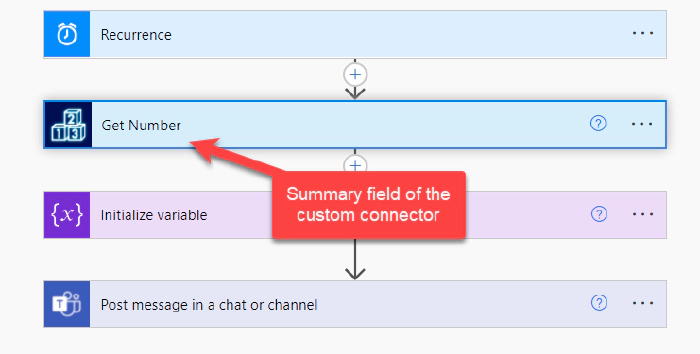
Get number
Initialize variable (so our number is always up to date)
Post message in a chat or channel
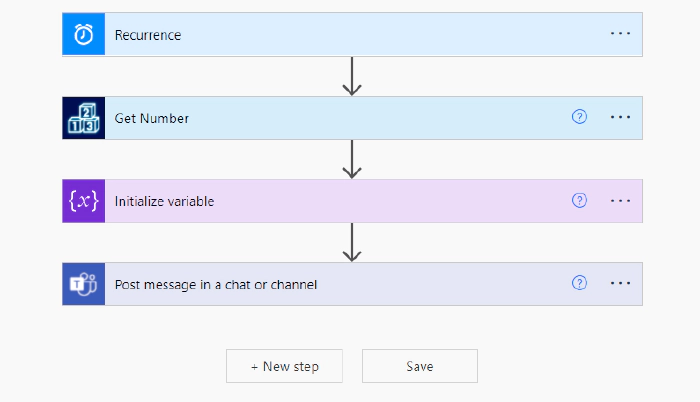
In order to select your custom connector you select “Custom” when choosing a connector in Power Automate
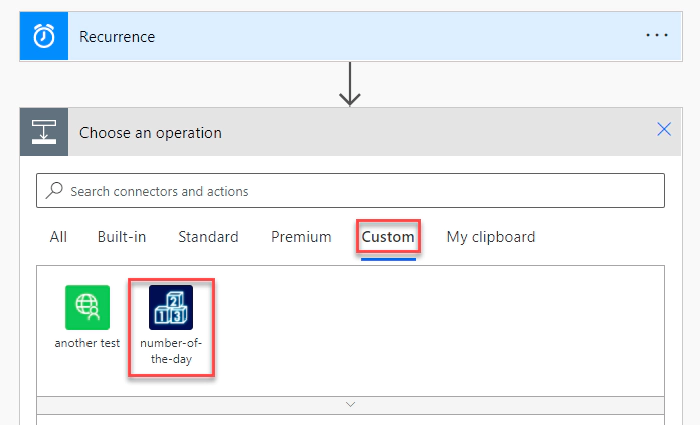
Click on custom to see all custom connectors.
Since our connector just has one action, that’s all we needed to do.
Now let’s put the value in a variable, so the number of the day is always up to date. Select the action "Initialize variable" and put in the following information:
Name: I called mine NrOfDay_Con (most importantly you need a name that YOU will recognize later on ;))
Type: Choose string (since the number of the day is a sequence of characters)
Value: We need to define the value of the variable. Do you remember the JSON object this API call will give us back? If no, check out the first blog of the series: Working with APIs in Power Platform for beginners. Basically we want to get a certain value within this JSON object, which we get with a function: `body(‘Get_Number’)[‘contents’][’nod’][’numbers’][’number’]`
Do you recognize the difference to the last function we used for the http request? Just the body is different, because we named it that while creating the connector.
Last step: include that variable in a Microsoft Teams message like a boss
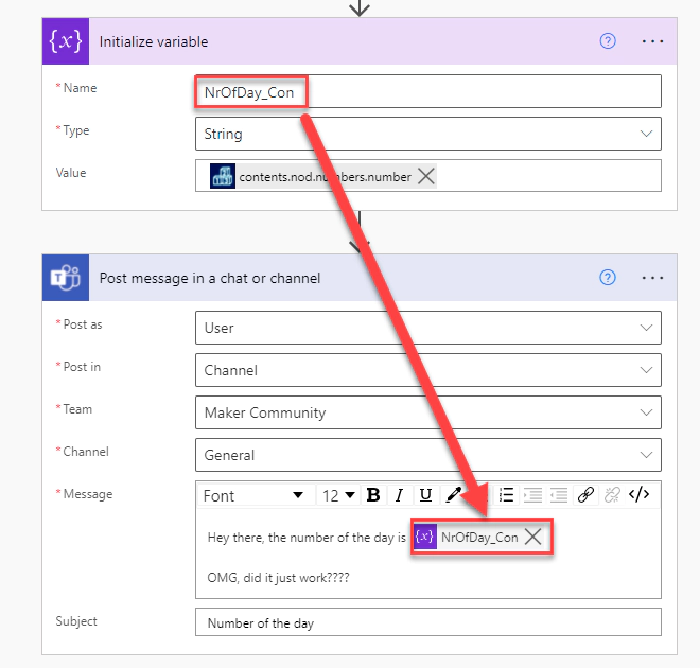
And that’s it. That is how you call an API, get a JSON object back and use certain values from that object in Power Automate...with a custom connector. Congratulations :)
I hope it was all clear and it did work out for you. If you have any questions, recommendations or found some typos, reach out to me on twitter.
Next API topic: Both methods (https request and custom connector) are working fine for open APIs where we don’t need any authentication. Next blog will be about https requests with authentication. Let’s tame the auth beast together.