
 Paolo Pialorsi

This sample shows how to build and run a secure Model Context Protocol (MCP) server in C# with ASP.NET Core, Microsoft Identity Web, and scope-based authorization.
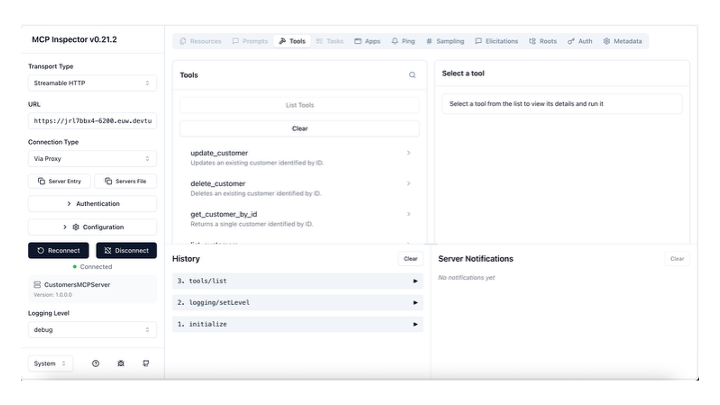
What this sample contains
- A .NET 10 MCP server (
CustomersMCPServer) hosted as an ASP.NET Core web app. - MCP tools for customer CRUD operations backed by
data/customers.json. - Optional security toggle to enable/disable JWT authentication and authorization.
- Entra ID integration for token validation and scoped MCP access.
Code overview (CustomersMCPServer)
Program.cs- Configures MCP transport and tool registration (
.AddMcpServer().WithHttpTransport().WithTools<CustomersTools>()). - Reads security and MCP settings from configuration.
- Enables Microsoft Identity Web authentication when
Security:Enabledistrue. - Applies scope-based authorization policy using configured scopes (for example
Customers.ReadWrite.All). - Configures CORS and forwarded headers for browser clients and reverse-proxy scenarios.
- Configures MCP transport and tool registration (
Tools/CustomersTools.cs- Exposes MCP tools:
ListCustomersGetCustomerByIdInsertCustomerUpdateCustomerDeleteCustomer
- Includes validation logic and in-memory synchronization.
- Loads customer data from
data/customers.json.
- Exposes MCP tools:
appsettings.json.sample- Template for MCP endpoint, security toggle, and Entra ID values.
CustomersMCPServer.csproj- Targets
net10.0and uses:ModelContextProtocol.AspNetCoreMicrosoft.Identity.WebMicrosoft.AspNetCore.Authentication.JwtBearer
- Targets
Quick start
1. Create runtime settings from sample
From solution root:
cp CustomersMCPServer/appsettings.json.sample CustomersMCPServer/appsettings.json
2. Edit appsettings.json
Set at least:
Mcp.ServerUrl(for local dev usehttp://localhost:6200/)Mcp.AllowedOrigins(for local Inspector/browser usehttp://localhost:6274)Mcp.UniqueUri(api://<CustomersMCPServer-client-id>)Mcp.ScopesSupported(for this sample:Customers.ReadWrite.All)AzureAd.TenantIdAzureAd.ClientId(client ID ofCustomersMCPServerapp registration)
3. Build
dotnet build CustomersMCPServer.slnx
4. (Optional) Use a custom PORT in VS Code for public URL access
If you plan to expose the MCP server through a public URL (for example via Dev Tunnel, Codespaces, or another proxy), run it on a known custom port so your public endpoint and local listener stay aligned.
Basic steps:
- Choose a port (example:
6200). - Configure
PORTin VS Code for your run/debug profile. - Forward the same port in VS Code and set its visibility to public.
- Update
CustomersMCPServer/appsettings.jsonsoMcp.ServerUrluses the same local port. - Update
Mcp.AllowedOriginsto include the origin that will call your MCP endpoint (for public endpoints, use the forwarded/public URL origin).
VS Code UI steps: create and publish a port
- Open Run and Debug in VS Code.
- Create or edit your launch profile and set
PORT(see example below). - Start the app once so VS Code detects the listening port.
- Open the Ports view:
- View > Terminal > Ports (or use Command Palette and search for
Ports: Focus on Ports View).
- Add/forward the port if it is not already listed:
- Click Forward a Port and enter
6200(or your chosen value).
- Make the forwarded port public:
- In the Ports view, find the forwarded port row.
- Open the context menu and change Port Visibility to Public.
- Copy the generated public URL from the Ports view and use it where needed (for example client/server settings and allowed origins).
Example VS Code launch.json snippet:
{
  "name": "Run CustomersMCPServer",
  "type": "coreclr",
  "request": "launch",
  "program": "${workspaceFolder}/CustomersMCPServer/bin/Debug/net10.0/CustomersMCPServer.dll",
  "cwd": "${workspaceFolder}/CustomersMCPServer",
  "env": {
    "PORT": "6200"
  }
}
Example appsettings.json value:
{
  "Mcp": {
    "ServerUrl": "http://localhost:6200/"
  }
}
When using a public forwarded URL, keep Mcp.ServerUrl as your local bind address (localhost), and use the public URL as the caller endpoint and as an allowed origin when applicable.
5. Run the MCP server
PORT=6200 dotnet run --project CustomersMCPServer/CustomersMCPServer.csproj
Default local endpoint:
http://localhost:6200
6. Start MCP Inspector
npx @modelcontextprotocol/inspector
Then connect Inspector to:
- Server URL:
http://localhost:6200
Security toggle (enable/disable)
In CustomersMCPServer/appsettings.json:
{
  "Security": {
    "Enabled": true
  }
}
true: Entra token validation and scope authorization are enforced.false: MCP endpoint is open (no authentication/authorization).
Entra ID app registration
Create two app registrations in your Entra tenant:
CustomersMCPServer(resource API / MCP server)CustomersMCPConsumer(client app that requests tokens)
A. Register CustomersMCPServer (API)
- Create app registration named
CustomersMCPServer. - In Expose an API:
- Set Application ID URI (for example
api://<server-client-id>). - Add delegated scope:
Customers.ReadWrite.All.
- Set Application ID URI (for example
- In Authentication, configure redirect URIs only if needed by your flow.
- Copy values into
CustomersMCPServer/appsettings.json:AzureAd.TenantIdAzureAd.ClientIdMcp.UniqueUrito match your Application ID URI.
B. Register CustomersMCPConsumer (client)
- Create app registration named
CustomersMCPConsumer. - In API permissions, add delegated permissions:
- From
CustomersMCPServer:Customers.ReadWrite.All - From Microsoft Graph:
openid,email,profile,User.Read
- From
- Grant admin consent for the tenant.
C. Tenant admin grant
A tenant admin must grant consent for the requested delegated permissions (especially custom API scopes and Graph permissions) so users can obtain tokens without per-user consent prompts.