Unstructured Document Processing and Content Assembly App
In this scenario you will find a Power Platform sample document management solution that uses Microsoft Syntex Unstructured Document Processing and Content Assembly.
All from a Power App: upload a benefits changes document to the app and a Syntex document understanding model will process the document and will extract metadata values from the document. Then using the extracted metadata with Syntex content assembly a custom service agreement will be generated and made available in the app.
Deploy today to your tenant and see a great example of the art of the possible with Power Platform and Microsoft Syntex.
Sample/Source Code
You can find the sample source code here: /scenario-samples/Unstructured-DPM-and-CA-Scenario
Deployment Instructions
Currently most of the steps are manual (for example import the content assembly modern template) but hopefully in the near future it might be possible to automate all of the process using MS Graph API or new Powershell commands. Before starting, download all content in a single folder on your computer.
Then use the PnP PowerShell powered scripts to deploy the necessary SharePoint online libraries, columns and the Syntex model to your content center.
- Import Syntex Model "BenefitChangesServiceAgreement.pnp" into your Syntex content center
- Import Syntex model into your Syntex Content Center
Import Syntex Model into your Syntex content center
The first step is to import the Syntex model template named BenefitChangesServiceAgreement.pnp into your Syntex Content Center.
To do this run ImportSyntexModel.ps1 PowerShell script.
Before running the PowerShell script open the file with your preferred editor and update:
- Variable $ContentCenterURL to be the url of your Syntex content center.

Save and execute the script.
After this you will find in your Syntex content center that the new model has been deployed.

Create SharePoint libraries, columns and deploy Syntex model
Ensure a new SharePoint site (recommended template Team Site) is created or an existing site can be reused for this solution. Make a note of the URL for this site.
The next step is to create the necessary SharePoint libraries, columns and publish the Syntex model to a library.
To do this use the DeployContent.ps1 PowerShell script.
Before running the PowerShell script open the file with your preferred editor and update:
- Variable $SiteURL to be url of the site to be used to add files and create documents.
- Variable $ContentCenterURL to be the url of your Syntex content center.
- Optionally update the variables $LibraryNameSA and $LibraryNameCA to use different library names

Save and execute the script.
The script completes the following:
- Creates the Contract Management Hub document library
- Add ServiceAgreementLink column to library
- Create Service Agreement document library
- Publishes the Syntex model to Contract Management Hub document library
Create Modern Template in "Service Agreement" document library
The next step is to create the Syntex Content Assembly modern template. Currently these are manual steps and the instructions are added below.
1. Create Modern Template
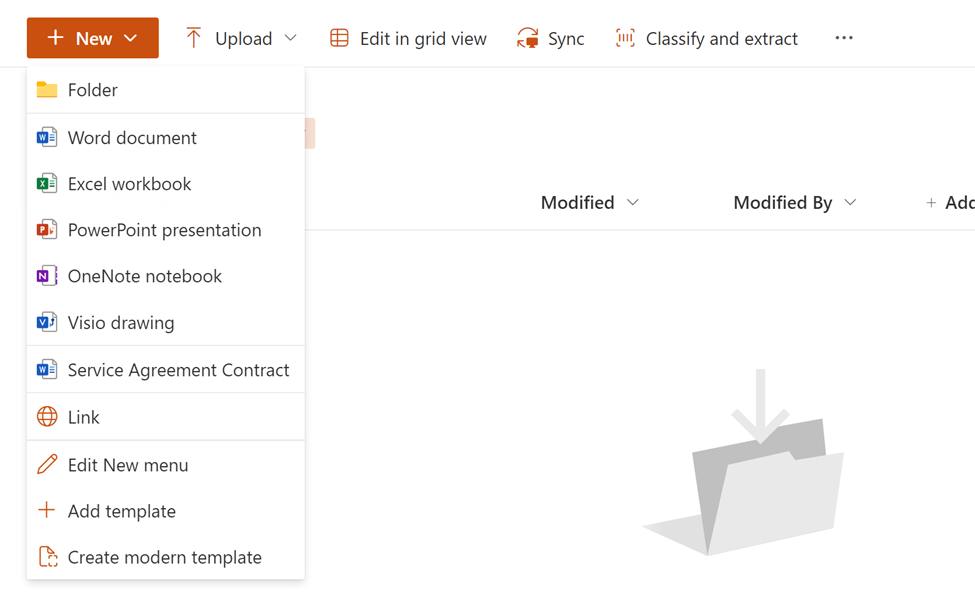
Access the “Service Agreement” document library in your target site.
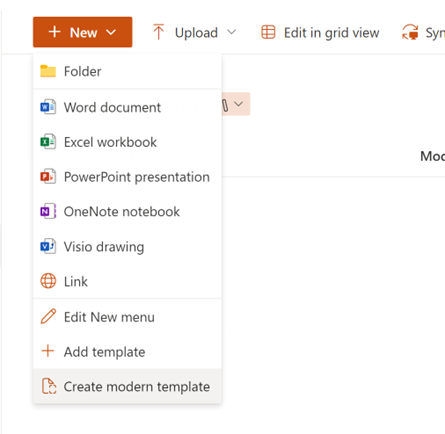
Select "+ New" -> "Create Modern Template"
2. Select “Service Agreement Contract.docx” as Template

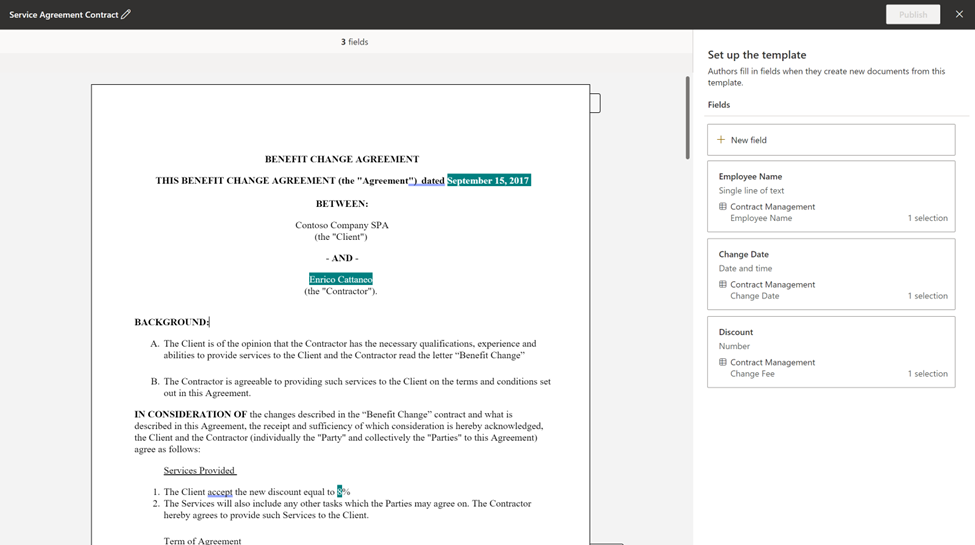
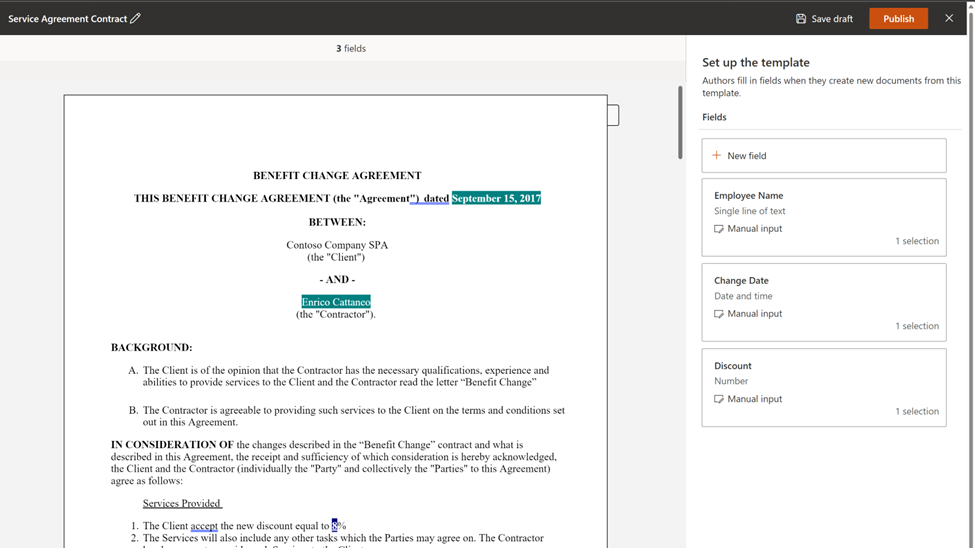
3. Create Placeholders
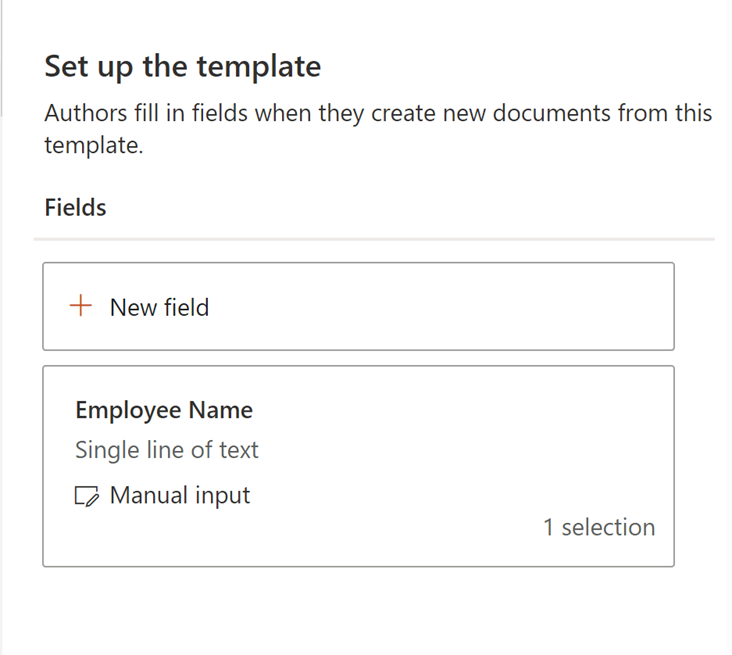
You need to create 3 placeholders in your template
- Employee Name
- Change Date
- Discount
This will be the final result:
To complete the above - do the following...
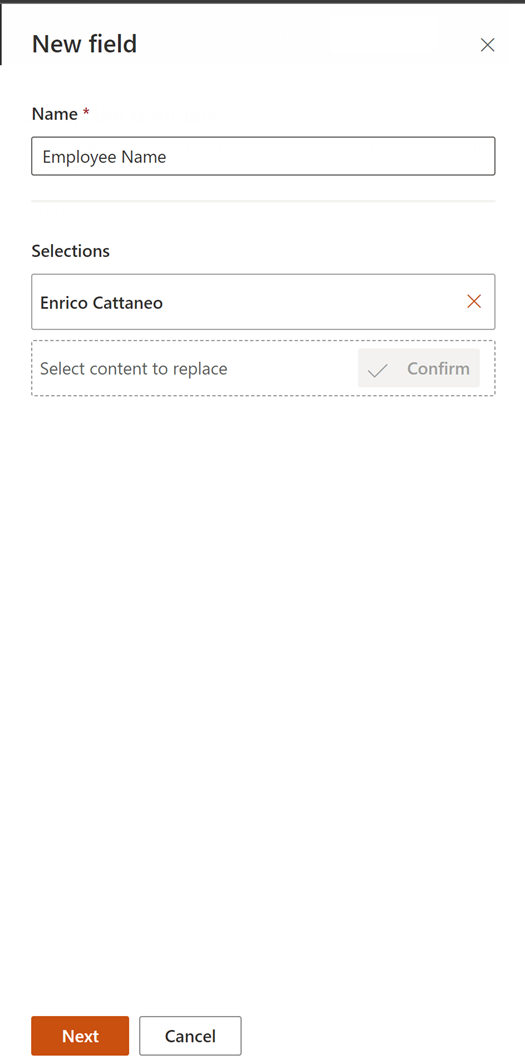
- Create “Employee Name” field.
- Click on “+ New field”
- As Name type “Employee Name”
- Select “Enrico Cattaneo” in the document text and “Confirm”
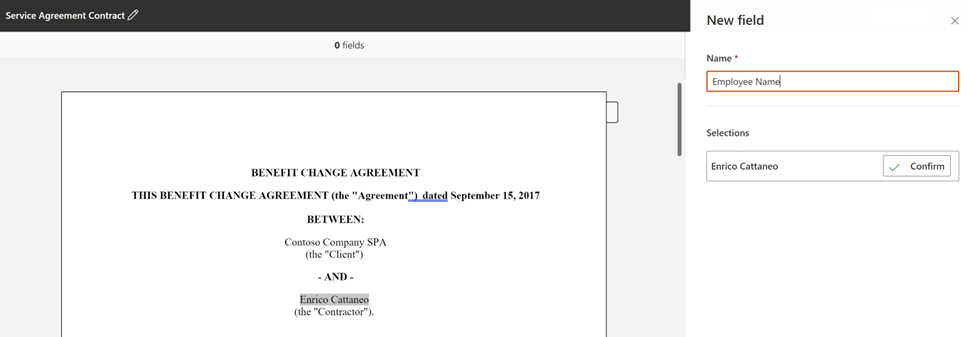
Press “Next” button
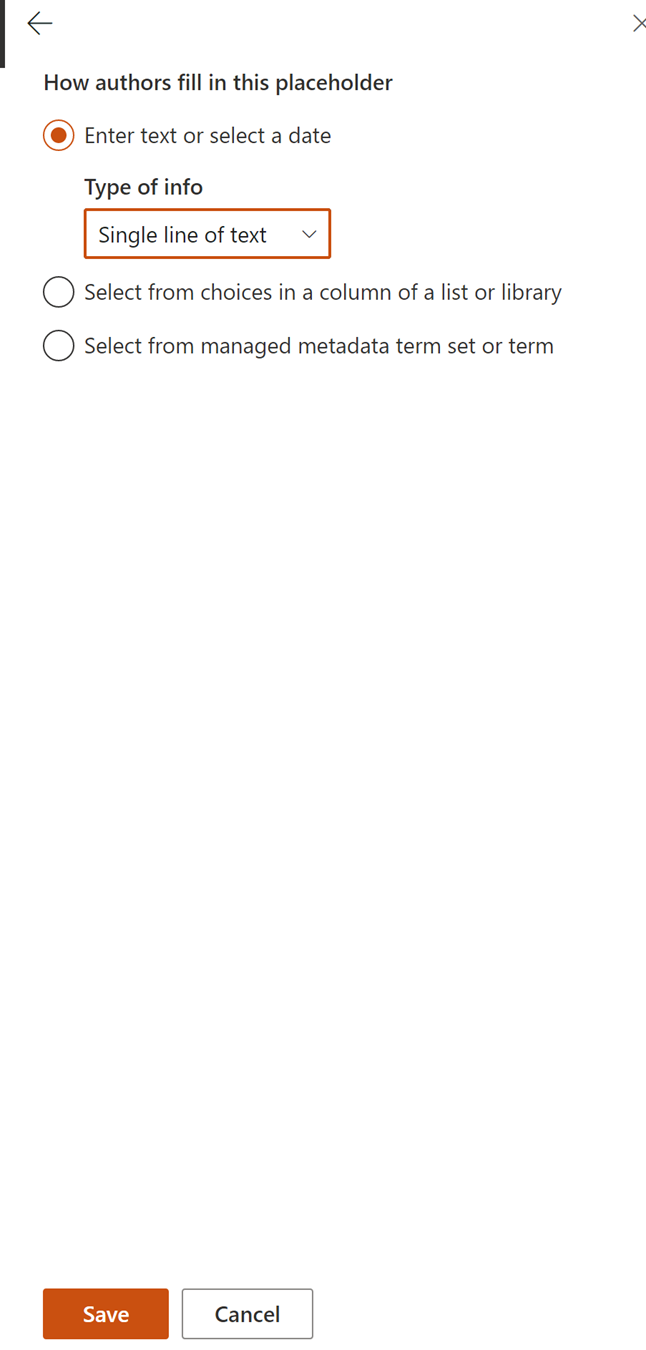
Select “Single line of text” and press “Save” button
Click “+ New field” to create “Change Date” field
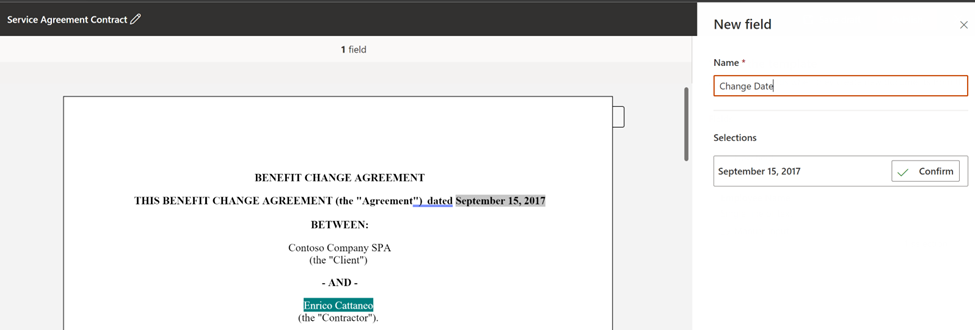
Select “September 15, 2017” in document text.
Press “Confirm” button…
Select “Date and time” as type
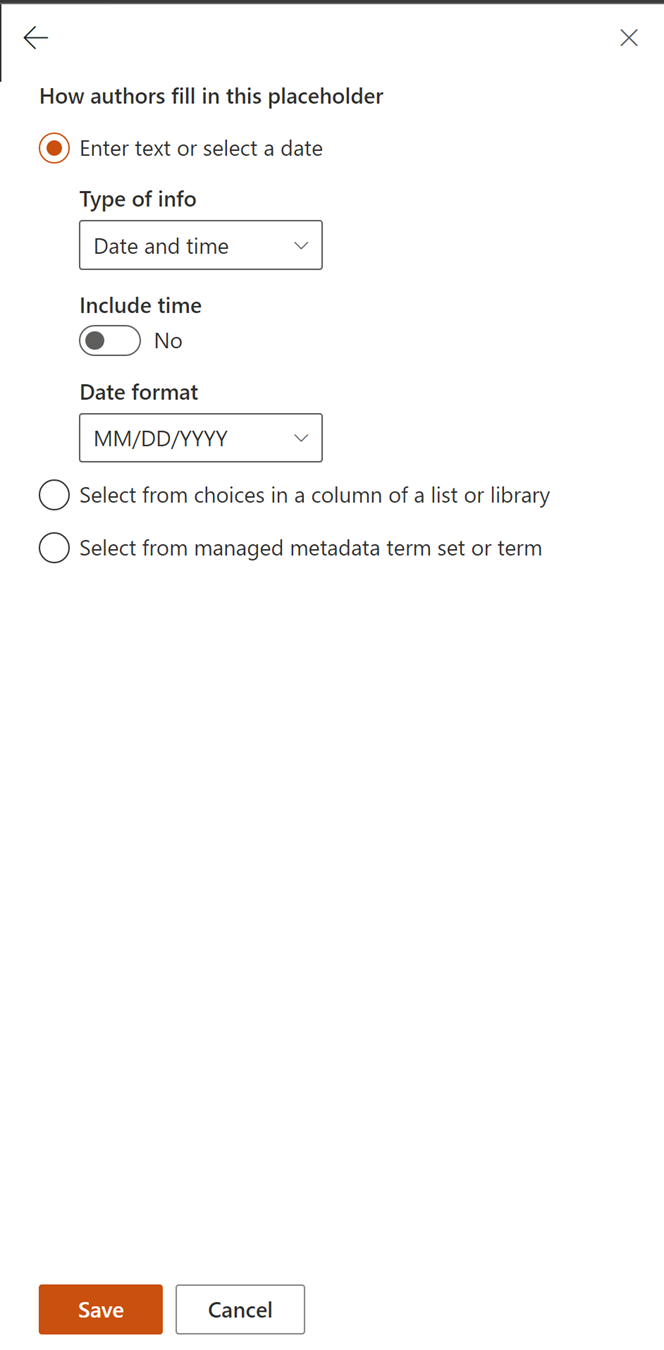
Press “Save” button…
Click “+ New field” to create “Discount” field
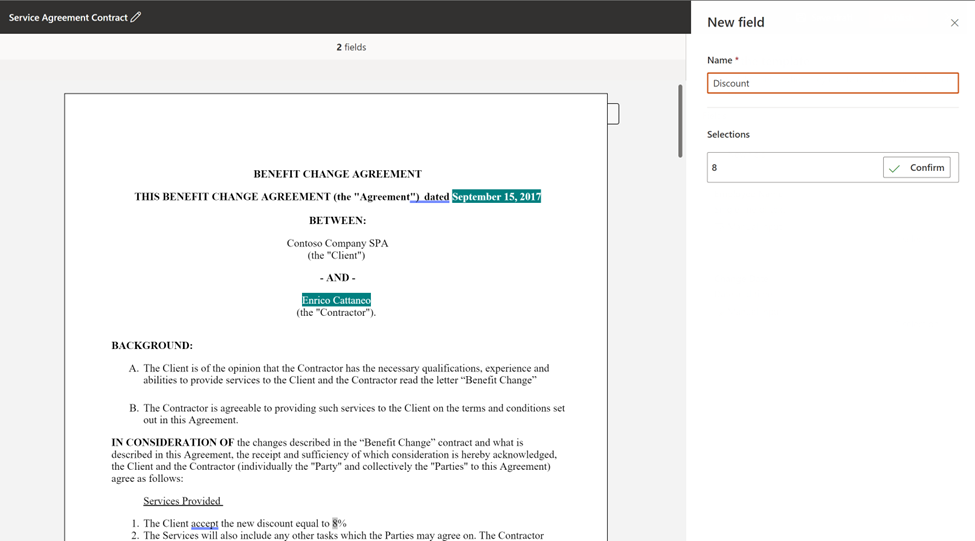
Select “8” in document text.
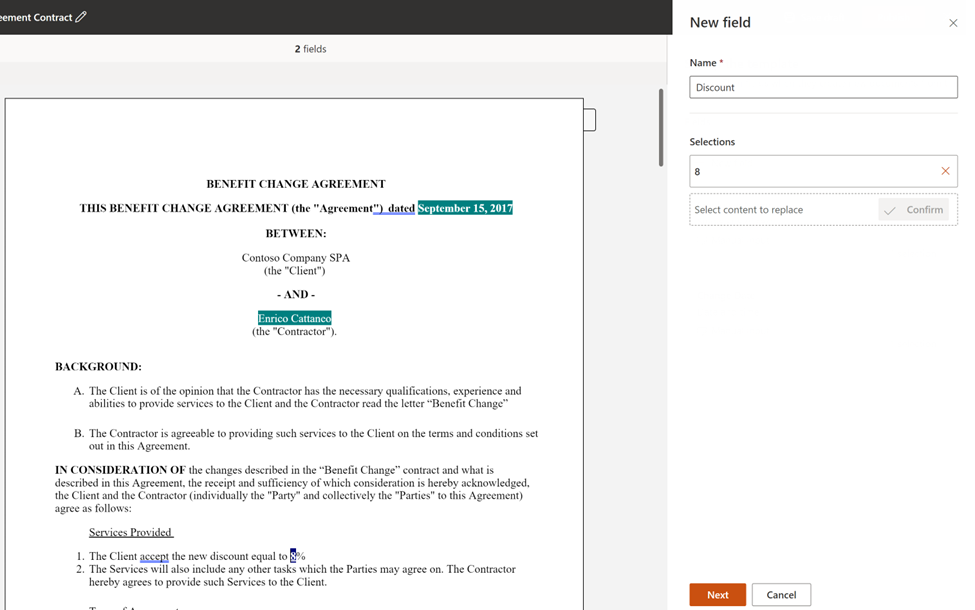
Press “Confirm” button…
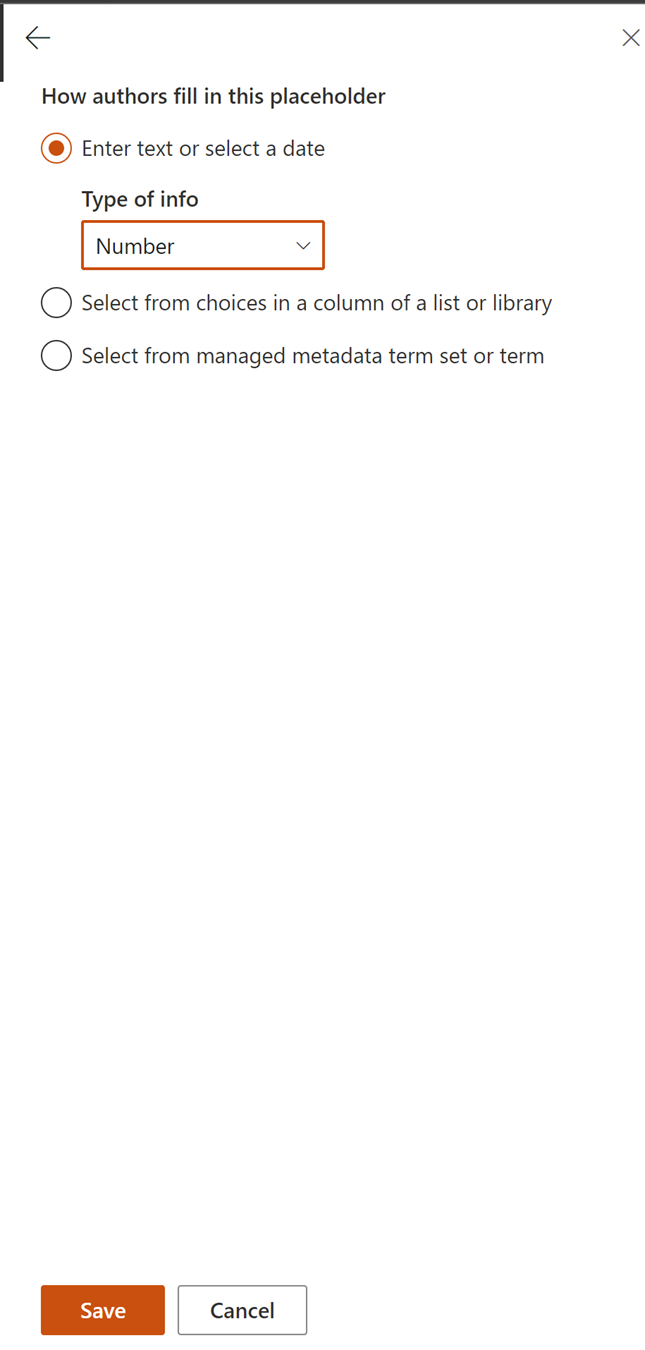
Select “Number” as type
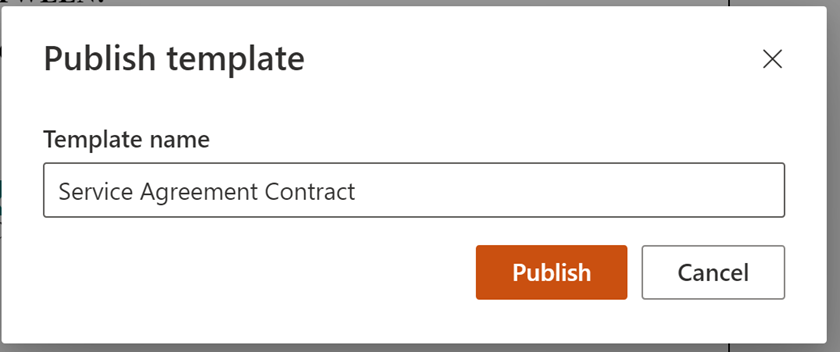
4. Publish Template
Press “Publish” button in the top right hand corner to publish the template.
Do not change the template name and press the “Publish” button one more time.

5. Check Result
Now check that the “Service Agreement Contract” template is now available in “Service Agreement” document library
Import Power Platform Solution
In this step you need to import DocManagementMicrosoftSyntex_1_0_0_9.zip as solution in your Power Platform Environment. To do this remember that you need an Environment with Dataverse.
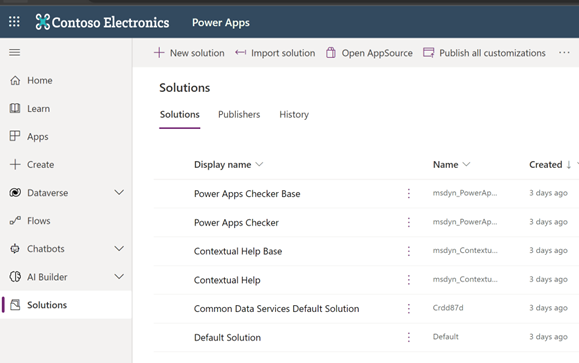
1. Import Solution
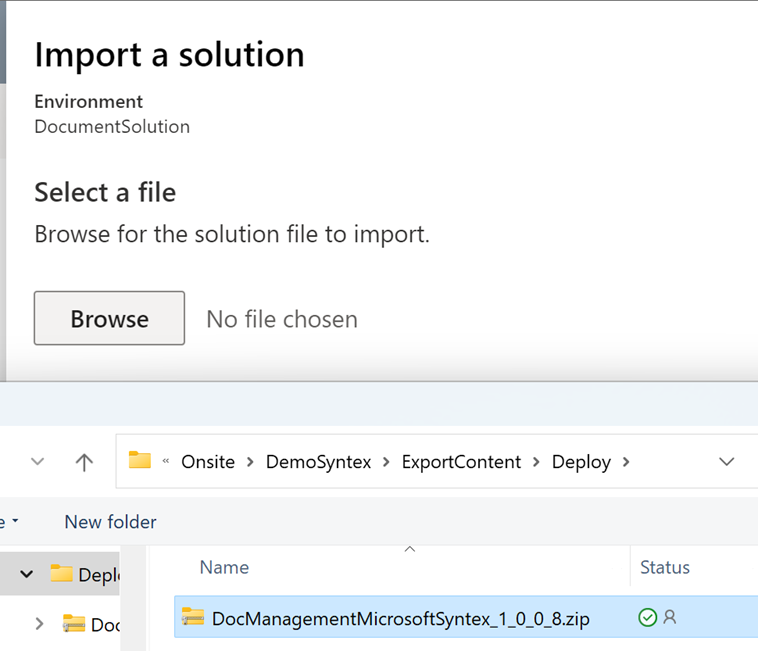
Go to the Power Platform admin centre & under the “Solution” section, click “Import Solution”
2. Select “DocManagementMicrosoftSyntex_1_0_0_8.zip”
Select zip file and click “Next”
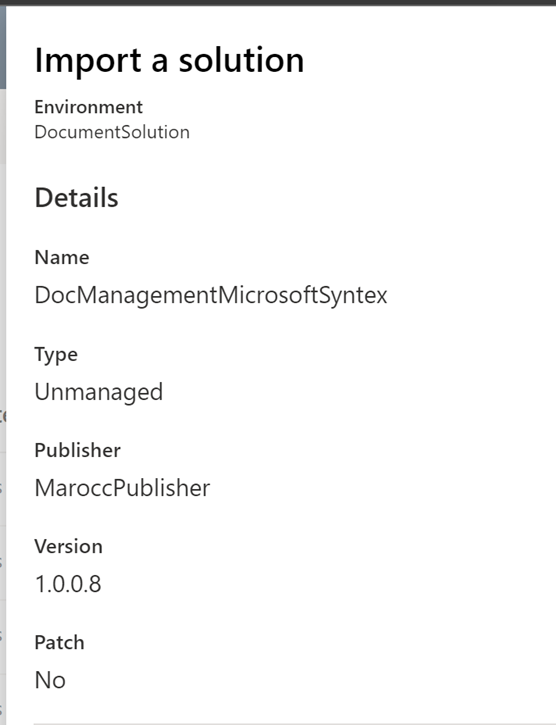
Import this solution as “Unmanaged” because you will need to change some settings and configuration after the import
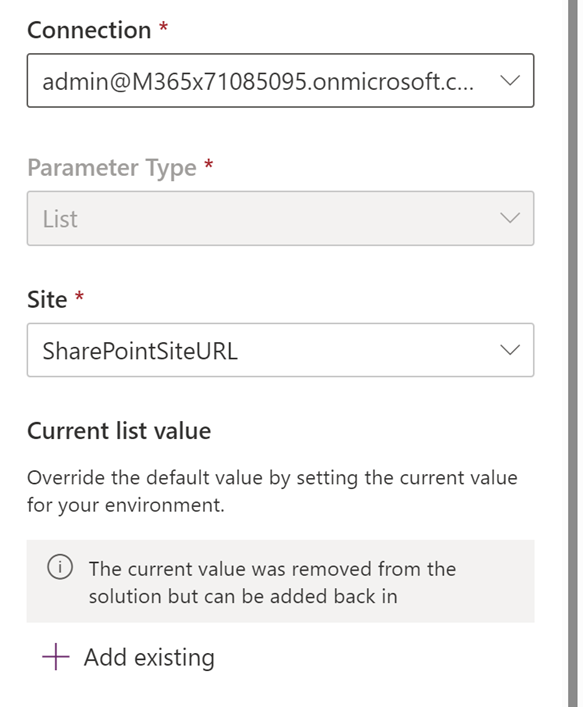
3. Configuring SharePoint settings (connection and url)
Now you must select a valid SharePoint connection. If you don’t have a valid connection the wizard will help you to create a SPO connection
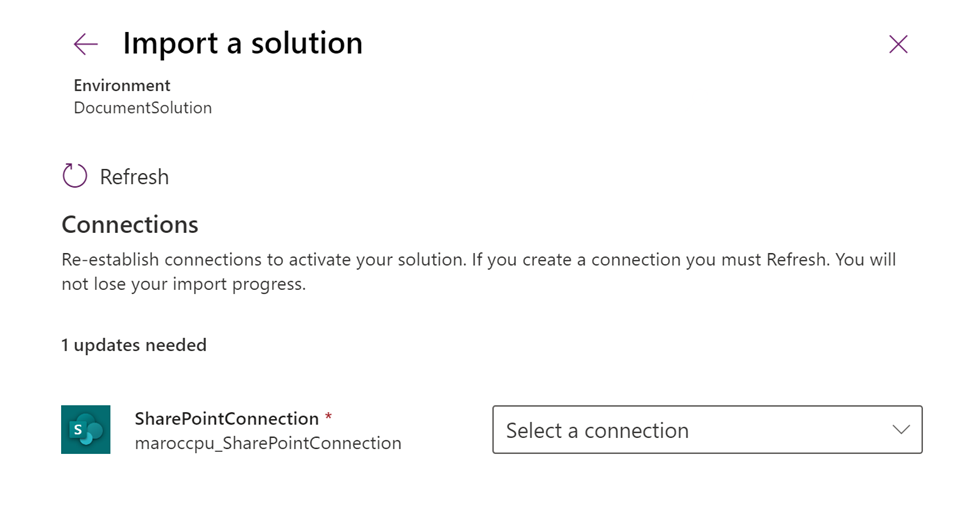
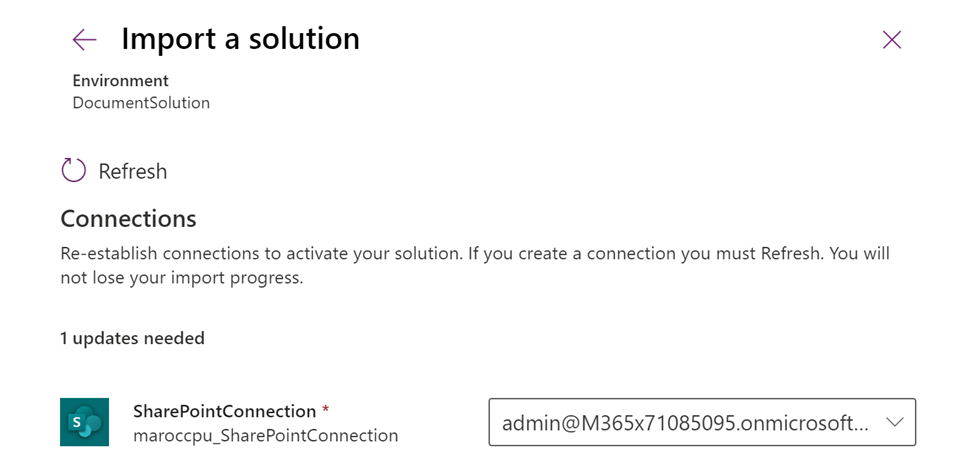
Click “Next”
Now you are able to select the correct SharePoint site URL and the “Contract Management Hub” document library

Click “Import”

Wait the process finish to import the solution.

Modify Environment Variables
Click on Solution to see all details

1. Modify “SharePointSiteURL” variable
Edit the environment variable “SharePointSiteURL”

Under “Current Site Value” click on “+ Add existing”
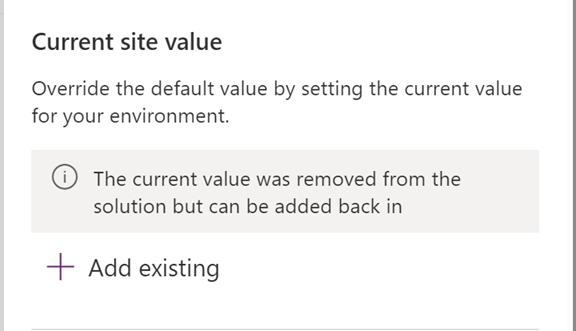
Select SPO target site for deployment
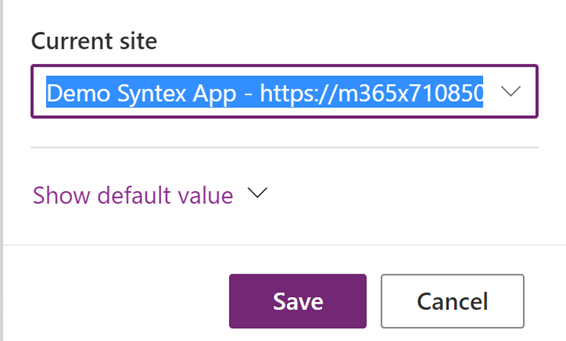
Press “Save” button.
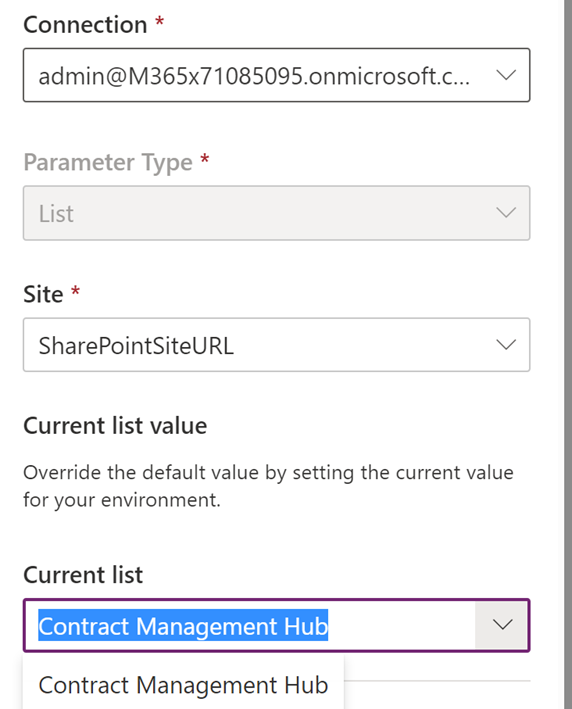
2. Modify “Contract Management Library Name” variable
Edit the environment variable "Contract Management Library Name"
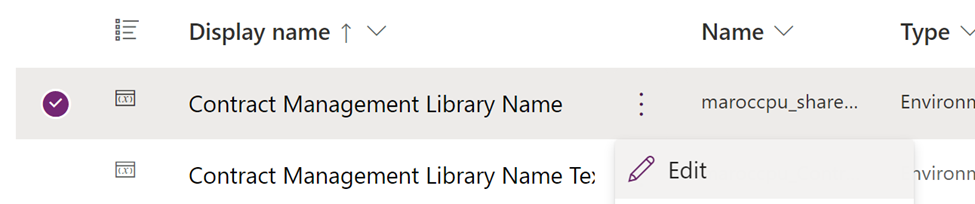
Under “Current List Value” section click on “+ Add existing”
Select “Contact Management Hub” and click “Save”
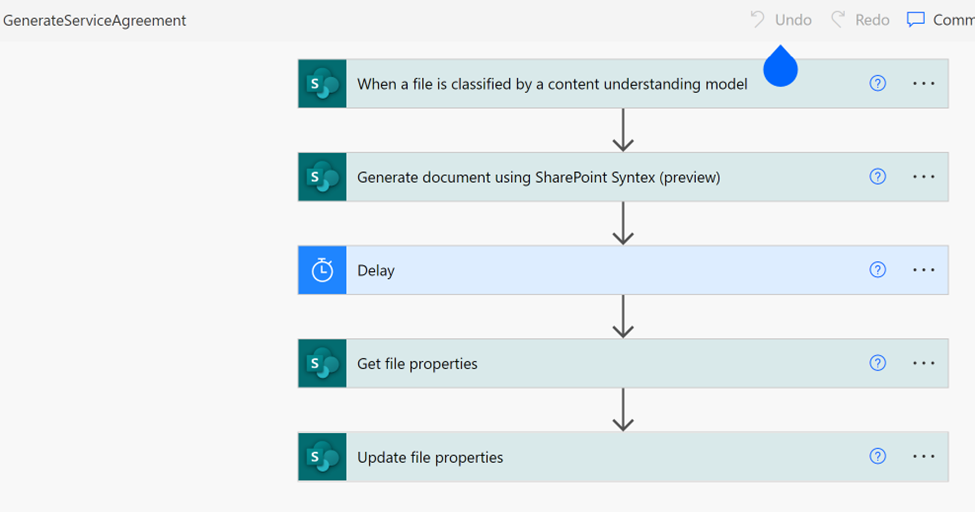
Modify “GenerateServiceAgreement” flow
Edit the flow "GenerateServiceAgreement" in “New Tab”

This is the flow...
1. Modify action “Generate document using SharePoint Syntex (preview)”
Because you have created the “Modern Template” manually you must change the reference in this action
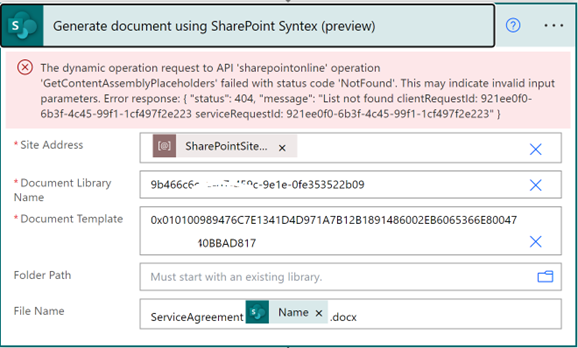
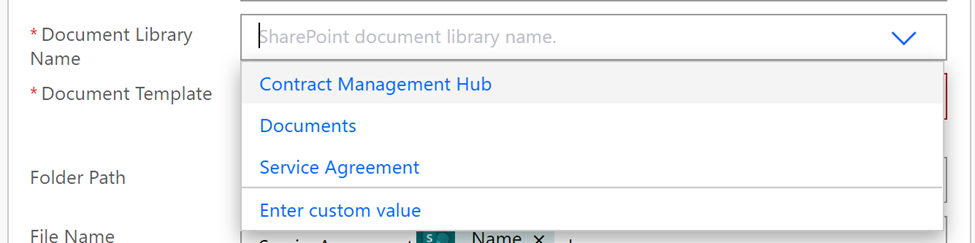
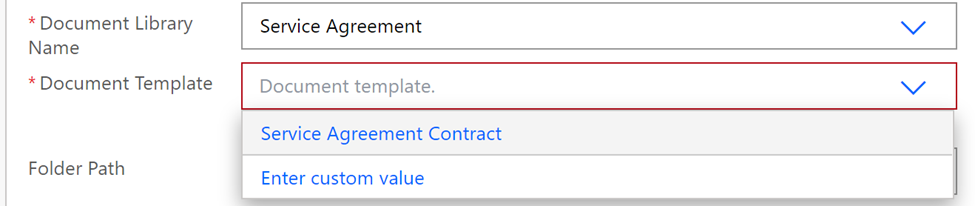
Clear “Document Template” field.

Clear “Document Library” field

Now PowerAutomate enables you to set the correct values
In “Document Library Name” field select “Service Agreement”
In “Document Template” field select “Service Agreement Contract”
2. Change all the field references
Now you must change the field references
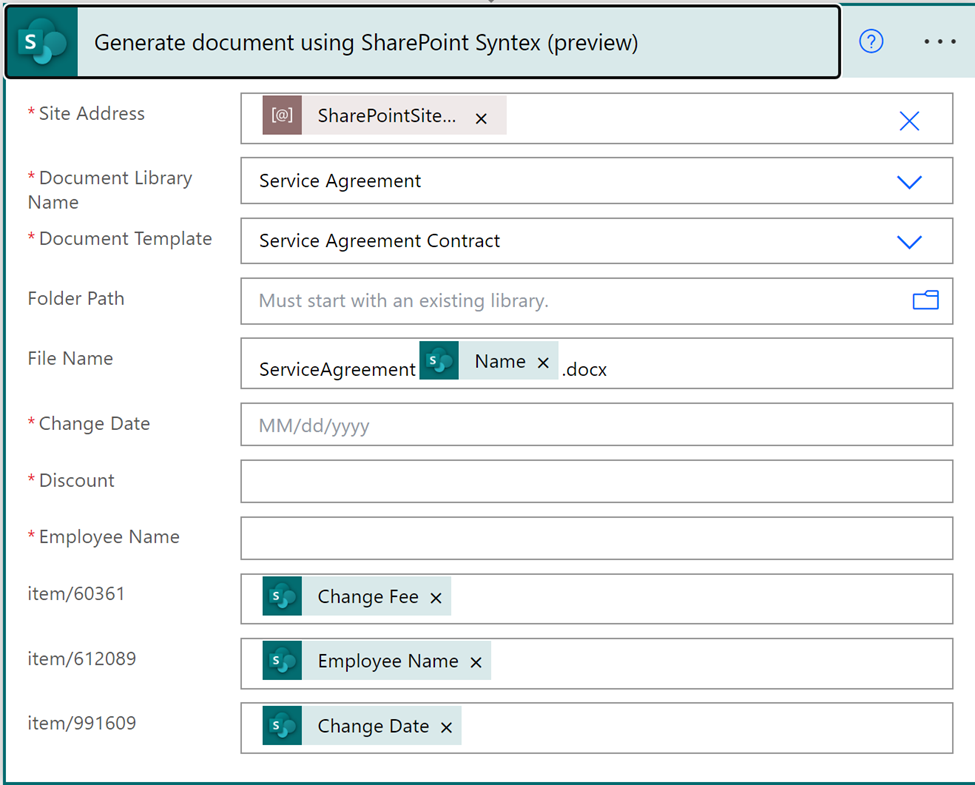
First you remove “item/xxxx” values, after this add the correct values to the fields
- Change Date -> Change Date
- Discount -> Change Fee
- Employee Name -> Employee Name
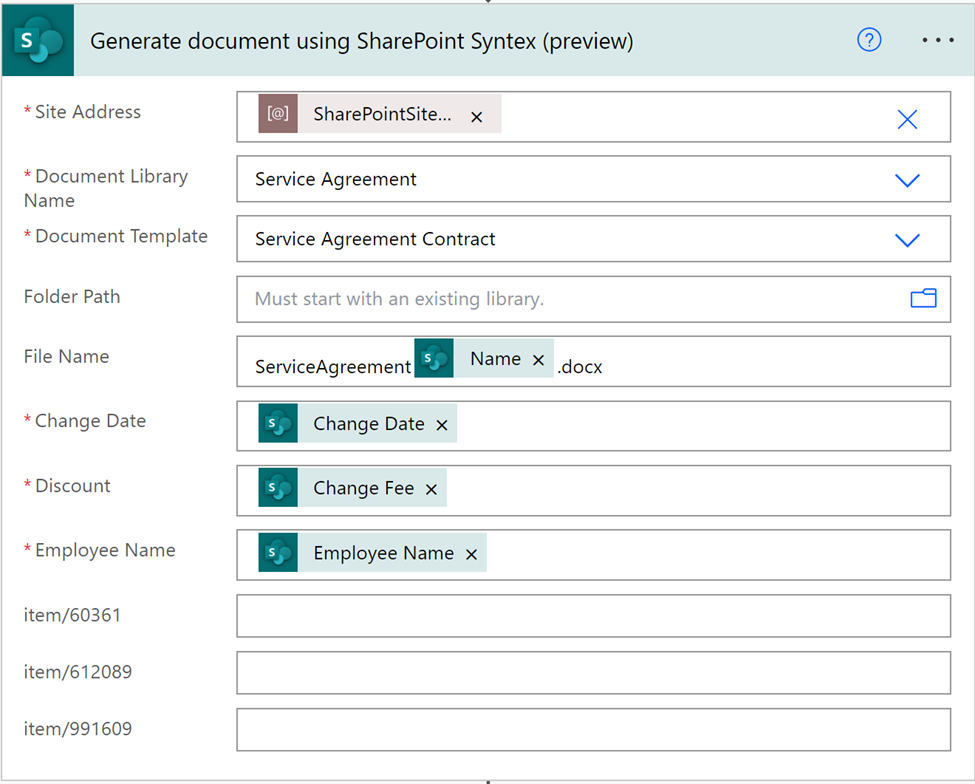
Save the flow.
3. Check flow is “Turned on”
If the flow is “Turn off” enable it using “Turn On” button

Test the app
Now you are ready to test the Power App and Flows that simulate a document management process.
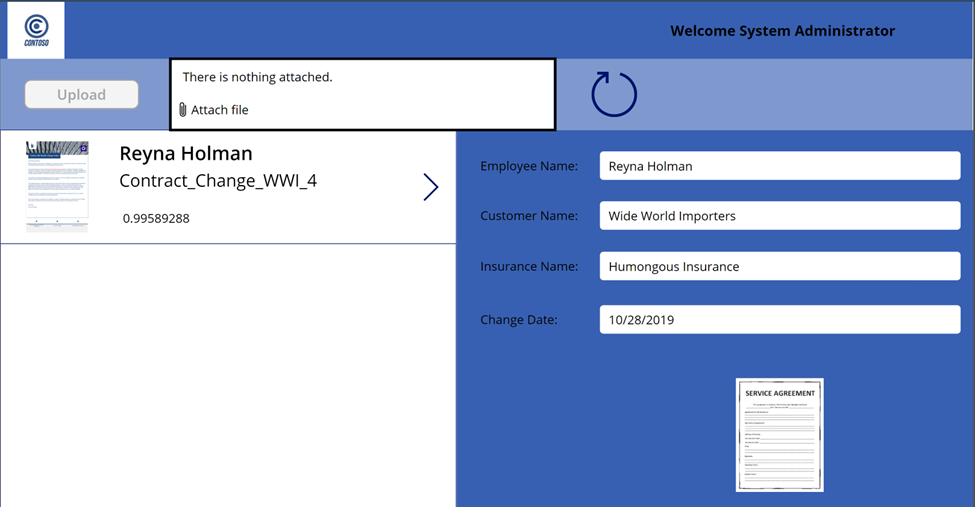
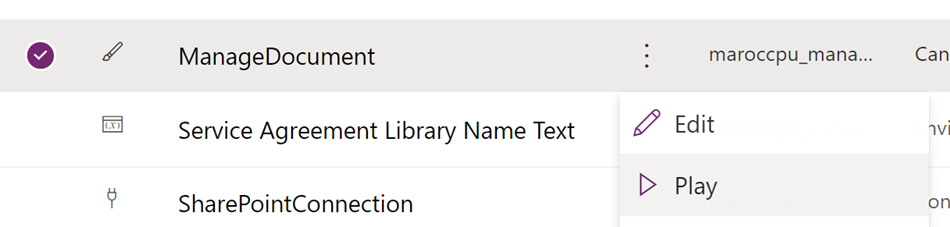
1. Play “ManageDocument” App
2. Click on “Attach file” and select “Contract_Change_WWI_4.docx”
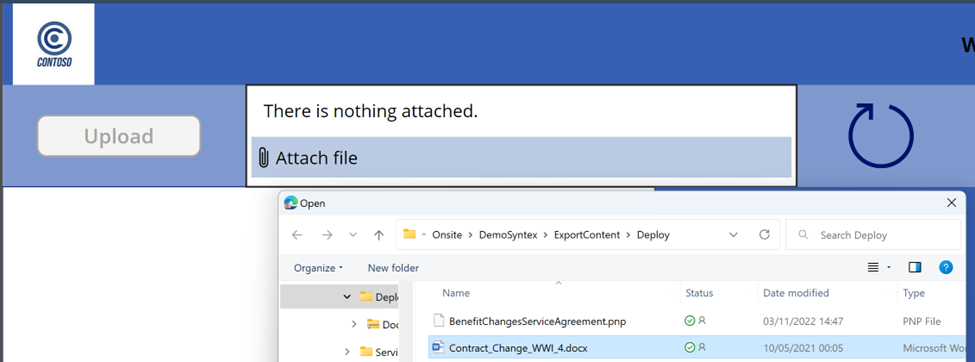
3. Press "Upload" button
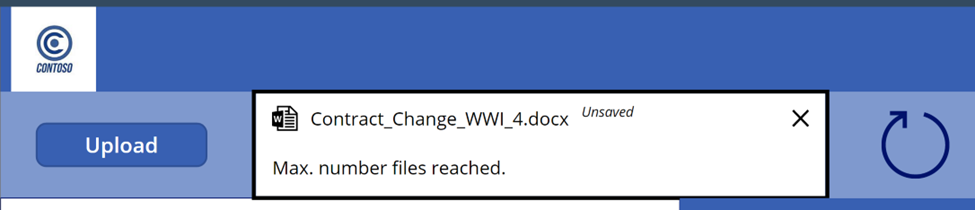
- Wait the notification message

The upload process is powered by "UploadContract" flow that you can find in the solution.
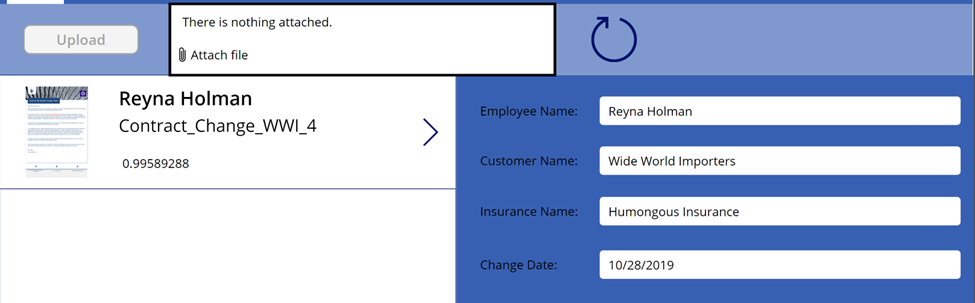
4. If you use the refresh icon you can check when Syntex classify your document
5. At the end you can see information details extracted by Syntex in form detail
6. When the flow “GenerateServiceAgreement” is finished you can click the icon to see the document create using “Modern Template”