
A reusable Power Platform snippet
Travel Plan (Topic)
This is a snippet that demonstrates how to use an AI prompt in a Copilot Studio Topic.
 Copilot Studio

- Last updated
- Aug 27, 2024
- Category
- Community snippet
From idea to implementation
Make it your own.
Check this snippet's prerequisites, permissions, and licensing before using it. The documentation below comes directly from the snippet README.
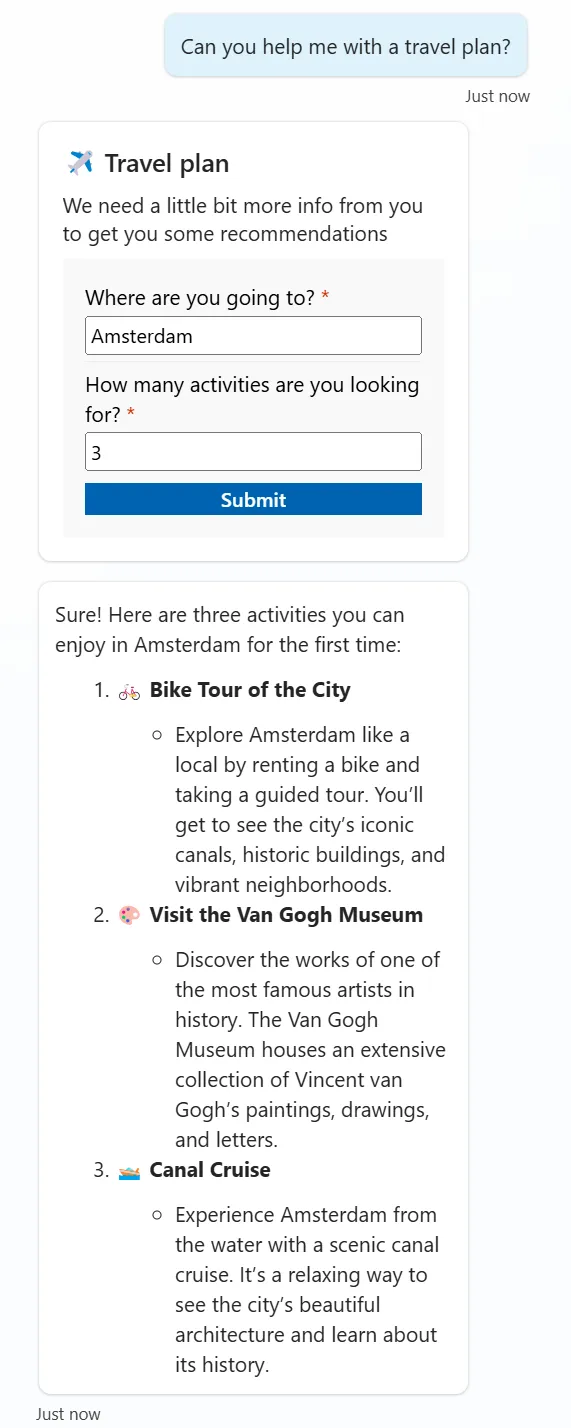
This is a snippet that demonstrates how to use an AI prompt in a Copilot Studio Topic. It uses an Adaptive Card to gather inputs and an AI prompt to generate a travel plan for a trip.
Authors
| Snippet | Author(s) |
|---|---|
| Travel Plan (Topic) | Daniel Laskewitz (@laskewitz) |
Minimal path to awesome
Open a copilot in Copilot Studio
Select Topics
Select + Add a topic
Select From blank
Change the name from Untitled to Travel Plan
Select More
Select Open code editor
Paste the contents of the YAML-file in the code editor
Select Close code editor
Don't worry about the error you'll see in the message card, later on that will disappear.
Select the + after the adaptive card to add a node
Select Call an action in the popout
Select Create a prompt in the next area
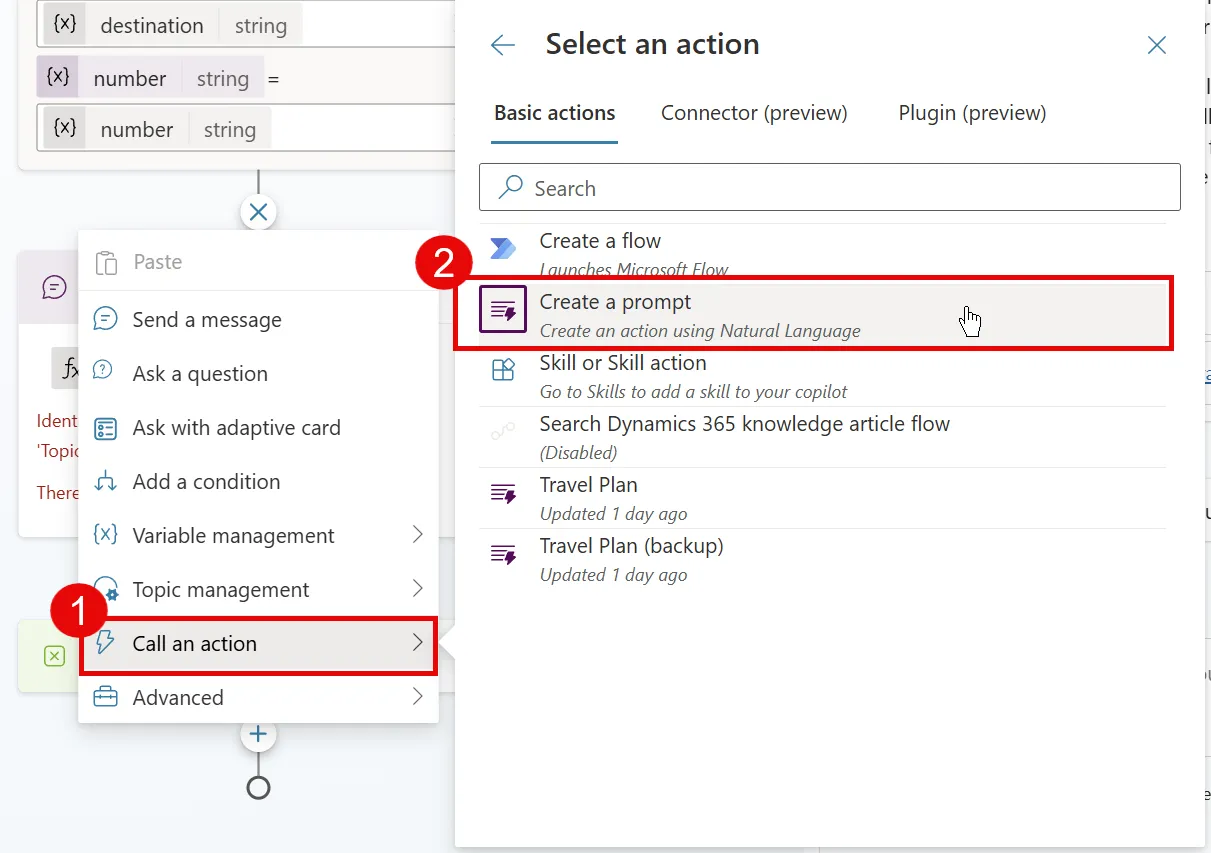
This will open the AI Builder prompt builder
Enter Travel Plan as the name for the prompt at the top
Enter the following prompt as the prompt:
Pease give me [Number] options for activities in [Destination] for people who are there for the first time. Please return a numbered list with emojis in the name of the activity and give it a brief description.Under Prompt settings, select Input
Select + Add input
Enter Number as the name
Enter 3 as the sample data
Select + Add input again
Enter Destination as the name
Enter Amsterdam, The Netherlands as the sample data
Select [Number] in the prompt and remove it from the prompt, leaving the cursor on that spot
Select the + Insert button
Select Number in the popout - this will add the input to your prompt
Select [Destination] in the prompt and remove it from the prompt, leaving the cursor on that spot
Select the + Insert button again
Select Destination in the popout to add destination to the prompt as well
Now you have replaced the text with actual inputs, and this means you can now test the prompt
Select the Test prompt button under the prompt to test the prompt with the sample data
This will show an example output of the prompt response in the Prompt response section
Select the Save custom prompt button
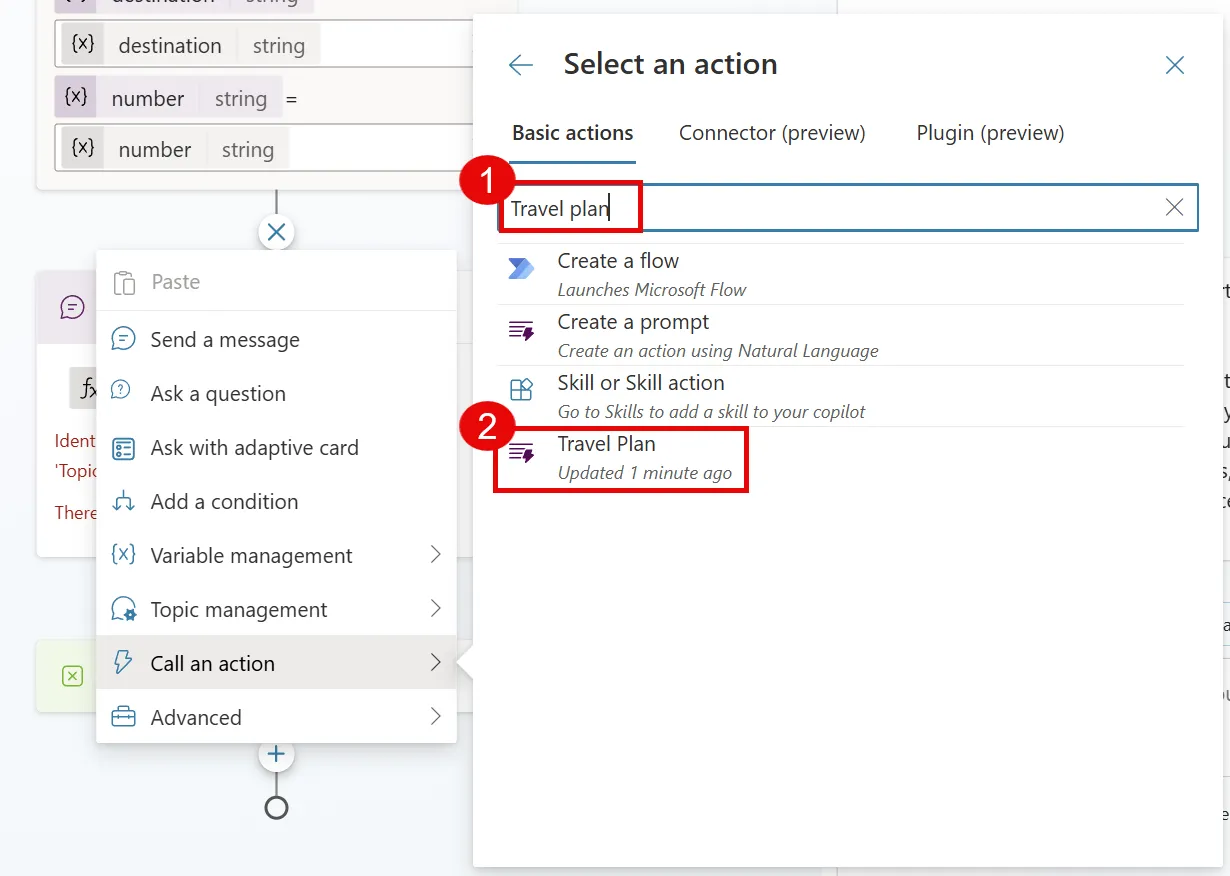
Back in Copilot Studio, you will not directly see the prompt. Make sure to search for Travel Plan and it will show for you
Select Travel Plan
Select > in the Destination input and select the destination variable (this is the output of the adaptive card)
Select > in the Number input and select the number variable
Select > in the predictionOutput output and select the Create new button to create a new variable
This will automatically create a variable called Var1.
Select Var1
This will open the Variable properties panel
Change the name from Var1 to promptOutput
Close the Variable properties panel
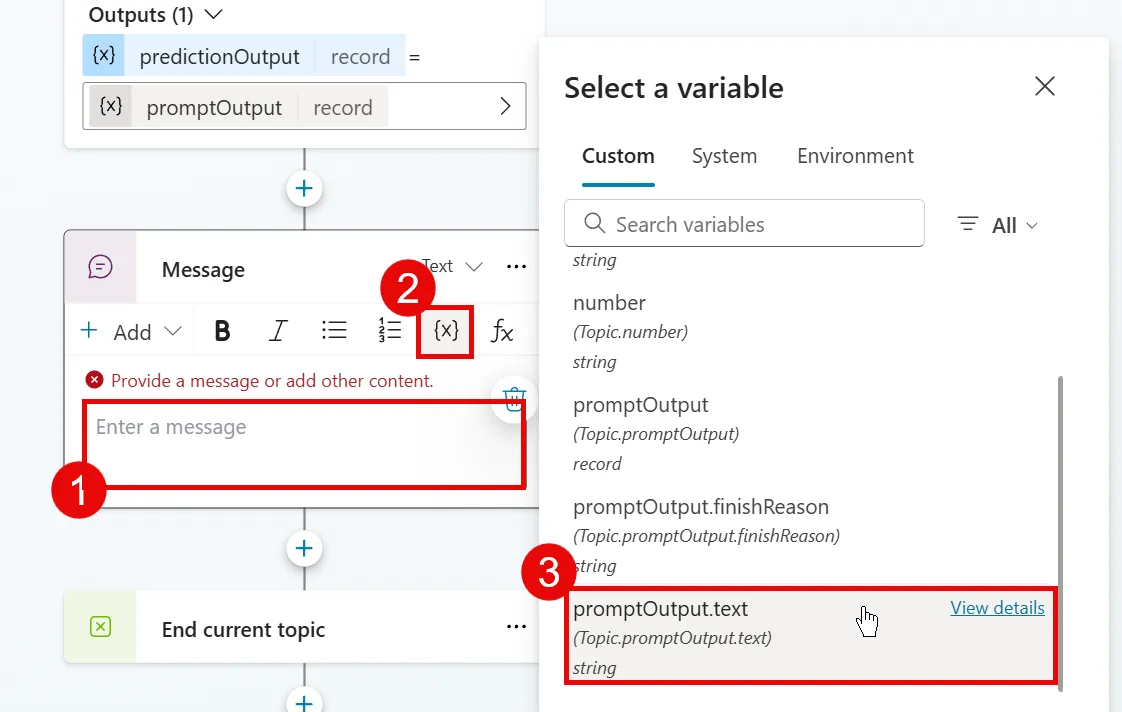
Select Prompt output in the message node by clicking on it (1)
Remove the text Prompt output
Select the variable icon {x} (2)
Select promptOutput.text (3) - this is the generated text by the prompt.
Save the topic
Test out the topic by using the Test copilot section and send
Can you help me with a travel plan?Fill in the card by adding a Location and a number of Activities
When you get a response with a bunch of activities in the location you entered, you're done!
Disclaimer
THIS CODE IS PROVIDED AS IS WITHOUT WARRANTY OF ANY KIND, EITHER EXPRESS OR IMPLIED, INCLUDING ANY IMPLIED WARRANTIES OF FITNESS FOR A PARTICULAR PURPOSE, MERCHANTABILITY, OR NON-INFRINGEMENT.