
From the contributor
How to use this sample
Summary
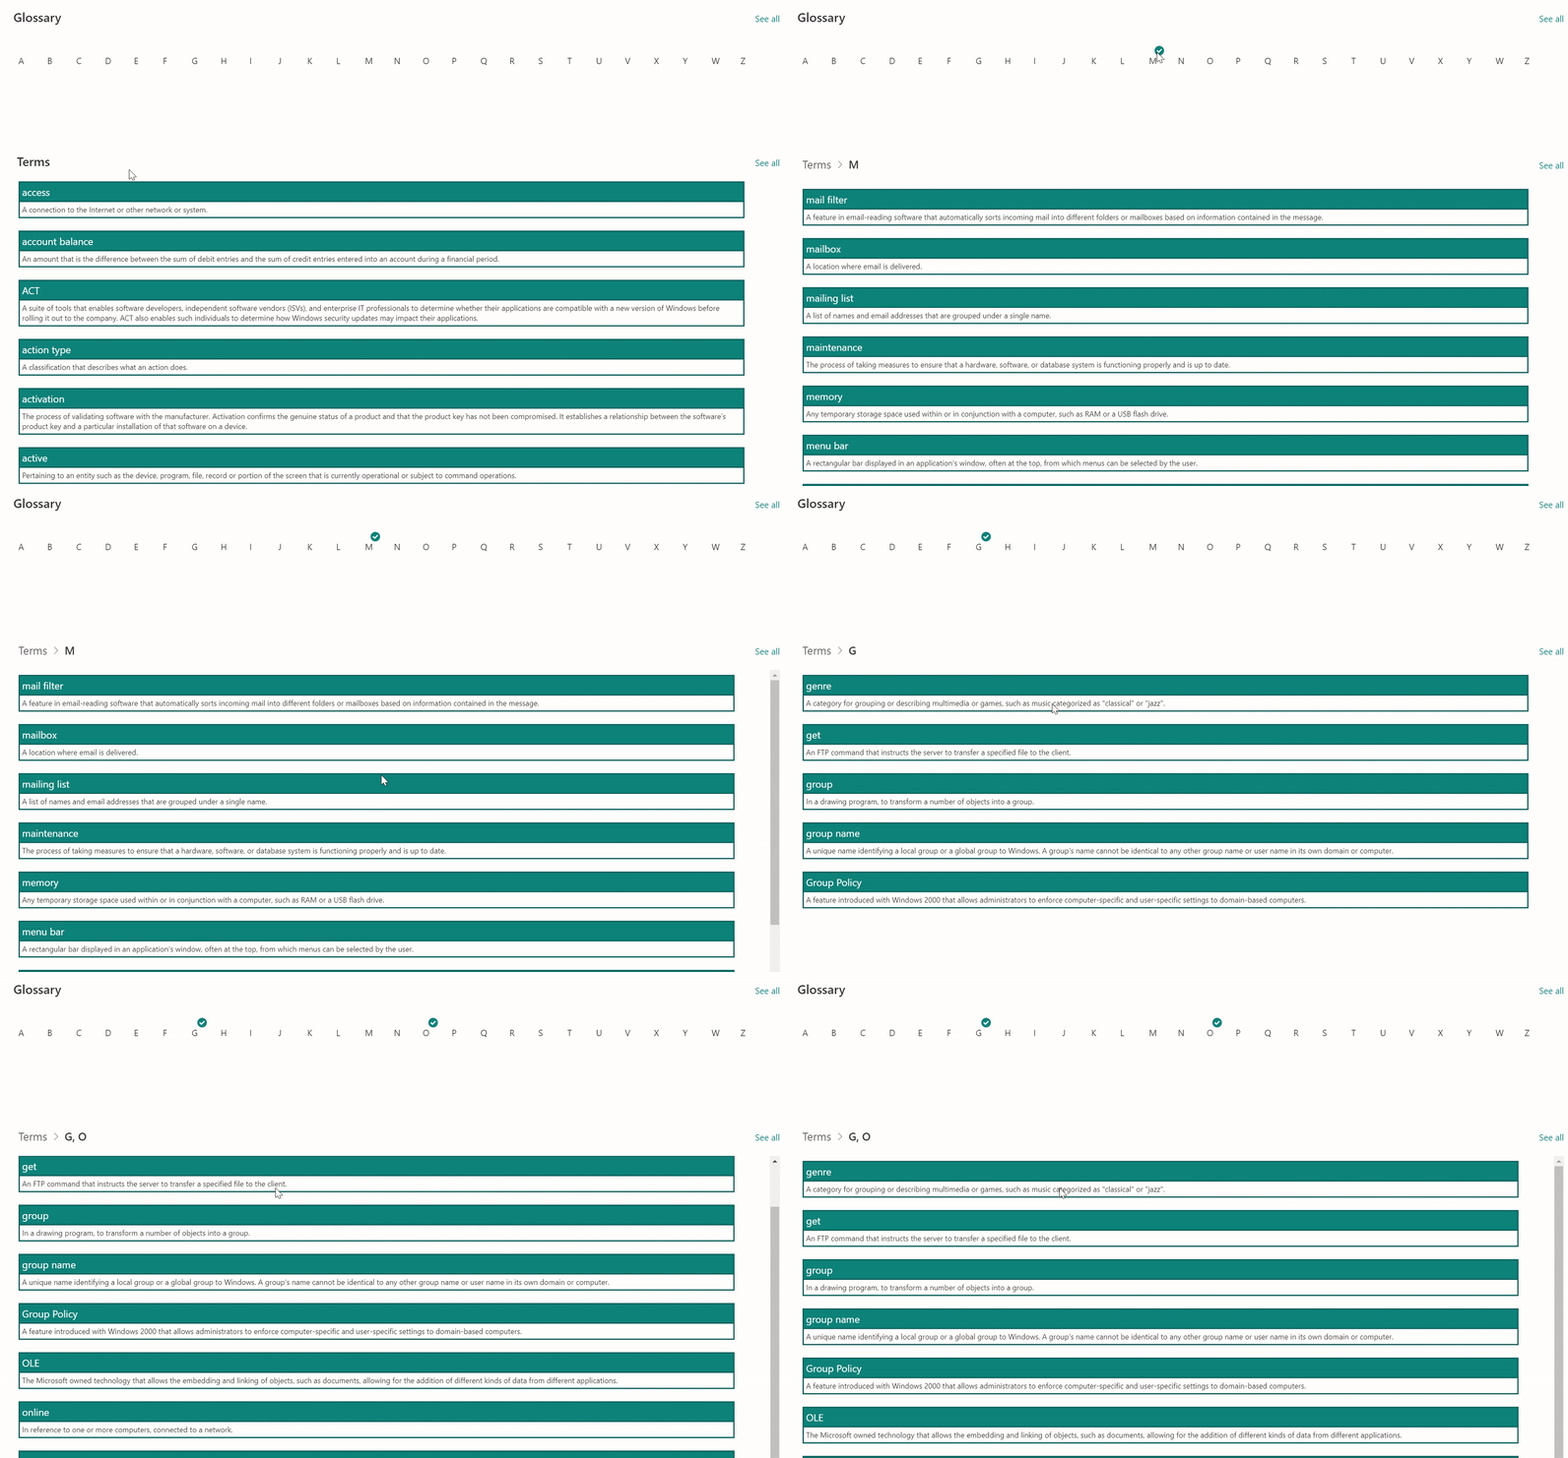
View formatters to buid a glossary page using connected list WebParts.
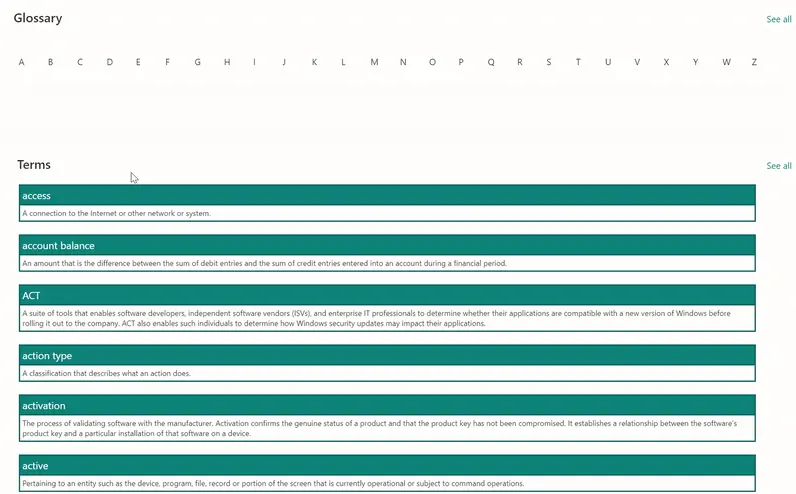
Two lists are needed on this sample, so two separate JSON files are used:
| File Name | View type for formatting | Details |
|---|---|---|
| glossary-filter.json | Gallery | Used to format the filter list. |
| glossary-filter-background.json | Gallery | Used to format the filter list with letter on a background. |
| glossary-dynamicfilter-view.json | List | Used to format the main list. |
View requirements
List 1: Glossary Filter
| Type | Internal Name | Required | Details |
|---|---|---|---|
| Single line of text | Title | Yes | Used to store a character to be used as a filter |
In this list we need to store all the alphabet letters from A to Z (or your country language variation of the alphabet if preferred) to be used later as filters. Apply either the glossary-filter.json or glossary-filter-background.json view formatter in a view in this list.
List 2: Glossary Terms
This is the list used to store all terms and descriptions. This list will consist of 3 fields:
| Type | Internal Name | Required | Details |
|---|---|---|---|
| Single line of text | Title | Yes | Used to store the glossary term |
| Multiple lines of text | Description | Yes | Used to store the term description, no rich text enabled |
| Calculated | FirstChar | Used to show the first character of the term. This is the key to the whole functionality. Set it to use an output of 'Single line of text' and use as the formula: =LEFT(Title,1). This will extract only the first character from the Title field and use it as the value. |
Apply the glossary-view.json view formatter in a view in this list.
Setting up the glossary page
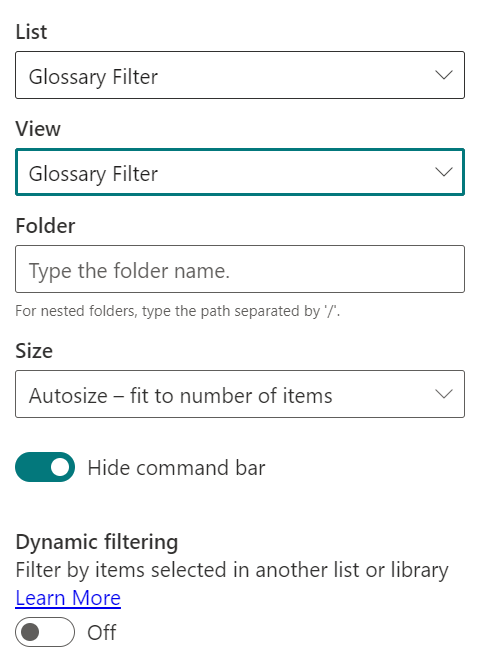
Create a new blank page and add a single column section. On this section, add a first List WebPart for the Glossary Filter list and use the following settings for the WebPart (hide the command bar so only the view content is shown):
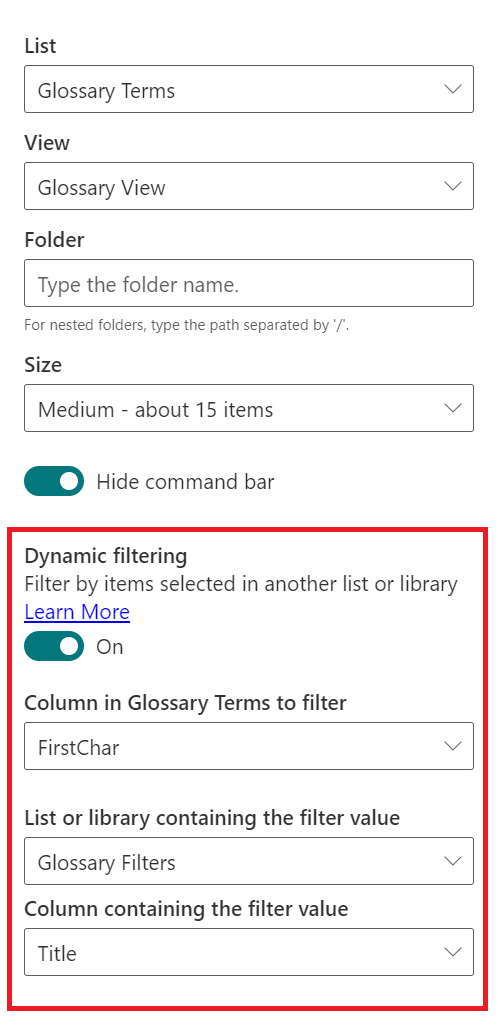
Add another list WebPart below it, but now select the Glossary Terms list, with the following settings (remember to hide the command bar so only the custom view will be shown):
Rename the webparts as desired, save and publish your page to get the correct settings applied.
To be more user friendly, in the example shown above they were renamed from:
-Glossary Terms to Terms
-Glossary Filters to Glossary
Sample
| Solution | Author(s) |
|---|---|
| glossary-dynamicfilter-view.json | Michel Mendes - Tweaked FAQ template from Chris Kent |
| glossary-filter.json | Michel Mendes |
| glossary-filter-background.json | Watana |
Version history
| Version | Date | Comments |
|---|---|---|
| 1.0 | April 04, 2021 | Initial release |
| 1.1 | December 13, 2024 | Added glossary-filter-background.json |
Disclaimer
THIS CODE IS PROVIDED AS IS WITHOUT WARRANTY OF ANY KIND, EITHER EXPRESS OR IMPLIED, INCLUDING ANY IMPLIED WARRANTIES OF FITNESS FOR A PARTICULAR PURPOSE, MERCHANTABILITY, OR NON-INFRINGEMENT.
Additional notes
References:
Glossary content was built using Microsoft Terminology Collection: https://www.microsoft.com/en-us/language/Terminology
JSON for Glossary view was adapted from the FAQ Sample from PnP GitHub Samples: https://github.com/pnp/List-Formatting/tree/master/view-samples/faqs