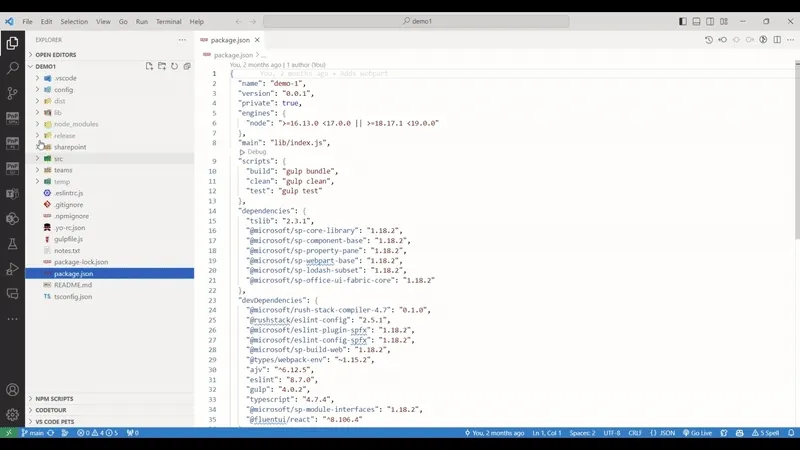
CI/CD Workflow
This action will allow you to generate YAML GitHub workflow or Azure DevOps pipeline to bundle, package, and deploy your project to any app catalog on every code push or on a manual run
SharePoint Framework Toolkit extends VS Code with additional UI to present you with a scaffolding form that will allow you to create a CI/CD Workflow in 3 easy steps.
It’s important to know that many fields are already prefilled and it is possible to hit create without changing any value to get a basic and default YAML workflow file.
GitHub
Section titled “GitHub”name: Deploy Solution test-solutionon: push: branches: - main workflow_dispatch: nulljobs: build-and-deploy: runs-on: ubuntu-latest steps: - name: Checkout uses: actions/checkout@v3.5.3 - name: Use Node.js 16.x uses: actions/setup-node@v3.7.0 with: node-version: 16.x - name: Run npm ci run: npm ci - name: Bundle & Package run: | gulp bundle --ship gulp package-solution --ship - name: CLI for Microsoft 365 Login uses: pnp/action-cli-login@v2.2.2 with: CERTIFICATE_ENCODED: ${{ secrets.CERTIFICATE_ENCODED }} CERTIFICATE_PASSWORD: ${{ secrets.CERTIFICATE_PASSWORD }} TENANT: ${{ secrets.TENANT_ID }} - name: CLI for Microsoft 365 Deploy App uses: pnp/action-cli-deploy@v3.0.1 with: APP_FILE_PATH: sharepoint/solution/test-solution.sppkg SKIP_FEATURE_DEPLOYMENT: true OVERWRITE: trueScaffolding form
step 1
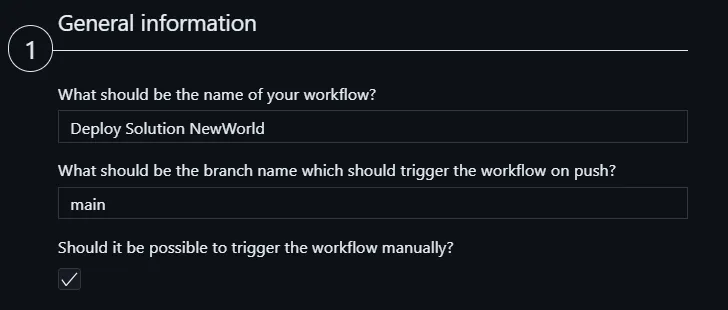
In the first section of the form you may provide general information about your workflow like what will be its name, or what is the name of the branch that every push will trigger the flow to run. It is also possible to allow you to run the workflow manually using the GitHub UI

step 2
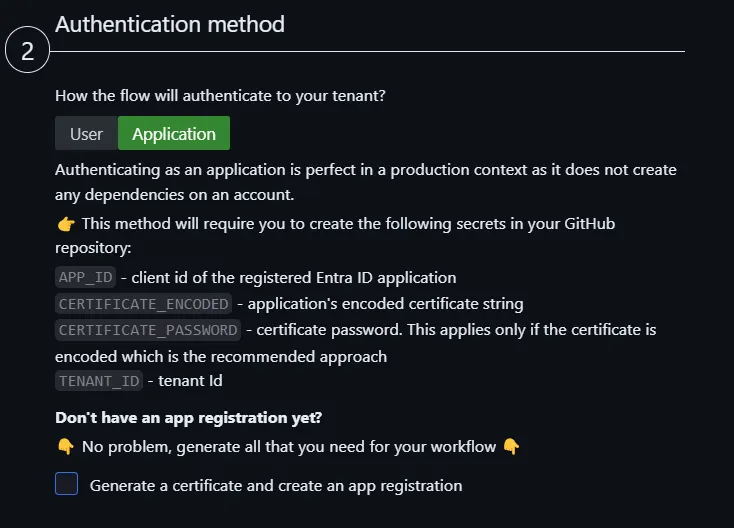
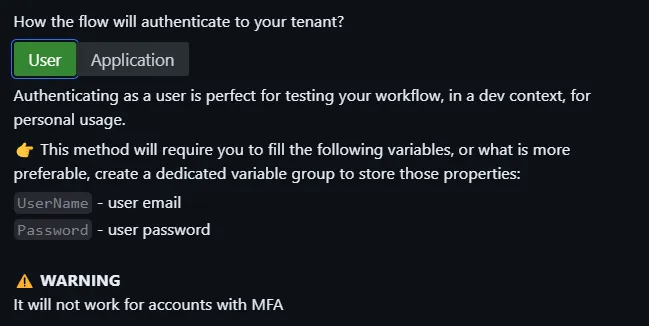
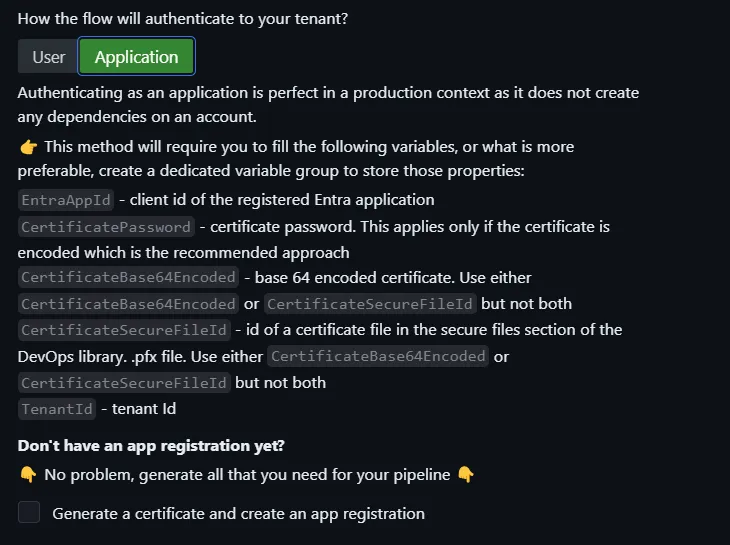
In the second step, you will need to decide how your flow will authenticate to your tenant. It is possible to pick between the user and application login method
for application, the following yaml will be generated for this step (this is the default option).
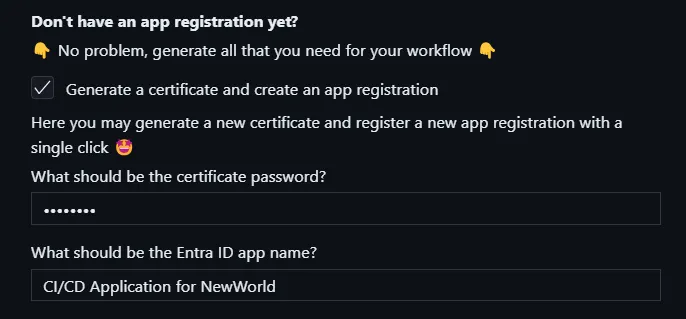
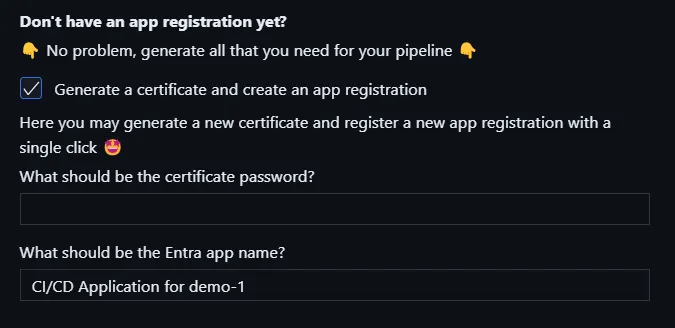
- name: CLI for Microsoft 365 Login uses: pnp/action-cli-login@v2.2.2 with: CERTIFICATE_ENCODED: ${{ secrets.CERTIFICATE_ENCODED }} CERTIFICATE_PASSWORD: ${{ secrets.CERTIFICATE_PASSWORD }} APP_ID: ${{ secrets.APP_ID }} TENANT: ${{ secrets.TENANT_ID }}It is also possible to generate a certificate and create a new Entra ID app registration directly within the form for your workflow. Simply check the additional checkbox and provide a password for your certificate and the name for your new app registration. Submitting the form will also create the file and the app and at the end, it will give you the generated values so that you may copy them to the secrets that are required to be created in GitHub repo for this authentication method.
for user, the following yaml will be generated for this step
- name: CLI for Microsoft 365 Login uses: pnp/action-cli-login@v2.2.2 with: ADMIN_USERNAME: ${{ secrets.ADMIN_USERNAME }} ADMIN_PASSWORD: ${{ secrets.ADMIN_PASSWORD }}step 3
Here we may specify if we will deploy the app to tenant or site-level app catalog. When the site type is selected then an additional select field will be presented to specify the site app catalog url. For the site type the following yaml will be added to the last step
SCOPE: sitecollectionSITE_COLLECTION_URL: https://sharepoint.tenant.com/appcatalogThis action only generates the workflow yaml file. It does not do any additional setting on GitHub. Depending on which login method you select additional steps are needed.
Depending on which authentication method was selected in GitHub repo settings, you will need to create the following secrets:
For the application login method you will need to create the following secrets in GitHub repo settings:
APP_ID- client id of the registered AAD applicationCERTIFICATE_ENCODED- application’s encoded certificateCERTIFICATE_PASSWORD- certificate password. This applies only if the certificate is encoded which is the recommended approachTENANT- Tenant ID
This use case is perfect in a production context as it does not create any dependencies on an account.
For the user login method you will need to create the following secrets in GitHub repo settings:
ADMIN_USERNAME- usernameADMIN_PASSWORD- password
This use case is perfect for testing. It will not work if the specified account uses MFA.
Check it out in action 👇
For more information check out the spfx project github workflow add and how to automate your CI/CD workflow using CLI for Microsoft 365 GitHub Actions in the CLI for Microsoft 365 docs.
Azure DevOps
Section titled “Azure DevOps”name: Deploy Solution demo-1trigger: branches: include: - mainpool: vmImage: ubuntu-latestvariables: - name: CertificateBase64Encoded value: "" - name: CertificateSecureFileId value: "" - name: CertificatePassword value: "" - name: EntraAppId value: "" - name: TenantId value: "" - name: SharePointBaseUrl value: "" - name: PackageName value: demo-1.sppkg - name: SiteAppCatalogUrl value: https://tenanttocheck.sharepoint.com/sites/CLIDemo1/AppCatalogstages: - stage: Build_and_Deploy jobs: - job: Build_and_Deploy steps: - task: NodeTool@0 displayName: Use Node.js inputs: versionSpec: 18.x - task: Npm@1 displayName: Run npm install inputs: command: install - task: Gulp@0 displayName: Gulp bundle inputs: gulpFile: ./gulpfile.js targets: bundle arguments: --ship - task: Gulp@0 displayName: Gulp package inputs: targets: package-solution arguments: --ship - task: Npm@1 displayName: Install CLI for Microsoft 365 inputs: command: custom verbose: false customCommand: install -g @pnp/cli-microsoft365 - script: >
m365 login --authType certificate --certificateBase64Encoded '$(CertificateBase64Encoded)' --password '$(CertificatePassword)' --appId '$(EntraAppId)' --tenant '$(TenantId)'
m365 spo set --url '$(SharePointBaseUrl)'
m365 spo app add --filePath '$(Build.SourcesDirectory)/sharepoint/solution/$(PackageName)' --appCatalogScope sitecollection --appCatalogUrl '$(SiteAppCatalogUrl)' --overwrite
m365 spo app deploy --skipFeatureDeployment --name '$(PackageName)' --appCatalogScope sitecollection --appCatalogUrl '$(SiteAppCatalogUrl)' displayName: CLI for Microsoft 365 Deploy AppScaffolding form
step 1
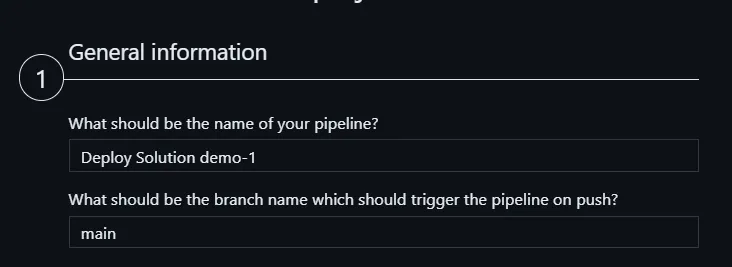
Here we need to specify what will be the name of the pipeline and what will be the branch name that will trigger the pipeline on every code push.
step 2
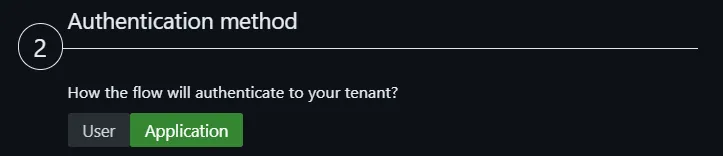
Here we need to decide what will be authentication method the pipeline will use to login to your tenant and deploy the app. Based on the selected method you will get different variables and different script used in the YAML pipeline file.
User login method is perfect for testing but is not the best fit for a pipeline that is supposed to be used in production. It also does not support multifactor authentication
Application login is perfect for a production pipeline. In this case, your pipeline will be created with a set of variables that are required to define the Entra application that will be used. Although you may populate those variables in the pipeline itself it is more recommended to create a dedicated variable group in Azure DevOps Library page and use it in your pipeline
It is also possible to generate a certificate and create a new Entra ID app registration directly within the form for your workflow. Simply check the additional checkbox and provide a password for your certificate and the name for your new app registration. Submitting the form will also create the file and the app and at the end, it will give you the generated values so that you may copy them to populate either the correct variables in your pipeline or in the dedicated variable group in Azure DevOps
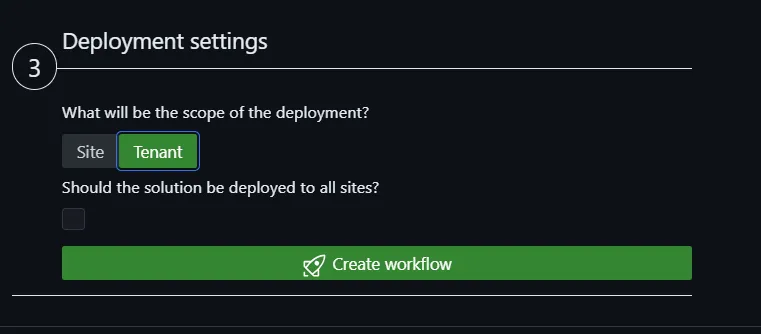
step 3
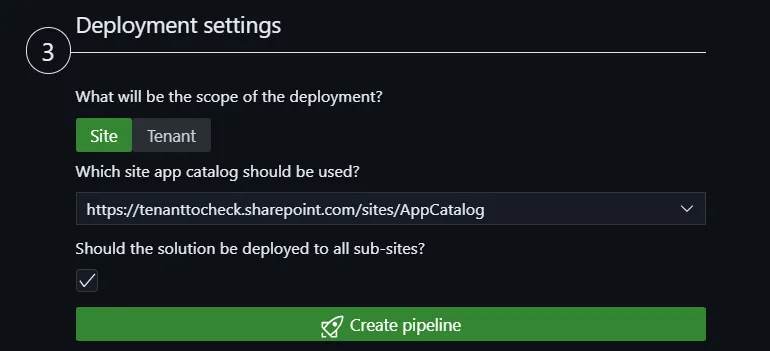
Here we may specify if we will deploy the app to tenant or site-level app catalog. When the site type is selected then an additional select field will be presented to specify the site app catalog url. For the site type the following yaml will be added to the last step
This action only generates the workflow yaml file. It does not do any additional setting on Azure DevOps. After you generate the pipeline file you will need to commit and push it to Azure DevOps repo and next create a pipeline build based on this file. To do that please follow the guidance you will get after the flow is generated
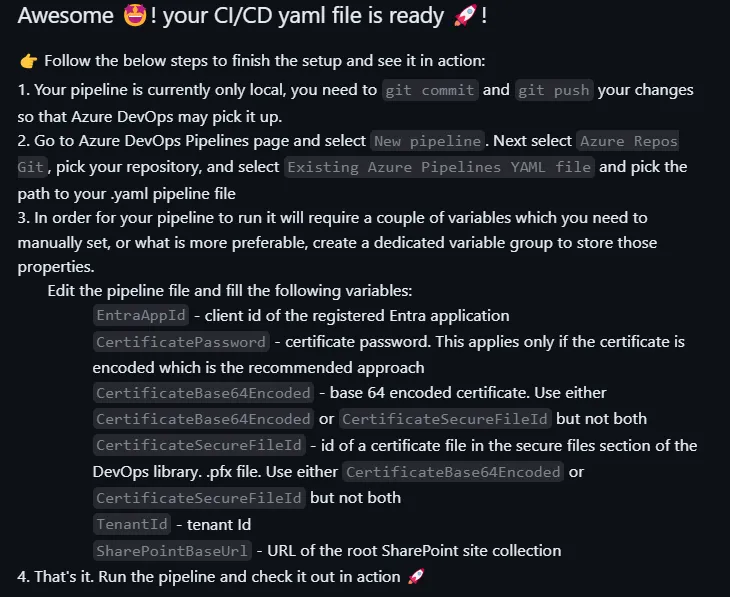
Creating a new pipeline in Azure DevOps is a one-time operation and then every time you update the YAML definition Azure DevOps will automatically pick up the changes. In order to create a new pipeline go pipelines page in your Azure DevOps project
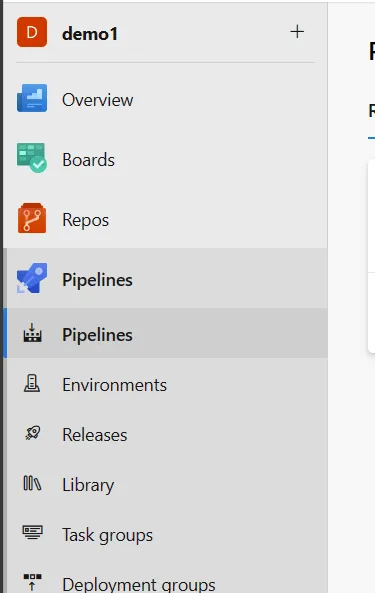
Then select the New pipeline button in the top right corner of the page. This will open a new page where you may select the location of your repo. Select Azure Repos Git and then select the repo where you pushed the YAML file.
Next in the top right corner of the page hit on the New pipeline button. After that follow the form by selecting the location of your repo, next the branch on which the YAML file is present and then select the option to create a new pipeline based on Existing Azure Pipelines YAML file
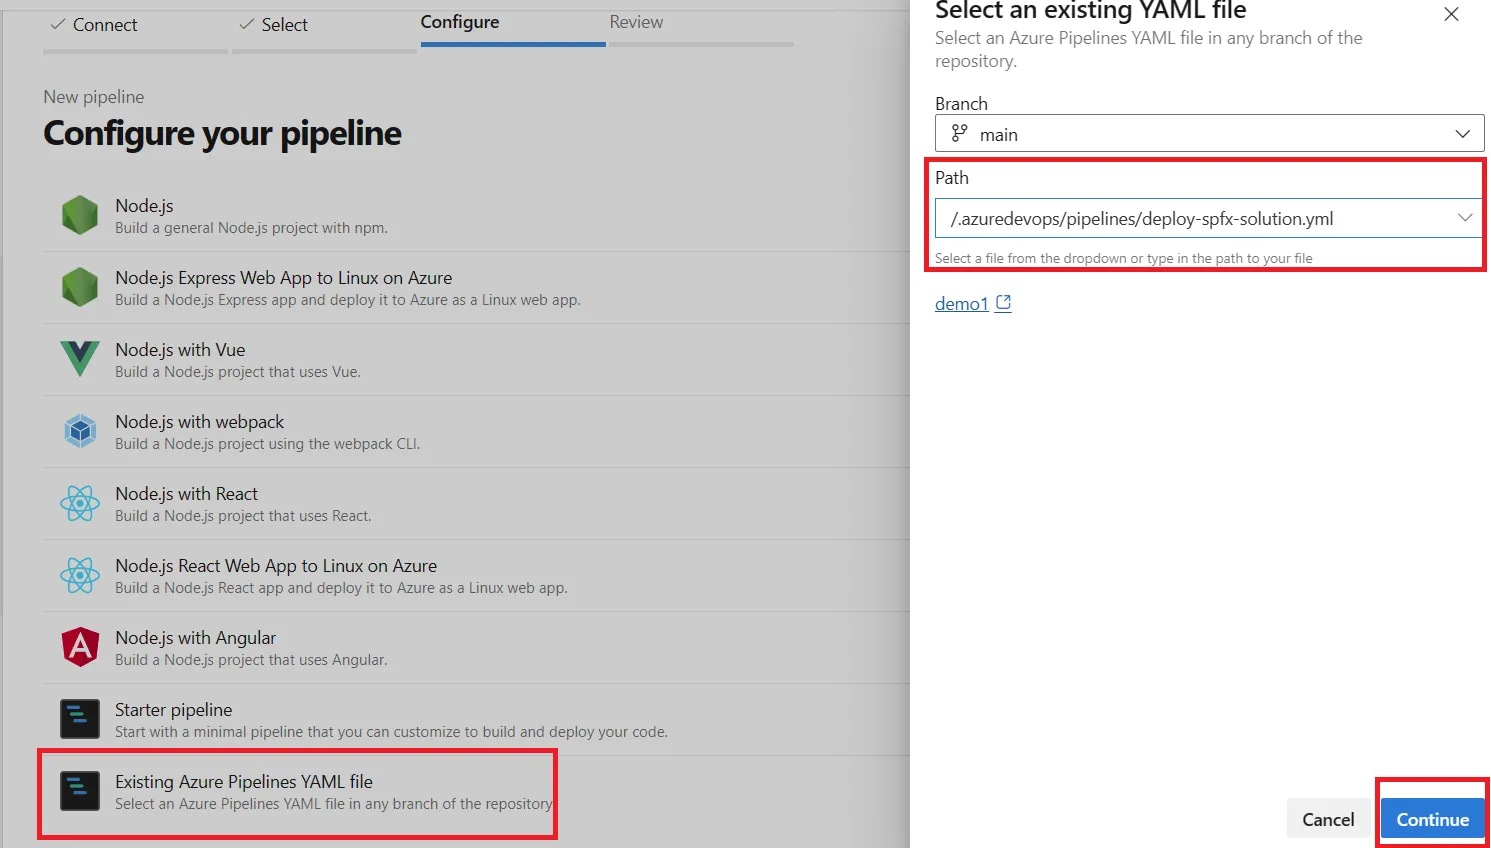
After that just confirm the create process and you are ready to go!
Check it out in action 👇