Sign in
SharePoint Framework Toolkit requires you to sign in to your Microsoft 365 tenant to be able to perform some actions like deploying solutions to the tenant or site-level app catalog, managing app catalogs, and more. The sign-in process is simple and straightforward, allowing you to quickly get started with your SPFx development. You may use an existing Entra App Registration or create a new one with a single click. The extension will guide you through the process of signing in and configuring the app registration if needed. If needed, you may also perform the manual setup of the Entra App Registration.
Sign in process
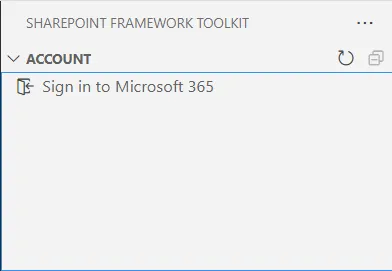
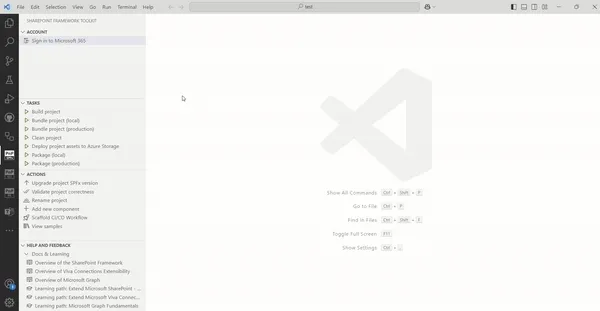
Section titled “Sign in process”In order to sign in to your tenant you must have SPFx Toolkit opened in the context of a SharePoint Framework project. In the account panel you may use the Sign in to Microsoft 365 button to start the process
Alternatively, you may use the >SPFx Toolkit: Sign in to Microsoft 365 command to do the same
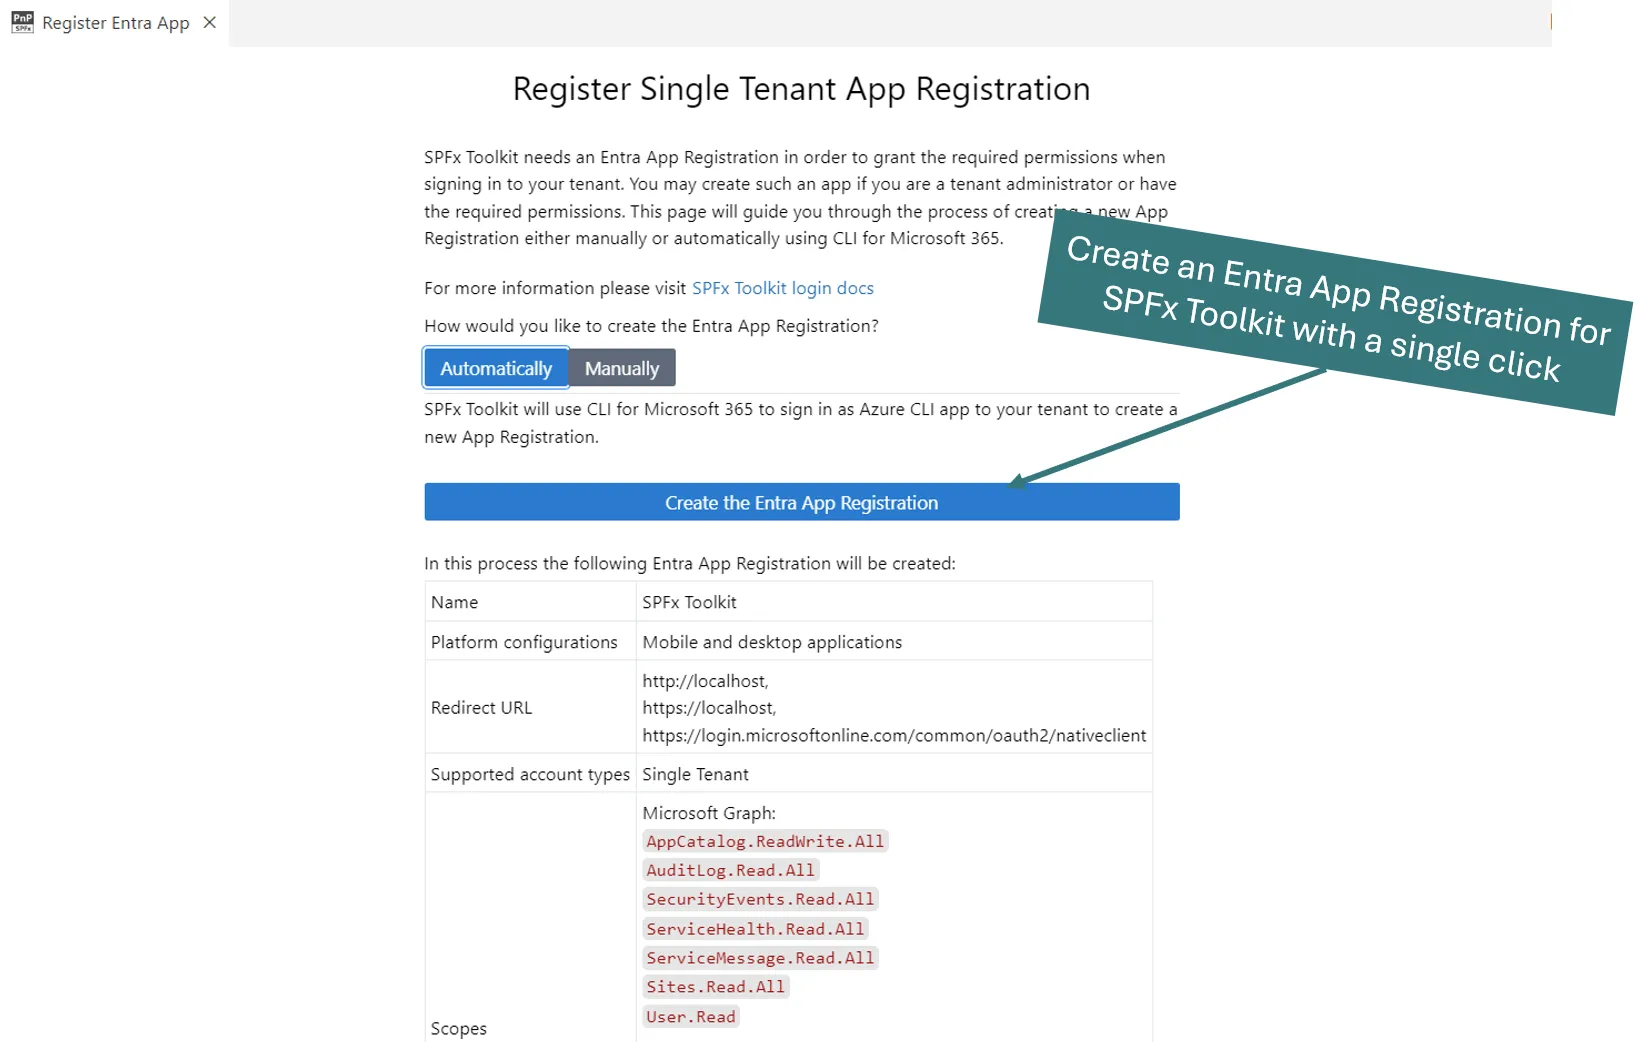
SPFx Toolkit needs an Entra App Registration to be able to sign in to your tenant. You may either use an existing app registration or create a new one with a single click using a dedicated form.
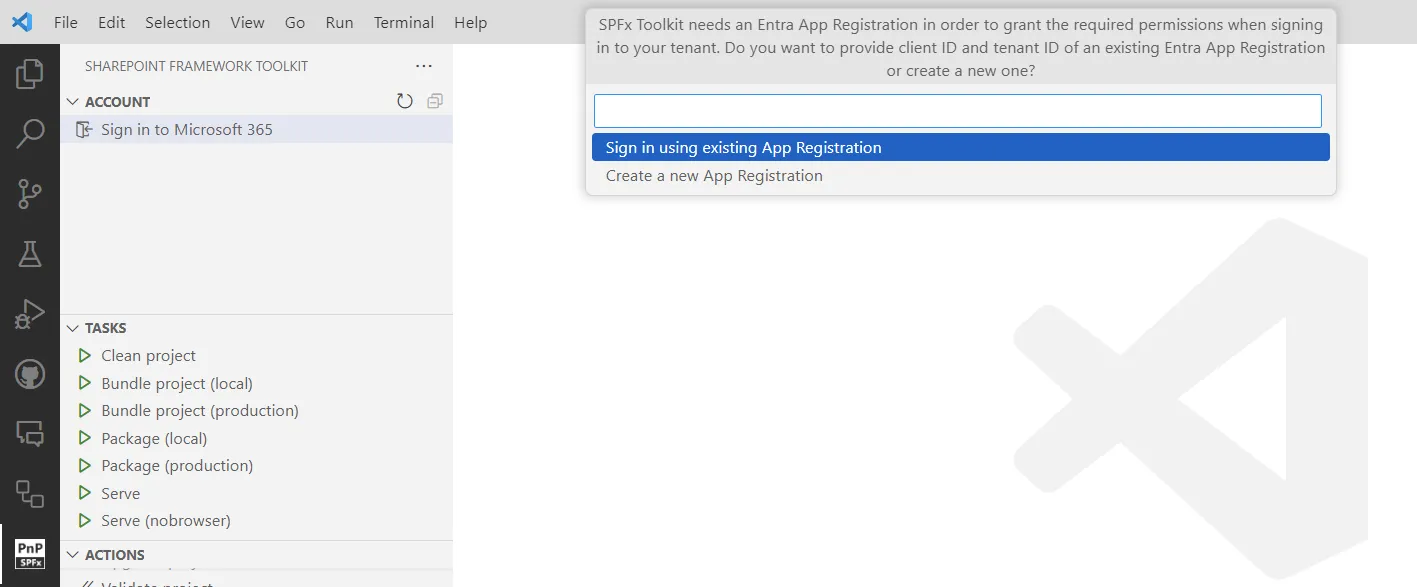
SPFx Toolkit will guide you through the process of creating a new app registration either manually by providing step-by-step guidance or automatically by creating the app registration for you.
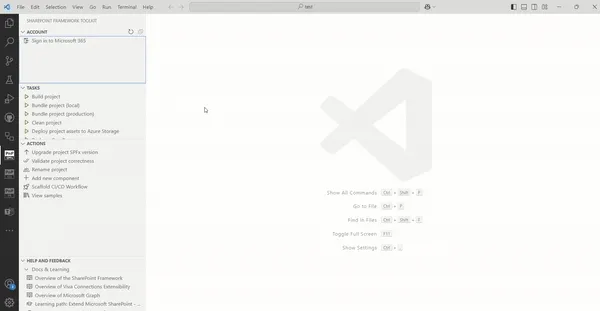
Check it out in action 👇
If you already have an Entra App Registration you may use it to sign in to your tenant by providing the Client Id and Tenant Id.
Manual setup of Entra App Registration
Section titled “Manual setup of Entra App Registration”If possible it is recommended to use the automated way to set up the SPFx Toolkit App Registration. Otherwise please follow the manual steps to perform it manually (this is required only one time on each tenant)
- Navigate to the Azure Portal
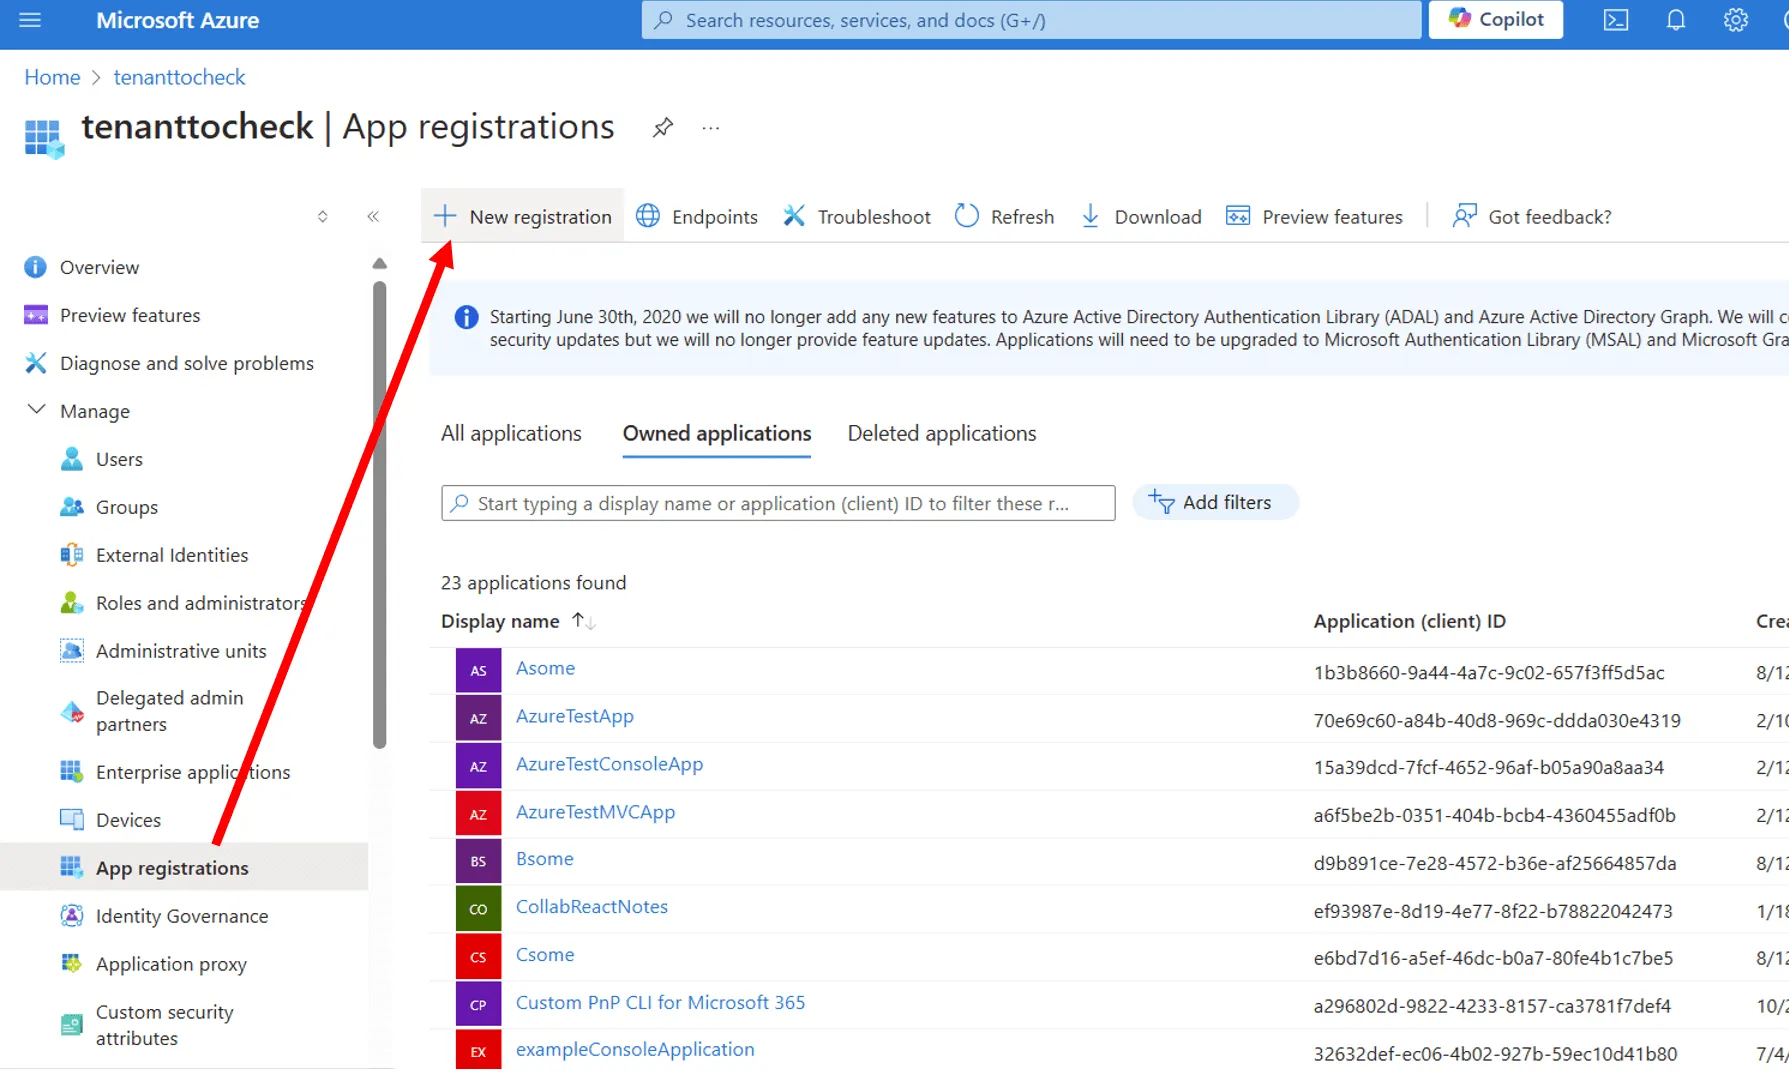
- Select Microsoft Entra ID from the global menu, select App Registrations in the Microsoft Entra ID blade and then select the New registration action button to open the Register an application form.
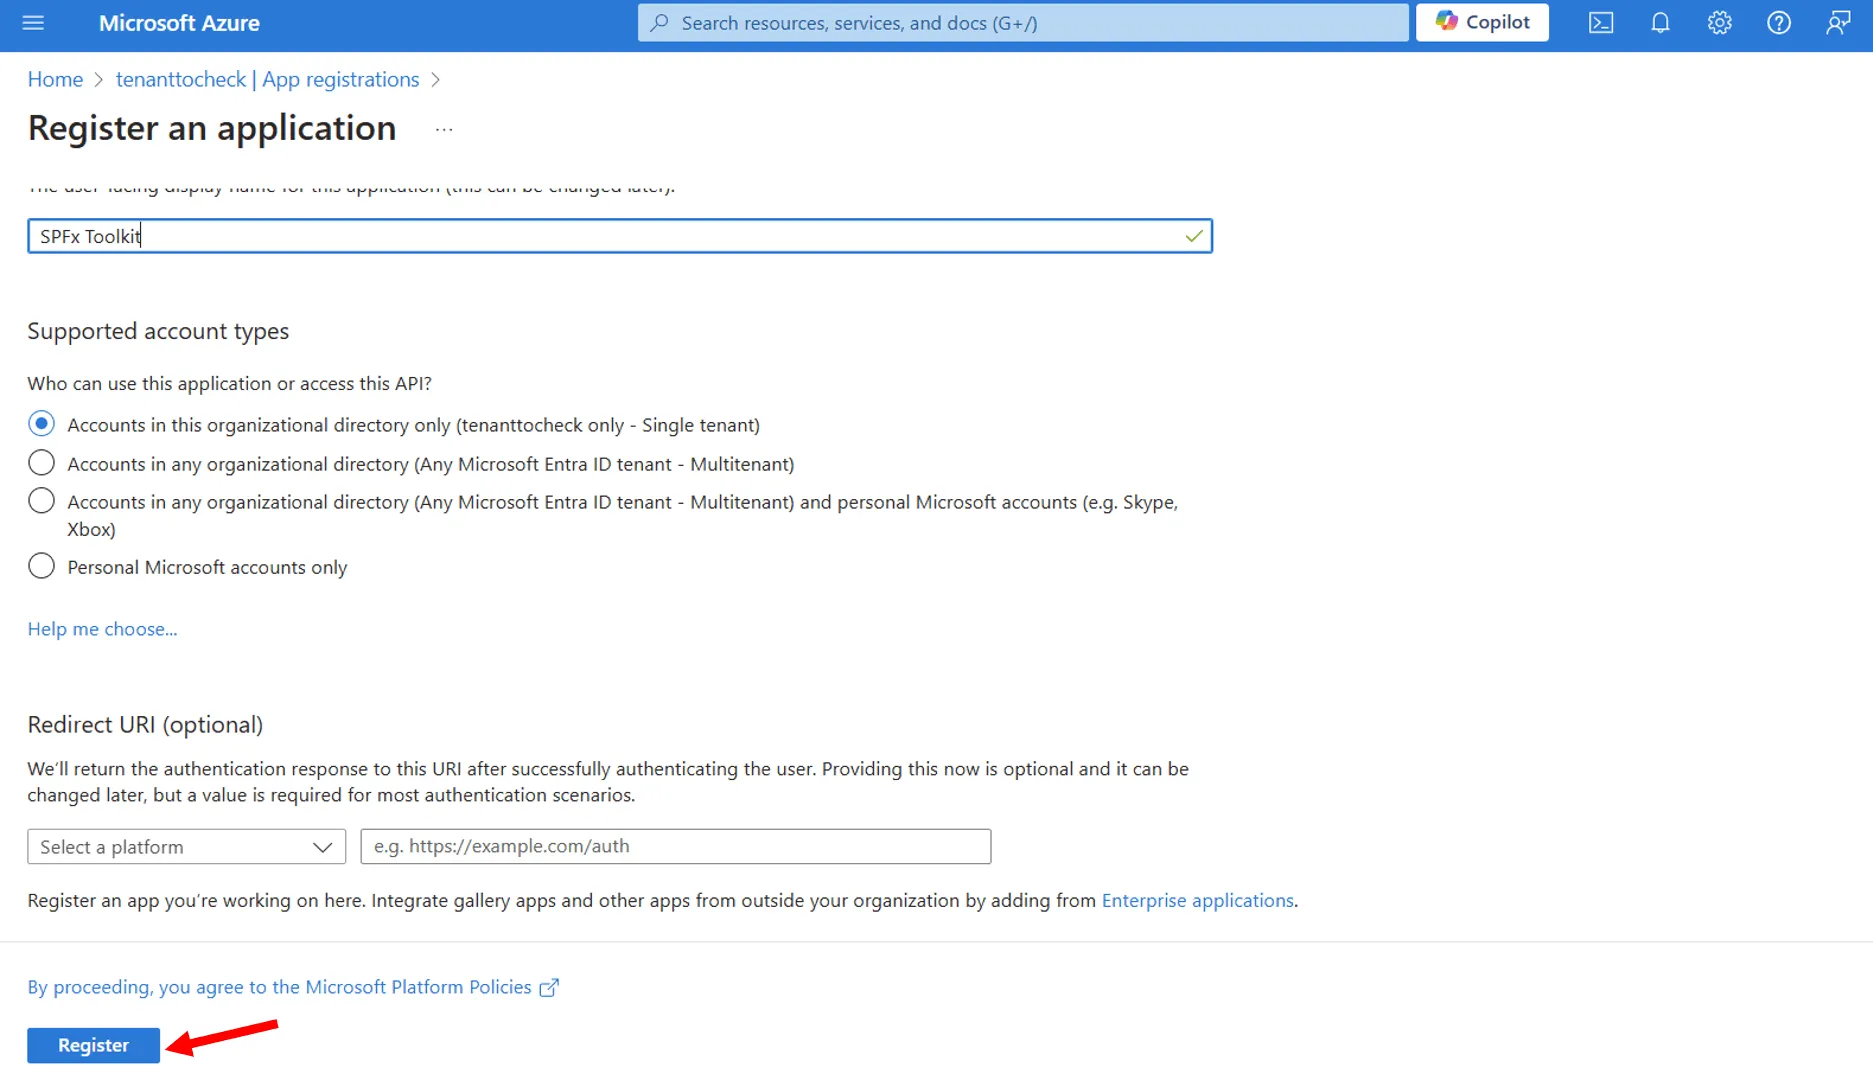
- In the form, enter a name for your new application. It’s recommended to name this app SPFx Toolkit but you may give it any preferable name
- Leave the
Supported account typesandRedirect URIvalues as they are and select theRegisterbutton at the foot of the form to create your custom application
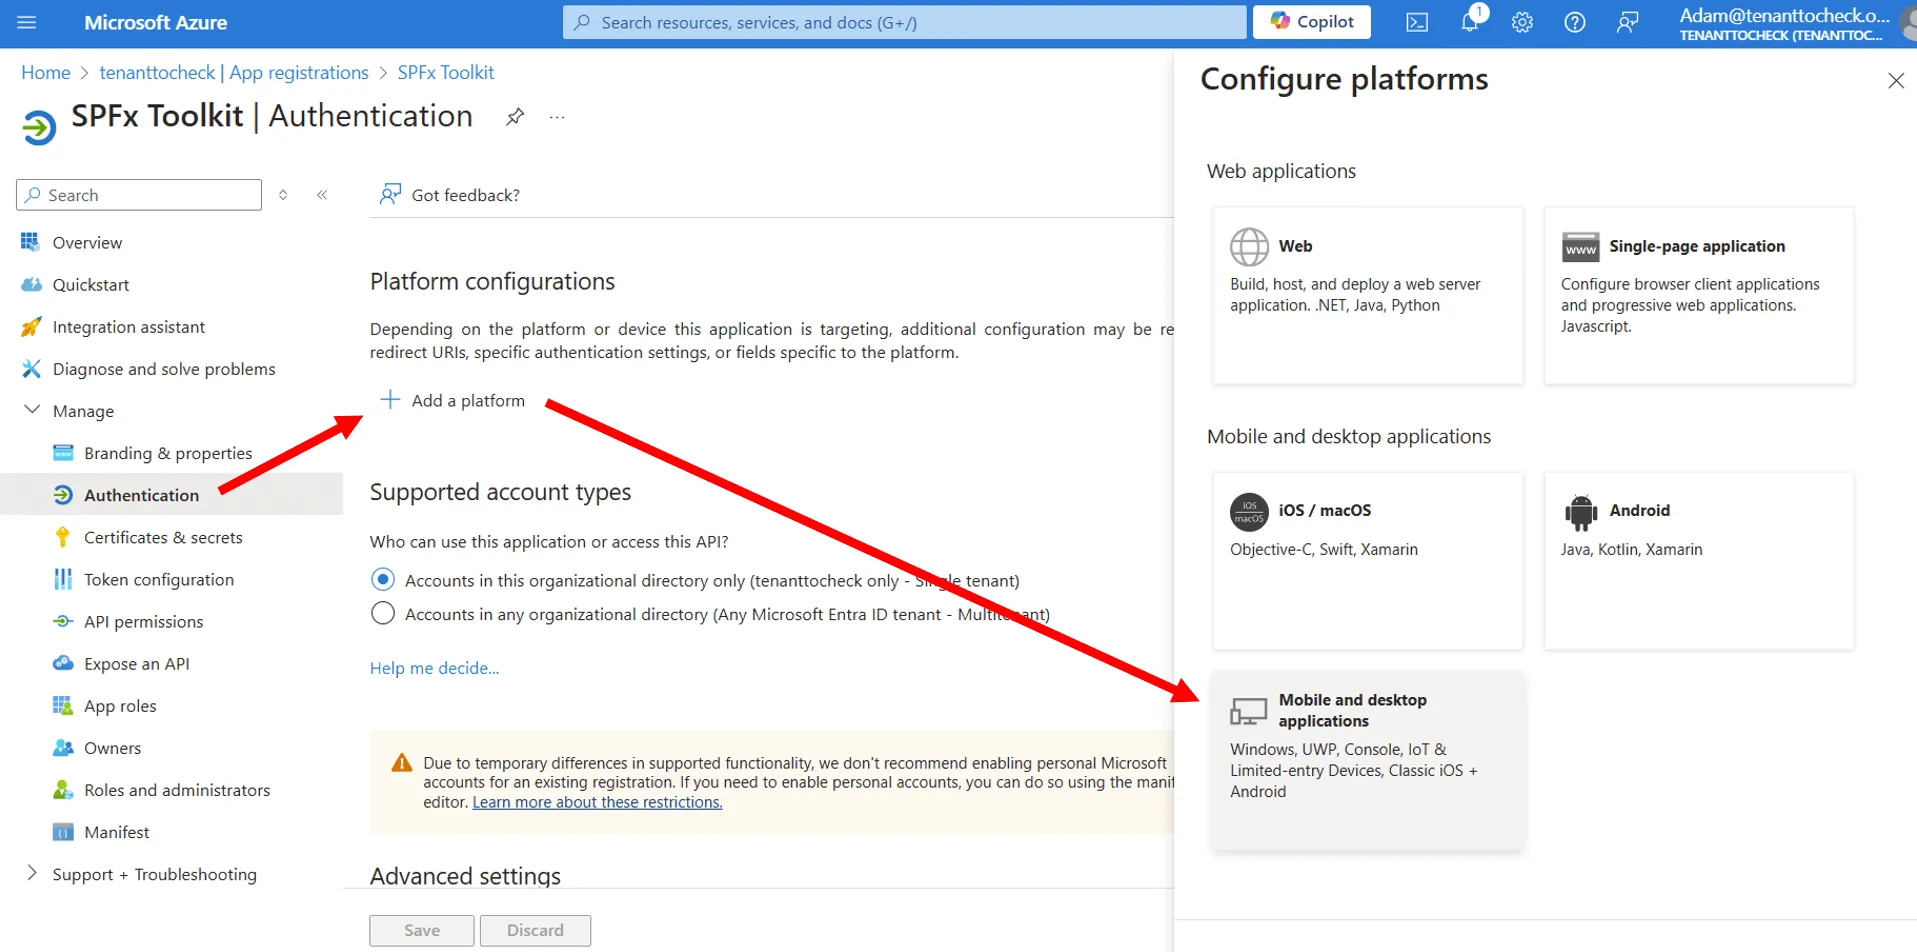
- Next we need to configure the
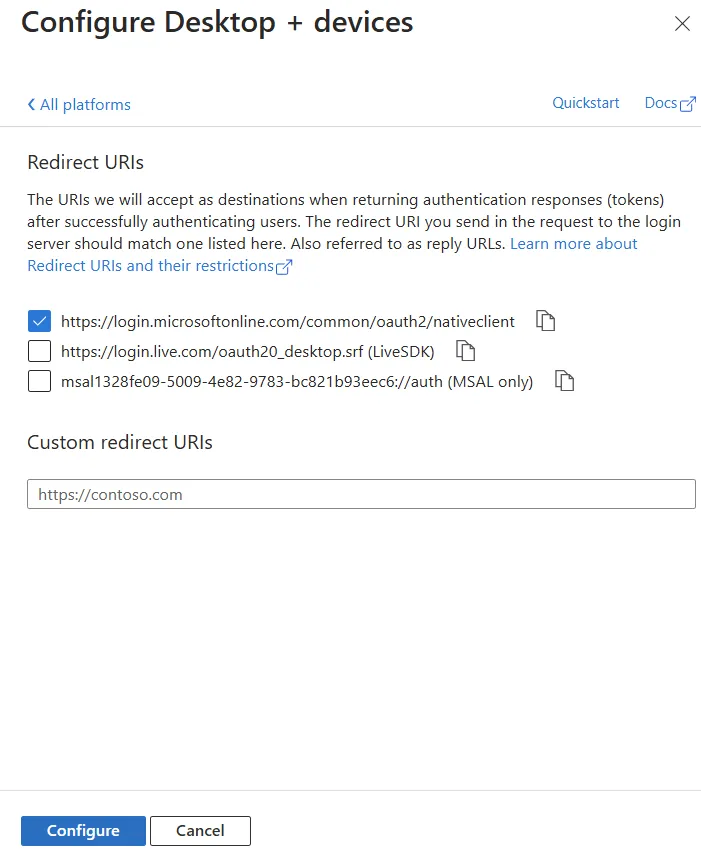
Authenticationfor our new app. Go to theAuthenticationpage and select theAdd a platformbutton to open up theConfigure platformsmenu and under theMobile and desktop applicationsheading, selectMobile and desktop applications. This will open another menu calledConfigure Desktop + Devicesdisplaying a section calledRedirect URIsand a list of checkboxes with some pre-defined URIs.
- Select the first option in the list,
https://login.microsoftonline.com/common/oauth2/nativeclientand select theConfigurebutton at the foot of the menu.
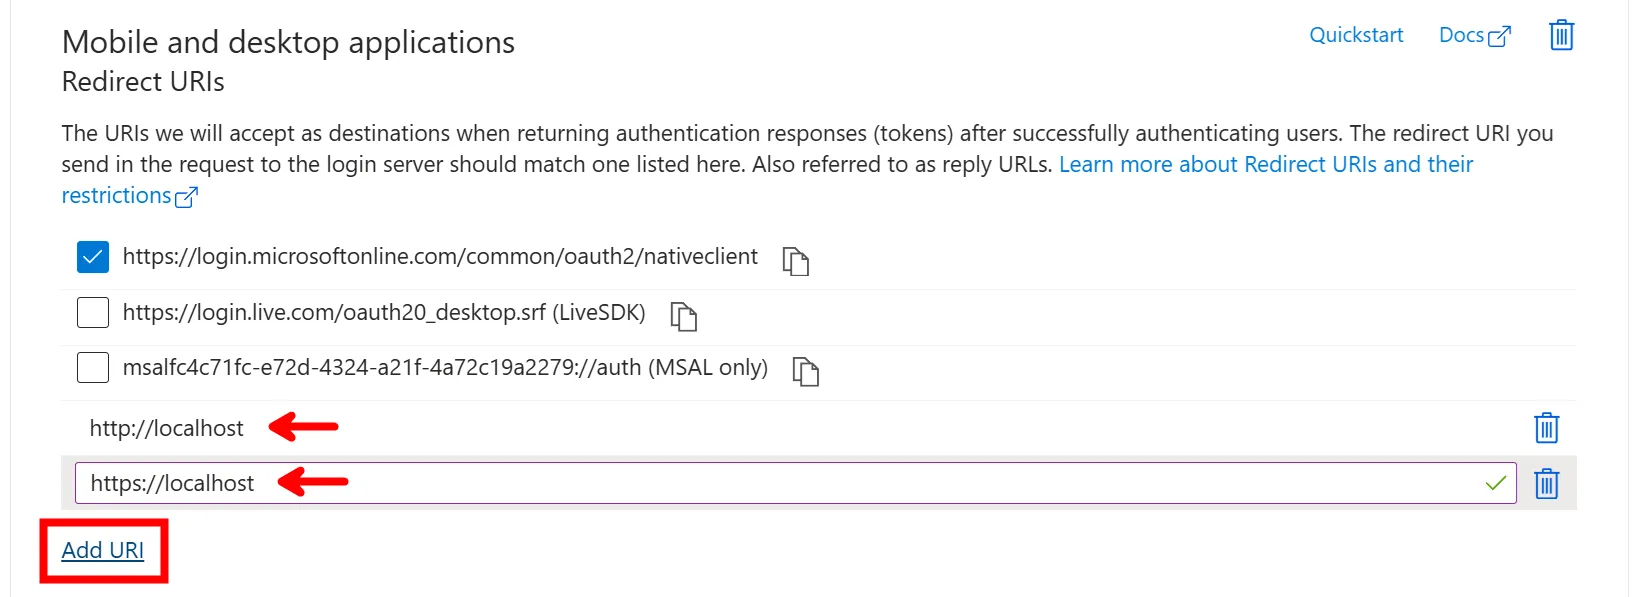
- Under Mobile and desktop applications, click on Add URI and enter the following redirect URIs:
- we can skip over the
Supported account typesection, as this is defaulted toAccounts in this organizational directory only (tenant only - Single tenant)meaning, that only users within the current tenant directory can use this application. - In the
Advanced settingssection, we need to enable theAllow public client flowstoggle, as we are using theDevice code flowmethod to authenticate to our tenant using the CLI for Microsoft 365.
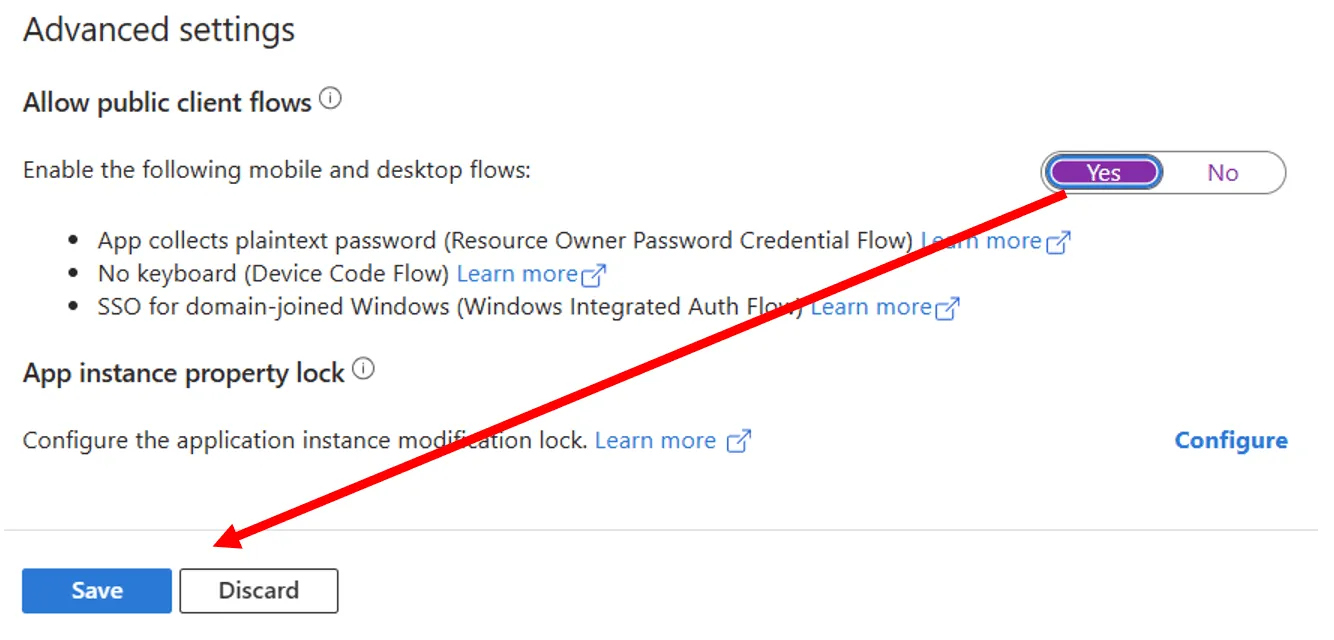
- To make sure all these changes are applied, select the
Savebutton before moving on. - Now that we have configured the application to work with the SPFx Toolkit, we next need to grant the required permissions. Select the
API permissionsin the menu option.
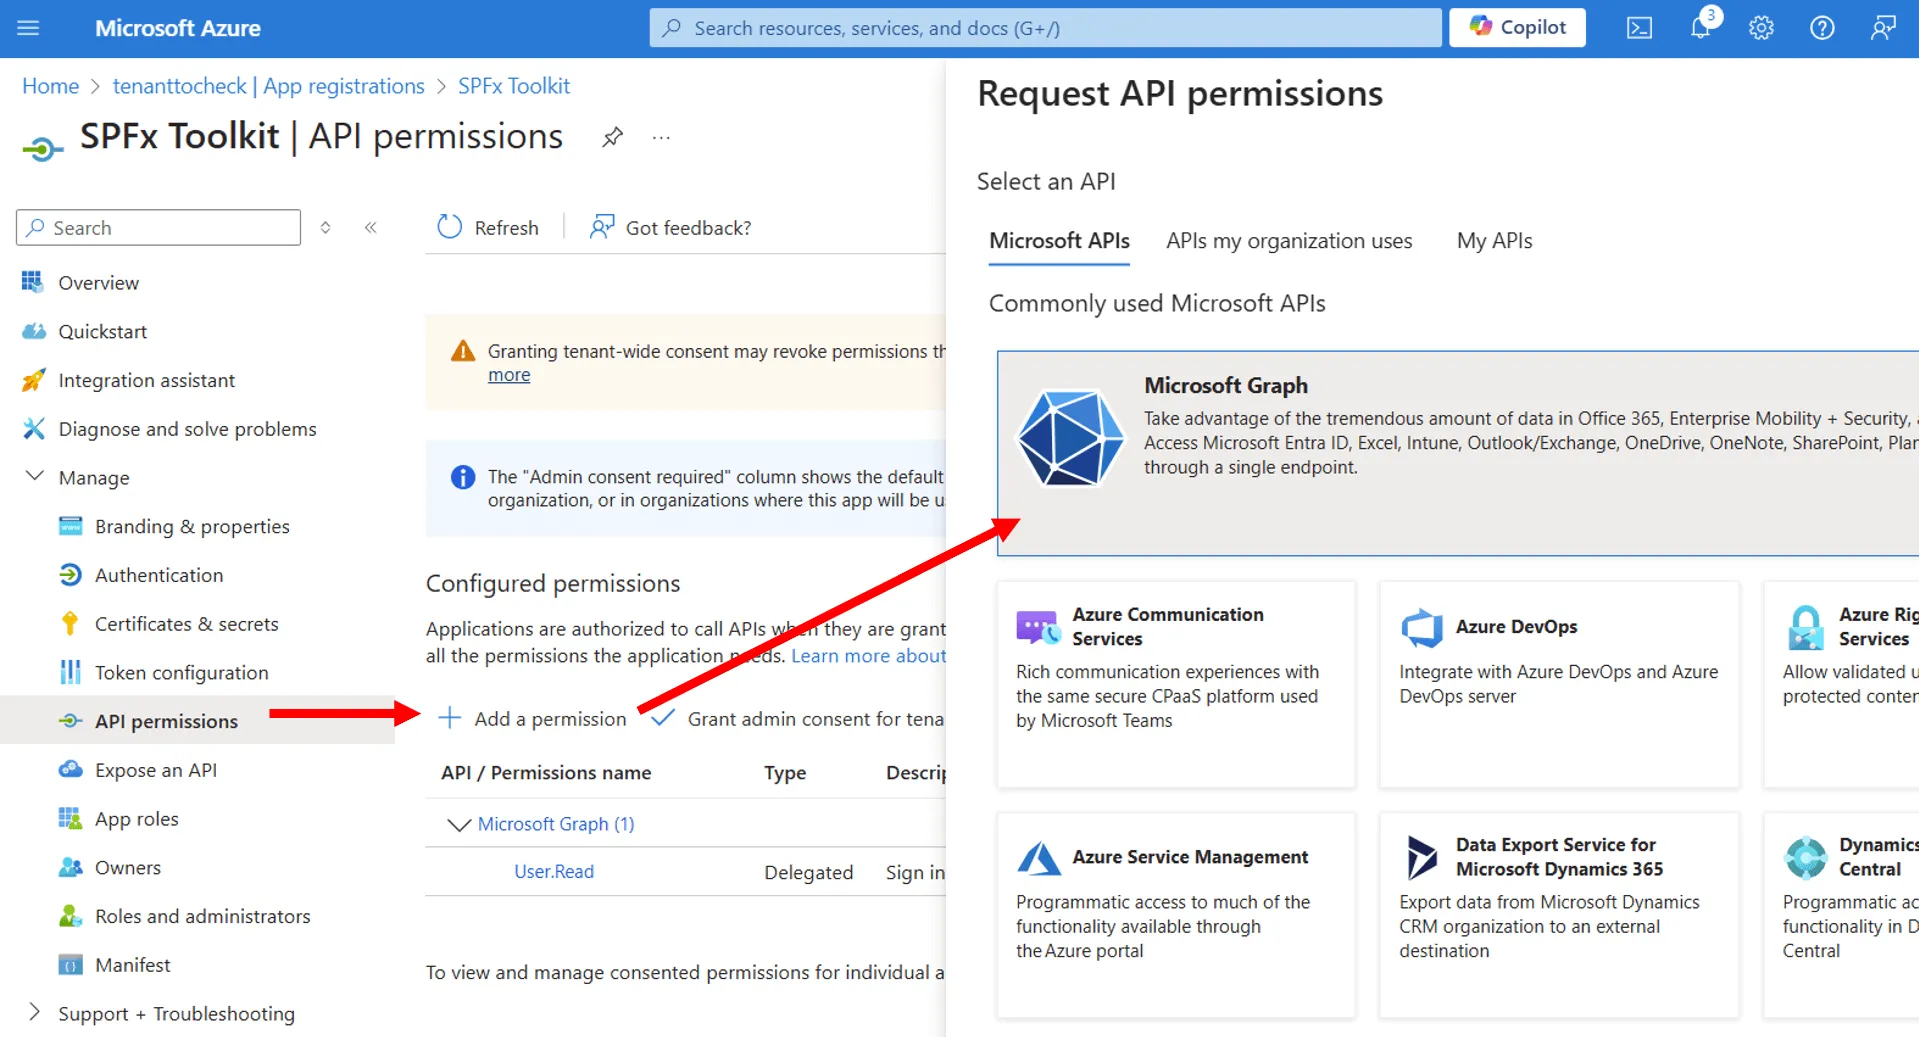
You will see a section called Configured permissions with one permission already granted. This is the default permission which allows the application to sign in the user account used when authenticating to the Microsoft Graph.
Add the following permissions:
    - Microsoft Graph:        - AppCatalog.ReadWrite.All        - AuditLog.Read.All        - Directory.AccessAsUser.All        - Directory.ReadWrite.All        - SecurityEvents.Read.All        - ServiceHealth.Read.All        - ServiceMessage.Read.All        - Sites.Read.All        - User.Read
    - Azure Active Directory Graph        - Directory.AccessAsUser.All
    - Azure Service Management        - user_impersonation
    - Office 365 Management APIs:        - ActivityFeed.Read        - ServiceHealth.Read
- SharePoint: - AllSites.FullControl - User.ReadWrite.All- Go to
Overviewpage and note down theApplication (client) IDandDirectory (tenant) ID - Click on the
Sign in to Microsoft 365and provide the noted downClient IdandTenant Id